
The Myth

Many people say open-plan homes must look seamless at all times. That belief pushes homeowners to hide everything and avoid any visible storage, which can leave spaces feeling sterile and impractical.
That pressure to stay minimal can make daily life harder. When storage is squeezed out of sight, clutter accumulates in drawers, on surfaces, and in corners because there is nowhere convenient to put everyday items.
The Truth
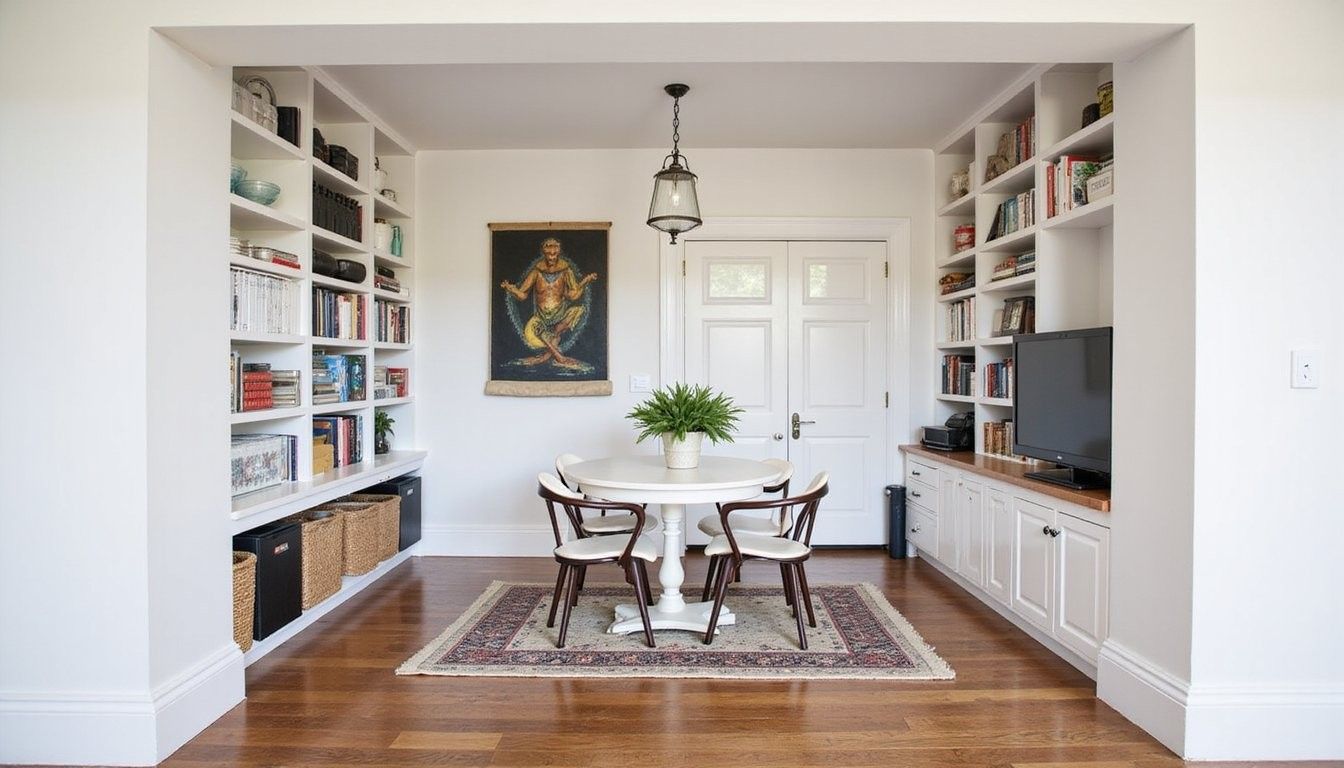
Functional storage in an open-plan home is about thoughtful zoning, not invisibility. Visible, attractive storage that matches your lifestyle can make the space feel intentional and lived-in while keeping mess under control.
Good storage supports everyday flow rather than hides it away. When storage is planned around activities and traffic patterns, you reduce friction, save time, and keep surfaces clear without sacrificing warmth or personality.
Myth-Buster Box
Reality: Well-designed, visible storage zones make an open-plan home more functional and welcoming.
Opening
Creating storage zones is a practical design choice that serves daily life. When you match storage to how you live, an open-plan layout becomes easier to maintain and more enjoyable to use.
Zones are about behavior, not just furniture placement. The goal is to make items easy to return to their home and to keep essential objects within reach of the activity where they are used.
Tools & Materials
- Measuring tape and floor plan sketch: Accurate dimensions let you plan furniture and storage so traffic flows remain clear.
- Labels and adhesive notes: Use these during the planning phase to mark where things live and to trial different zone assignments.
- Multi-purpose furniture pieces: Choose benches, ottomans, and consoles with built-in storage to add function without clutter.
- Open shelving and baskets: These give you display space for attractive items and concealed spots for less pretty necessities.
- Hooks, rails, and wall organizers: Vertical tools take advantage of height and keep floors clear for movement.
- Drawer inserts and dividers: These keep small items organized so zones function reliably day after day.
- Lighting and rugs: Use these to define zones visually while ensuring storage areas are well-lit and inviting.
Zone Planning & Mapping
Start by mapping daily activities and their ideal locations. Walk through a typical day, note where you eat, work, relax, and store items, and sketch zones that align with those routines so storage supports activity rather than obstructs it.
Keep traffic flow and sightlines in mind as you assign storage. Place frequently used items close to where they are needed and choose low-profile storage near walkways to prevent bottlenecks while keeping the space visually open.
Think in terms of task-based clusters instead of room-by-room boxes. For example, group breakfast items near the coffee station and mail sorting near the entry to create intuitive drop-off and pick-up points that reduce surface clutter.
Test your plan with temporary solutions before committing to built-ins. Use bins, baskets, or labeled boxes for a few weeks to see if locations feel natural and to avoid expensive mistakes when fitting permanent storage.
Furniture That Stores
Invest in pieces that serve two or more functions to maximize value. A bench with a lift-up lid, a dining console with drawers, or a sofa with hidden compartments turns footprint into useful storage without adding visual weight.
Scale and proportion matter to keep zones cohesive. Select storage furniture that complements the size of your space and use shorter pieces to preserve sightlines while taller units can anchor zones and provide vertical storage where appropriate.
Open shelving versus closed cabinetry is a stylistic and practical choice. Shelves encourage neatness because contents are visible, while cabinets conceal clutter but require inner organization to stay useful, so match the option to your habits.
| Option | Pro | Con |
|---|---|---|
| Open shelving | Easy access and display | Shows dust and clutter |
| Closed cabinetry | Tidy appearance | Requires internal organization |
| Multi-purpose seating | Adds hidden storage | May limit comfort or style choices |
Vertical & Hidden Storage
Use vertical surfaces to free up floor space and keep essentials at eye level. Tall shelving, wall-mounted rails, and pegboards transform walls into highly usable storage that supports quick access without crowding the room.
Hidden storage keeps the casual look while giving you practical capacity. Toe-kick drawers, under-bench compartments, and hollow stairs are discreet homes for items you don’t want on display but need nearby.
Balance openness with concealment for a curated feel. Combine open shelves for attractive items with closed drawers for messy utilities so zones feel purposeful and not chaotic.
Styling & Zoning With Color and Texture
Define zones visually with rugs, paint, and finishes to cue use without walls. A change in flooring or a contrasting wall color can signal a shift from dining to living, making the storage choices within each area feel intentional.
Texture helps bind storage into the design so it reads as décor. Wicker baskets, wooden boxes, and fabric bins warm the look of functional items and invite touch while keeping the area organized.
Lighting is a subtle way to emphasize storage that matters most. Spot or under-shelf lighting makes a coffee station or work nook feel finished and encourages you to return items to their place in the evening and morning routines.
Maintenance Routines
Adopt short daily habits to keep zones functional without huge cleanups. Spend five minutes at the end of the day returning items to their homes and clearing surfaces to stop small piles from turning into hours of work.
Use monthly audits to reassess what you keep in each zone. A quick look-through helps you remove items that migrated into a zone but don’t belong there, keeping storage honest and efficient.
Cost vs. Impact Table
Plan investments with realistic expectations about cost and visual impact. Some changes are low-cost but high-impact, and others require a bigger budget to transform functionality in lasting ways.
| Upgrade | Approx. Cost | Impact on Function |
|---|---|---|
| Baskets and bins | Low | Moderate |
| Custom built-ins | High | High |
| Multi-function furniture | Medium | High |
| Lighting and rugs | Low to Medium | Moderate |
Comparing Storage Approaches
Weigh visible versus hidden storage based on lifestyle and tolerance for tidiness. If you like a lived-in look, open storage that encourages curation may suit you, while hidden storage helps maintain a sleek backdrop for entertaining and minimal décor choices.
| Criteria | Visible Storage | Hidden Storage |
|---|---|---|
| Ease of access | High | Medium |
| Aesthetic control | Requires styling | Easier to maintain clean lines |
| Maintenance effort | Higher | Lower |
Smart Storage for Specific Zones
Entryways benefit from a clear drop zone to prevent clutter migration into living spaces. A bench with shoe storage, a tray for keys, and a vertical pocket or wall hook for daily bags will keep the entry tidy and make departures smoother.
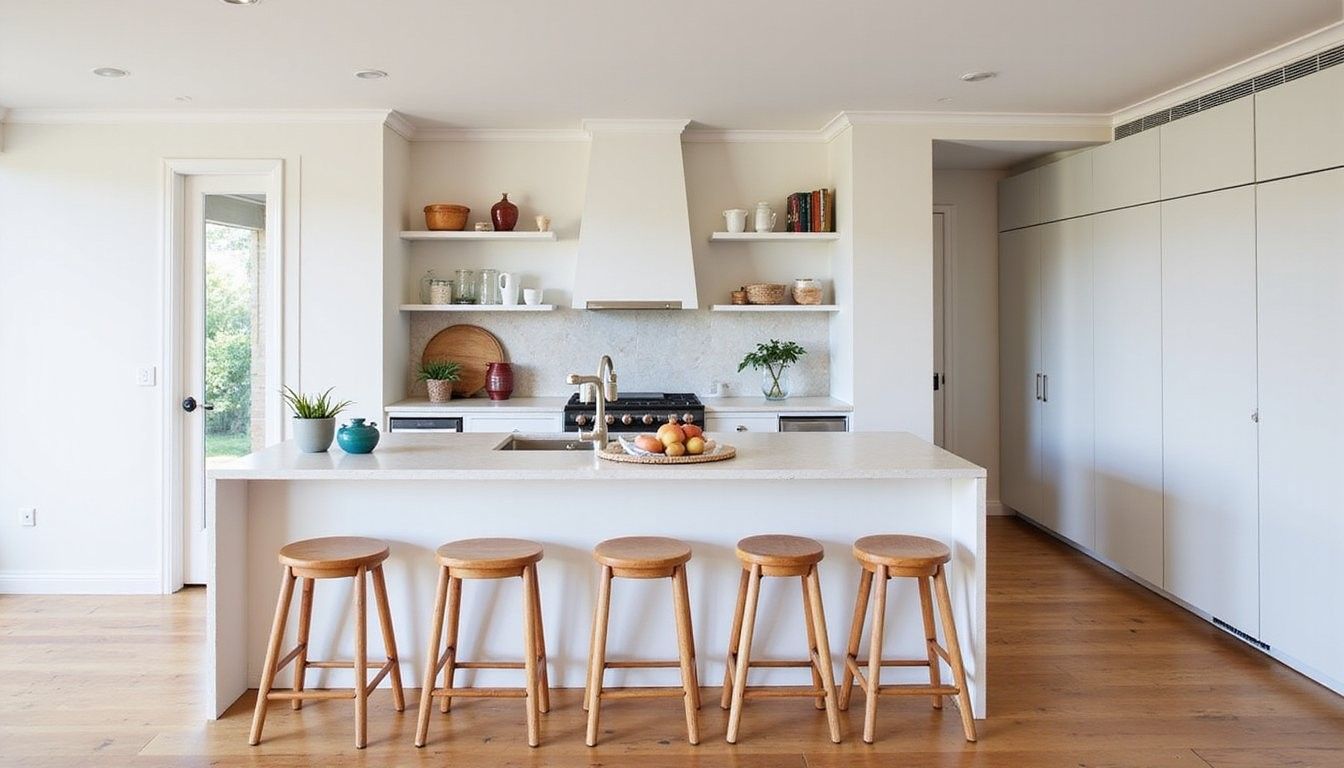
Kitchen and dining areas need storage that supports food prep and service without crowding counters. Open shelving for everyday dishes, pull-out drawers for pantry items, and a small appliance garage can streamline meal routines and keep surfaces clear.
Living zones can combine display and utility in one footprint. Use a media console with drawers for remotes and games, and pair it with a bookshelf that holds both décor and baskets for loose items to create a balanced look.
Work or study nooks should have designated spots for paperwork and tech gear to avoid overflow into communal spaces. A slim desk with drawers, a vertical file rack, and a charging station keep work contained and portable when you need to shift focus.
Small Space Tricks for Open Plans
If you have limited square footage, prioritize items that are used daily and store or donate the rest. Letting go of duplicates and rarely used items frees up storage for things that actively support your routines and reduces the need for oversized furniture.
Mirror storage and slim cabinetry keep visual space feeling larger while adding function. Choose reflective surfaces or thin-profile cupboards to create an airy look with usable compartments behind them.
What to Avoid
Each of the pitfalls above undermines the usefulness of space. When you funnel everything into one spot or overfill visible shelves, you rob your home of the order and ease that good zones create.
Quick Wins to Start Today
Begin with a 30-minute sweep to return items to their homes and clear a surface. That simple routine resets the visual and functional baseline so you can see which zones need more thoughtful solutions and which are working well.
Add baskets to one or two shelves to immediately tidy visual noise. Uniform containers make clutter look curated and reduce the friction of returning small items to a defined container instead of leaving them around.
Tip: Consistency beats perfection; a single basket style across zones creates calm even if storage is eclectic.
When to Call a Pro
Seek design help when your storage needs require structural changes or custom cabinetry. A professional can maximize awkward corners, integrate systems into false walls, and suggest materials that match the look and budget of your home.
| Situation | DIY | Professional |
|---|---|---|
| Simple shelving | Yes | Optional |
| Load-bearing alterations | No | Yes |
| Custom joinery | Possible for skilled DIY | Recommended |
Boolean Checklist
Use a simple yes/no checklist to decide if a storage solution fits your needs. Answering a few boolean questions quickly filters options and prevents impulse buys that won’t serve daily routines.
| Question | Yes | No |
|---|---|---|
| Will this be used daily? | ☐ | ☐ |
| Does it obstruct traffic? | ☐ | ☐ |
| Is it visually cohesive with the zone? | ☐ | ☐ |
Long-Term Habits
Teach household members where things belong and lead by example to maintain zones. A shared understanding of storage homes reduces the burden on one person and creates a cooperative rhythm that keeps the open-plan area pleasant.
Revisit and adjust zones seasonally to accommodate shifting needs. As your routines change across months, small moves like rotating seasonal clothing or switching out hobby supplies keep storage aligned with use.
Mistakes Many Make
Overcomplicating storage systems discourages their use and leads to piles on the nearest surface. If returning items feels like a chore, people will stop doing it, so keep systems straightforward with only a few clear homes for common items.
Underestimating the visual role of storage hurts the look of an open-plan space. If storage is sloppily arranged or mismatched, it reads as clutter rather than intentional design, so plan aesthetics as well as capacity.
Final Assembly and Implementation
Schedule a realistic rollout to implement changes without overwhelming the household. Tackle one zone at a time over a few weekends so the whole family can adapt and give feedback rather than trying to overhaul everything at once.
Label temporary homes clearly during the transition period to train new habits. Once routines stick, you can remove temporary labels and enjoy the smoother flow and cleaner visuals of an organized open-plan home.
Frequently Asked Questions
How do I choose between open shelving and cabinets? Open shelving works when you are willing to curate contents and dust regularly, while cabinets are better if you prefer clean lines and have small items that need hiding; match your choice to your tolerance for maintenance and the look you want.
What is the easiest zone to start with? The entry or a coffee station are great starters because improvements there deliver immediate daily benefits and are contained projects that build momentum for larger changes.
Can I make temporary solutions look intentional? Yes, using matching containers, consistent color palettes, and thoughtful placement turns temporary storage into a designed feature that reads as planned rather than improvised.
How much should I spend on built-in storage? Budget for built-ins when they solve persistent pain points like awkward alcoves or insufficient kitchen storage, and consider medium-cost multi-purpose furniture when budgets are tighter to balance cost and impact.