
This quick and easy peanut butter treat comes together with only five basic items! It’s rich, smooth, and requires no oven, no special tools, and no thermometer—ready in just minutes.
I’m always drawn to sweets that are simple yet irresistible. This luscious peanut butter fudge may appear impressive, but it’s surprisingly effortless to prepare. No complicated gadgets or candy-making steps—just pure creamy goodness in no time!
Tell me about this recipe!
- Minimal Components – you’ll only require five basic items to make this treat! Grab some creamy nut spread, regular butter, powdered sugar, a dash of vanilla, and a pinch of salt.
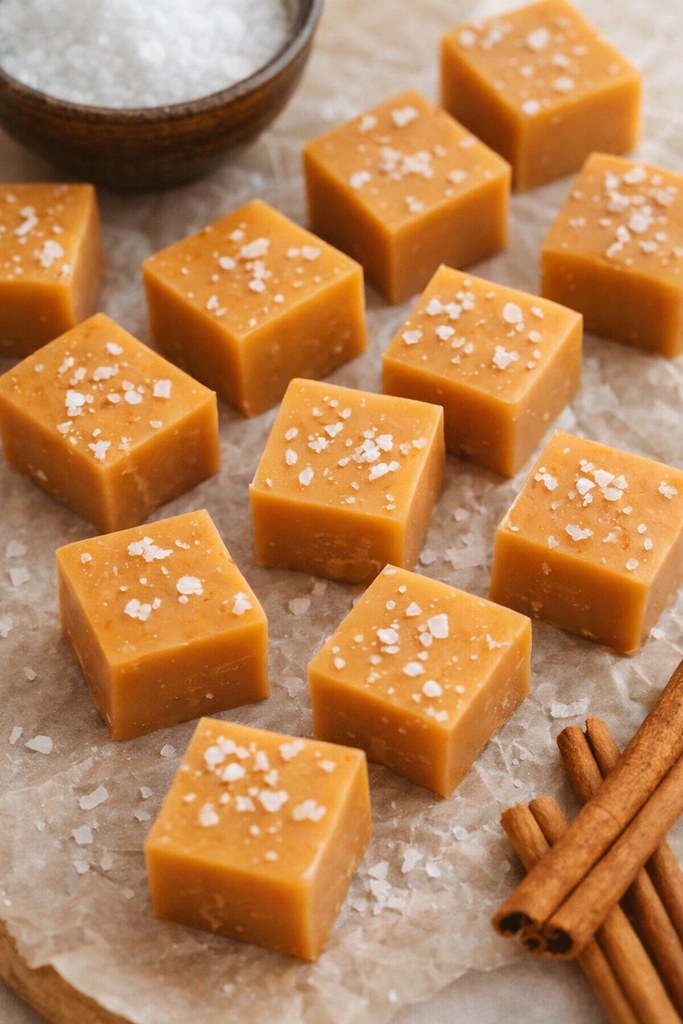
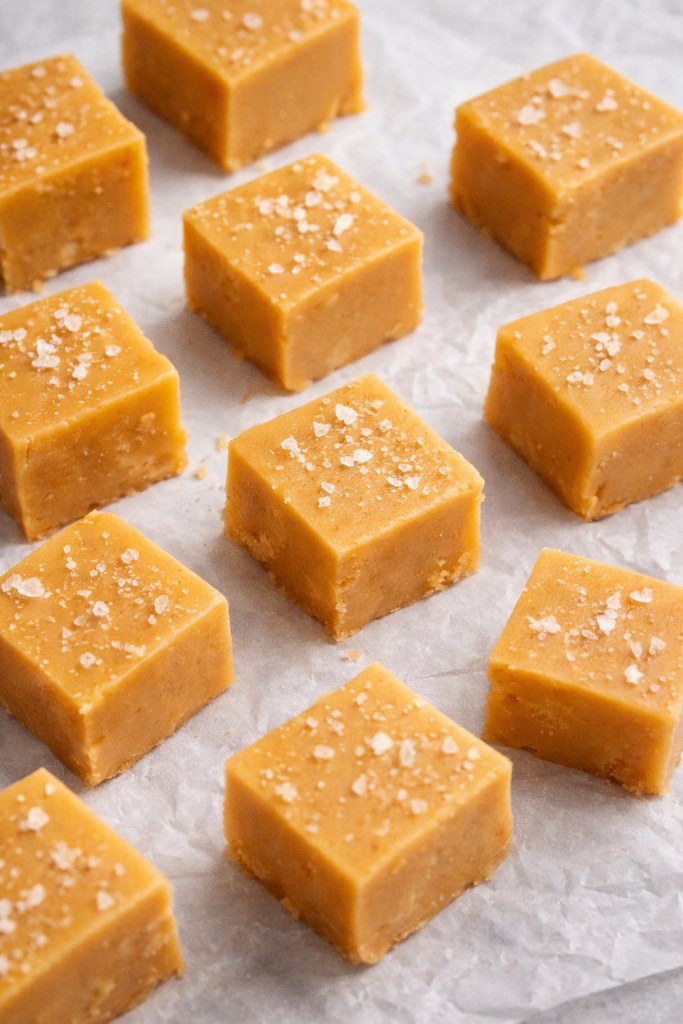
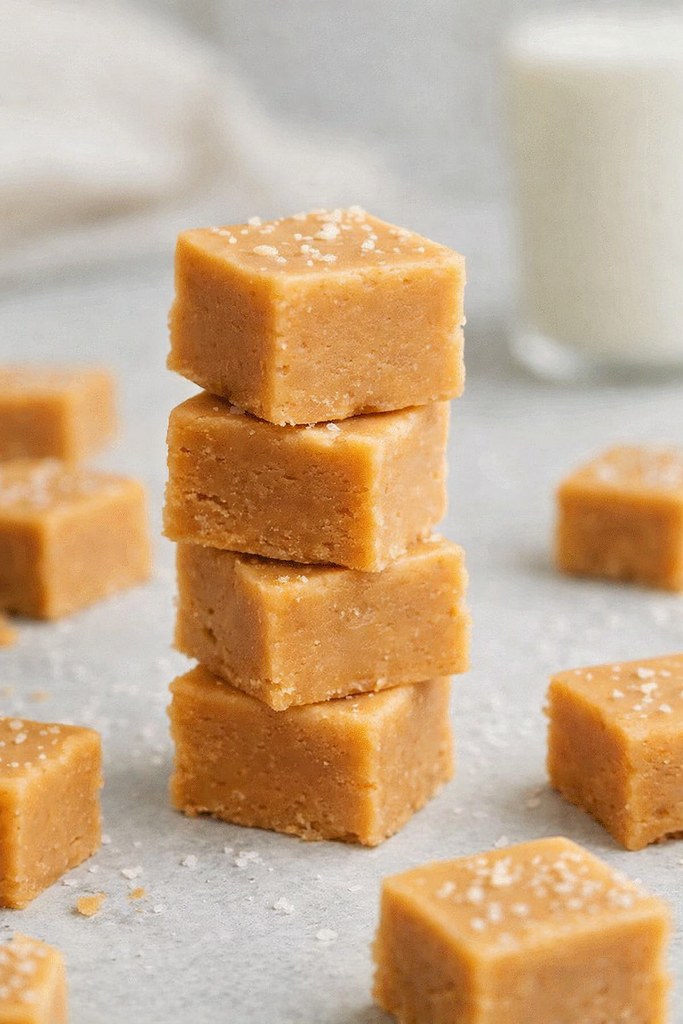
- Make It Your Own – want to dress it up? Try topping it with colorful sprinkles, a sprinkle of flaky salt (my favorite touch!), or even a handful of crushed nuts for extra crunch.
- Quick Mix Method – this simple fudge comes together in one single bowl — no stovetop or endless stirring needed!
Ingredient Notes
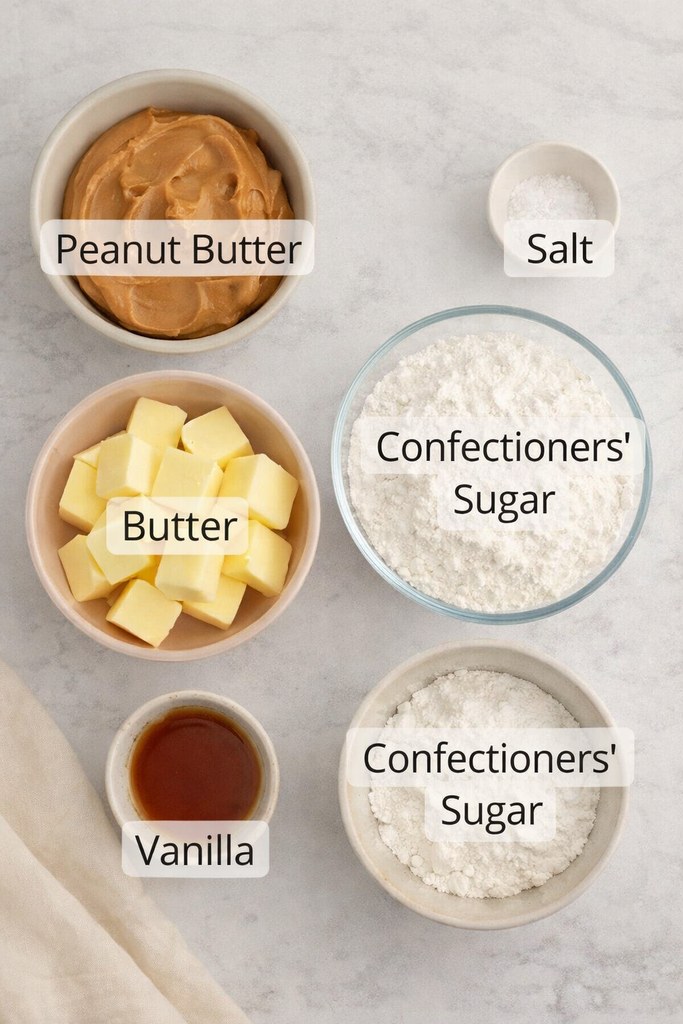
Nut Spread: I’ve tried this treat only with smooth, store-bought peanut spread — not the natural kind that separates and forms an oily layer on top.
Powdered Sweetener: Often called icing or confectioners’ sugar. It’s best to sift it first so the fudge turns out silky and free of clumps.
Pure Vanilla Essence: Since this dessert has just a few components, a premium vanilla makes a big difference in flavor depth.
Unsalted Cream Butter: I prefer European-style butter for its lush texture and rich, buttery taste compared to standard varieties.
Salt: A pinch of salt enhances every sweet bite! I also sprinkled a bit of flaky sea salt over the fudge once it was set for a perfect finish.
Step by Step Instructions
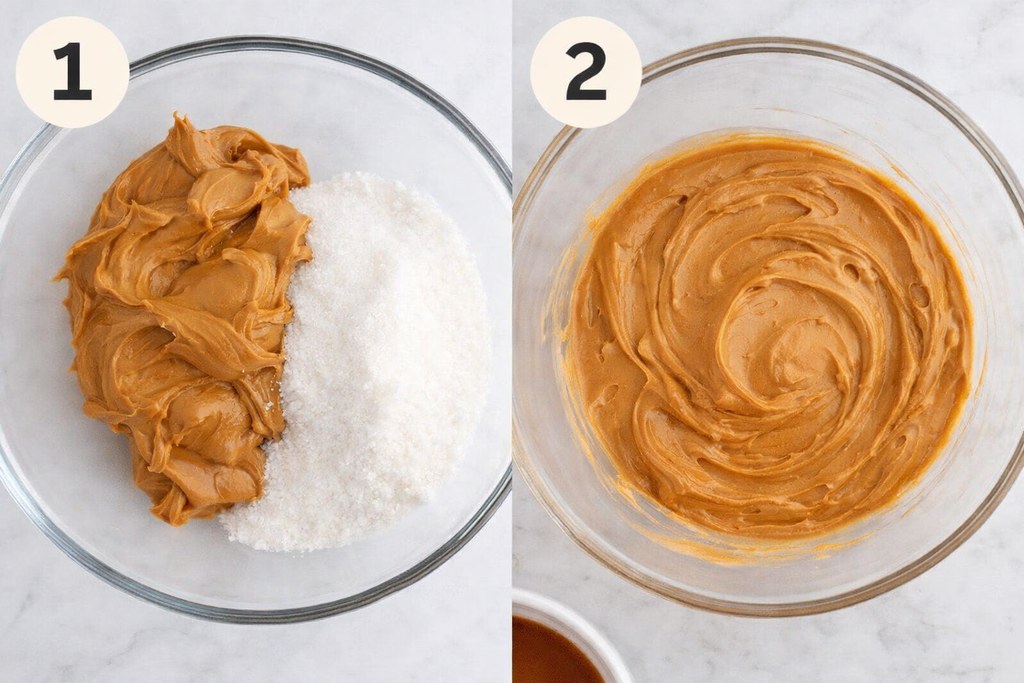
Stage 1: Grab a heatproof mixing bowl suitable for the microwave. Add both the peanut spread and butter into it. Cutting the butter into small chunks beforehand will make it soften more quickly.
Stage 2: Warm the mixture in the microwave in short 30-second bursts, stirring in between each round, until both ingredients have fully liquefied and blended smoothly.
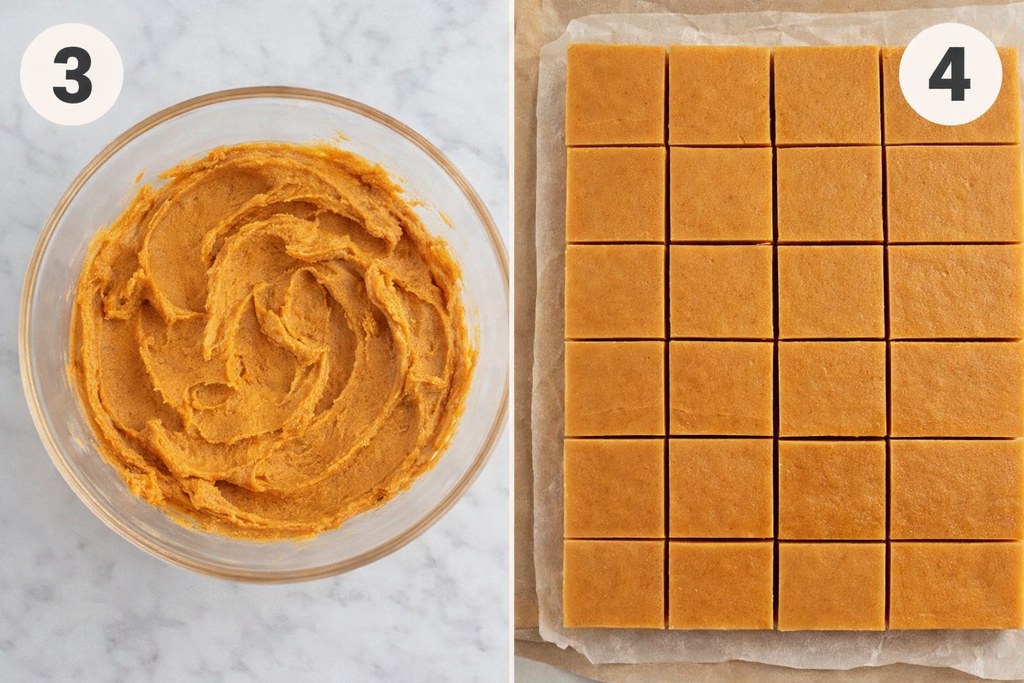
Stage 3: Carefully remove the container from the microwave. Combine it with powdered sugar and a dash of vanilla essence. Stir thoroughly with a silicone spatula until the mixture becomes creamy and dense—its texture should resemble soft dough.
Stage 4: Transfer this thick mixture into a parchment-lined 8×8 inch dish. Use the spatula to level and flatten the surface evenly. Place the pan in the refrigerator to firm up. When solid, lift it out and cut into neat bite-sized pieces.
Recipe Tips & Tricks
- Weigh precisely – It’s best to rely on a digital kitchen scale to portion ingredients in grams. This ensures consistency, precision, and flawless baking results every single time.
- Decorate as you like – I finished this fudge with a sprinkle of sea salt, but feel free to use your favorites—think colorful sprinkles, crushed nuts, bits of peanut butter candy, or mini chocolate pieces.
- Level the surface – Before refrigerating, gently even out the top of the fudge with an offset spatula or silicone scraper. Smooth until the surface looks uniform and glossy, with no uneven lines or bumps remaining.
Easy Peanut Butter Fudge (No Stove Needed)
Course: Food64
servings10
minutes50
kcal10
minutesIngredients
1 cup peanut butter
1 cup unsalted butter cubed
3 teaspoons vanilla extract
3 cups confectioners’ sugar
½ teaspoon kosher salt
Directions
- Prepare a square vessel measuring eight by eight inches by fitting it with nonstick lining.
- Inside a roomy, heat-safe container, warm the nut spread together with dairy fat until liquefied. This typically requires a few minutes; pause every forty-five seconds to stir thoroughly. Once the blend appears fully glossy and unified, remove it from the heating unit.
- Incorporate powdered sweetness, aromatic essence, plus mineral seasoning. Using a flexible scraper, blend until the mixture turns dense, silky, and completely uniform.
- Transfer the thick mass into the prepared square vessel and smooth the surface with a small angled tool. Place into cold storage for a minimum of three hours. Once firm, divide into sixty-four one-inch portions, or cut into larger pieces if desired.