
I always liked making small handmade gifts for Mother’s Day because the act of creating feels like sending a little piece of time back to someone who gave me so much. The scent of paper and a ribbon in my kitchen, or the way a painted edge dries under the afternoon light, turns the whole day into a quiet celebration.
Handmade Mother’s Day Gift Crafts have a way of carrying memories that a store-bought present rarely does.
Some of my favorite projects are simple enough to finish while listening to music, and the results have often prompted a warm, surprised laugh from the recipient. These handmade Mother’s Day Gift Crafts range from cozy to decorative, each offering tactile details and personal touches that make gifting feel layered and warm.
Pressed flower glass frame for sunlit memories
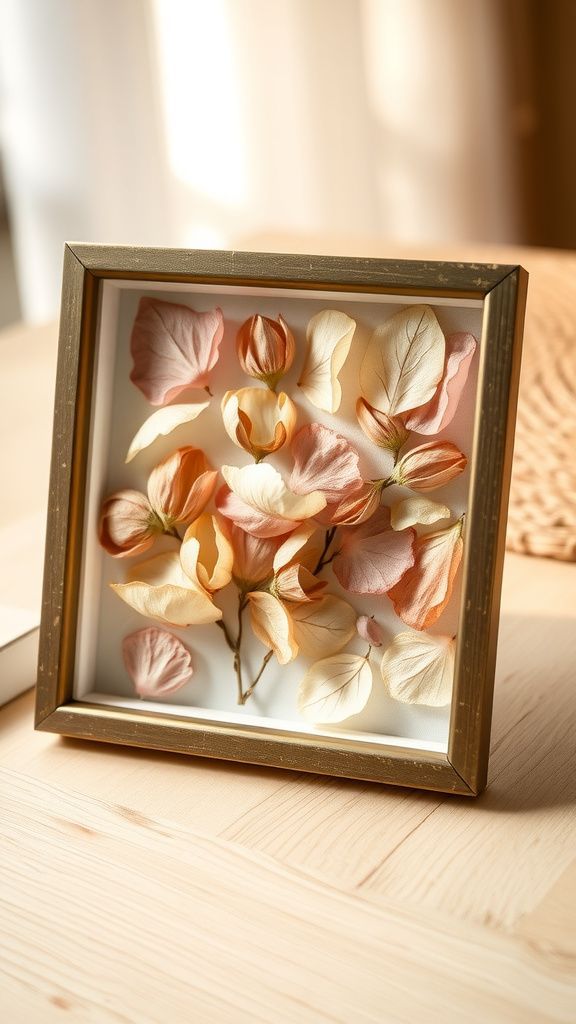
I remember gathering tiny petals from the garden for a framed piece that felt fragile and alive. The pressed blooms lay flat against clear glass, their veins catching light like miniature stained glass windows.
There was a slight papery scent, and the smoothness of the glass contrasted with the delicate ridges of a dried petal. Seeing a favorite bloom preserved next to a little photo made the whole wall feel softer.
It felt like bottling an afternoon into something both quiet and quietly bright.
Steps
- Collect fresh, flat flowers and press them between absorbent paper for several days until fully dried.
- Arrange dried blooms on the backing board inside the frame, experimenting with placement until it feels balanced.
- Place a second sheet of glass over the arrangement and secure the frame backing to hold everything in place.
- Clean the exterior glass and add a small label or handwritten note to the back for a personal touch.
Personal coupon book full of kind gestures
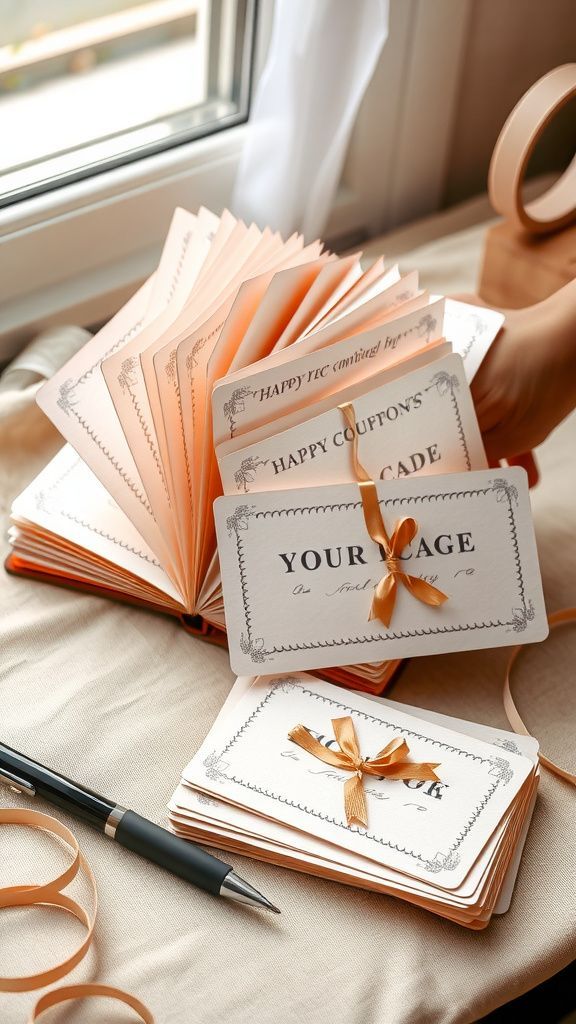
Making a small coupon book felt like folding little promises into slipcovers of paper. Each flap had different patterns and textures, from smooth cardstock to a strip of ribbon that caught the light.
I loved scribbling casual notes in my own handwriting; the strokes looked earnest and oddly more meaningful than a fancy card. Handing over the bundle, the sound of pages flipping felt like unwrapping small favors.
It was a tactile way of gifting time and attention, with a worn ribbon curled around the edge afterward as a keepsake.
Steps
- Gather cardstock in complementary colors and cut to matching sizes suitable for a small booklet.
- Decorate each card with hand-drawn icons, patterned scraps, or small stamps to indicate different offerings.
- Stack the decorated cards and bind one edge with a ribbon or staple, adding a cover card with a personalized title.
- Optionally tie a thin ribbon around the finished booklet for presentation and slip a small note inside the cover.
Lavender sachets scented with calm, homey warmth
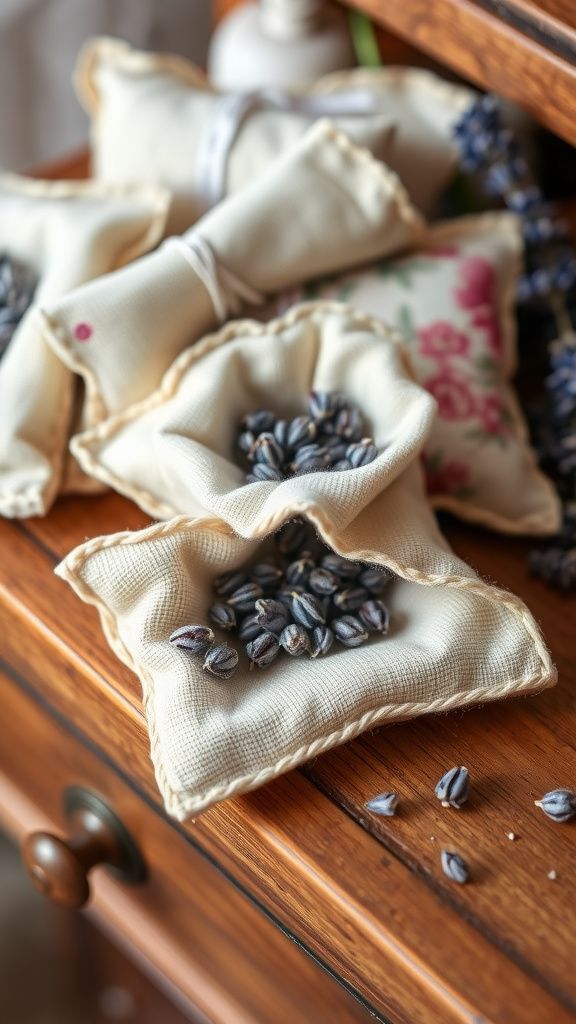
A sachet filled with dried lavender has a way of bringing a slow smile. The fabric had a slightly nubby texture when I ran fingers over the seam, and the scent was dusty and floral in the most comforting way.
Tucking one into a drawer felt like slipping a little sleep-inducing secret into the linen. Small stitches along the edge made the shape cozy in the palm.
It was the kind of gift that settled into daily life, releasing a soft perfume every time a drawer opened or a pillow moved.
Steps
- Select a soft natural fabric and cut matching rectangles for each sachet.
- Sew three edges together with a small opening left for filling, then turn the fabric right side out.
- Fill the pouch with dried lavender buds and a bit of filler like cotton for shape, then finish sewing the final edge closed.
- Add a small decorative tag or stitched initial to personalize the sachet before gifting.
Memory jar filled with tiny handwritten notes
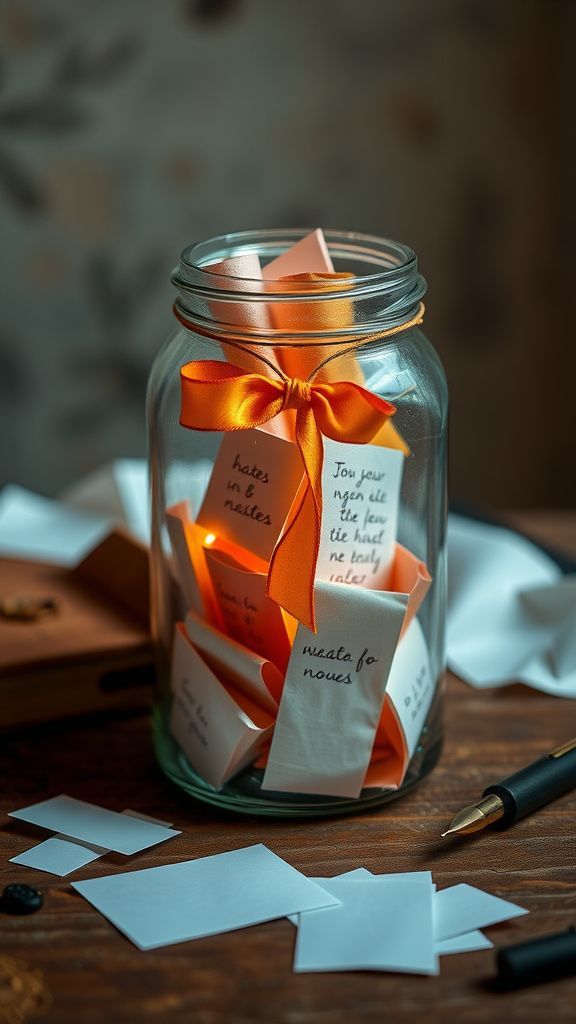
A clear jar filled with folded notes felt like collecting bursts of sunlight in glass. Each slip carried a short memory, a line that made me smile when I pulled one free.
The jar had small imperfections in the glass that bent the light into tiny rainbows, and the rustle of paper when a note came free was quietly satisfying. Tying a ribbon around the neck made it feel ceremonious.
Giving the jar felt like offering a slow series of small reminders that could be opened on a rainy afternoon.
Steps
- Gather a clean glass jar and a stack of small paper squares with varied colors or textures.
- Write short memories, compliments, or gentle prompts on each square and fold them neatly.
- Fill the jar with the folded notes, tamping them gently to fit more in, and seal with a lid.
- Decorate the jar neck with a ribbon or small tag that hints at how the notes might be used.
Embroidered tea towel with heartfelt stitchwork
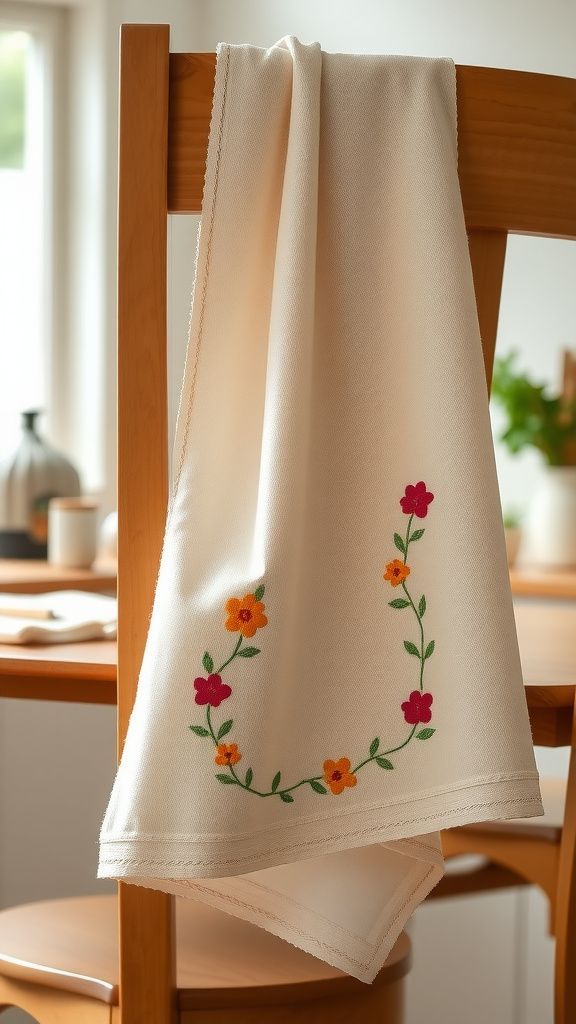
An embroidered towel felt like a slow conversation stitched in thread. The fabric had a whisper of stiffness from the weave, and tiny raised stitches formed a phrase that made me grin every time I passed the sink.
Colors were chosen to pop against the neutral cloth, and the texture of the floss created subtle shadows as light moved across the surface. Hanging it up transformed a practical item into a small statement of care.
It became a visible reminder that everyday moments can carry affection, even in a kitchen corner.
Steps
- Choose a plain tea towel and transfer a simple design or phrase onto the fabric.
- Thread an embroidery hoop to hold the fabric taut and select complementary floss colors.
- Stitch the design using basic embroidery stitches for text and small motifs, keeping tension even.
- Remove the hoop, press gently from the back, and hang or fold neatly before presenting.
Hand-formed clay jewelry dish with rustic glaze
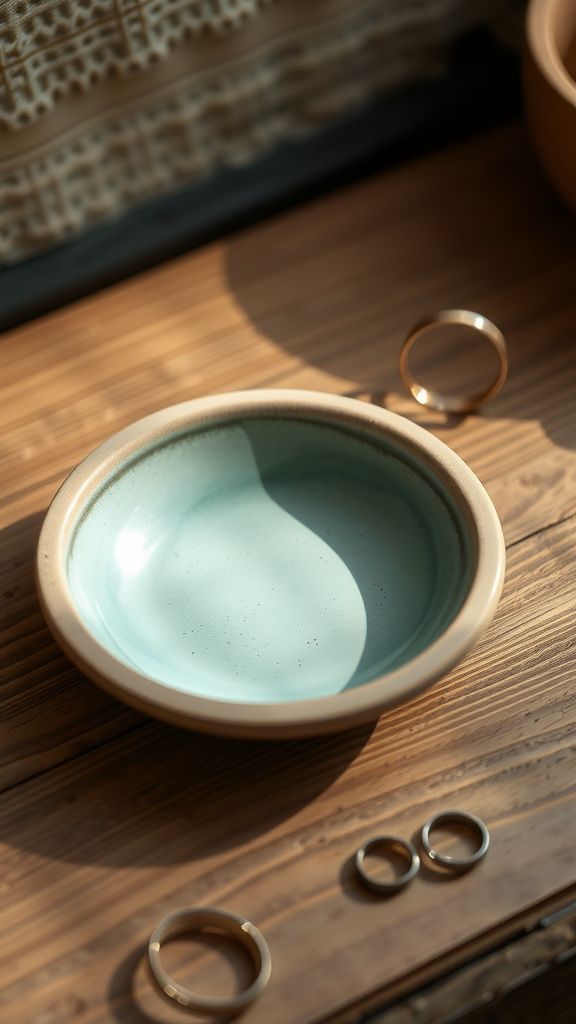
This little dish felt satisfying to hold, its rim rounded from my thumb and its surface slightly warm after firing. The clay bore tiny fingerprints that made it feel personal rather than perfect.
A glaze pooled in the center, creating a glossy pool that contrasted with the rawer matte outside. When light hit it, flecks of mica in the glaze caught the eye.
Placing rings in the dish became a small ritual, a soft clink against the glazed center that felt like a tiny daily celebration.
Steps
- Knead and shape a small lump of air-dry or oven-bake clay into a shallow dish form and smooth edges.
- Allow the dish to dry completely according to the clay type before applying glaze or paint.
- Apply a thin coat of glaze or food-safe finish if appropriate, and cure or bake per product instructions.
- Let the dish cool and place soft padding or felt on the base before gifting to protect surfaces.
Hand-lettered quote print with quiet typography

Creating a hand-lettered print felt like choosing a tone of voice for paper. The ink had a slight sheen when fresh, and the curves of letters held tiny hesitations that made the phrase feel human.
I liked how the weight of a stroke could change the mood from playful to tender, and the paper absorbed ink with a faint, satisfying bite. Framing the piece under glass made lines crisp against the muted paper.
Hanging such a print seemed to gently alter the room, providing a small pause for anyone who glanced its way.
Steps
- Choose a short quote and test different lettering styles on scrap paper to find a fitting look.
- Transfer the chosen design onto high-quality paper using pencil guidelines for spacing.
- Ink the lettering with fine pens or brush markers, allowing ink to dry fully before erasing pencil.
- Frame the finished print behind glass with a simple mat to highlight the hand-lettered work.
Upcycled tea tin planter with vintage charm
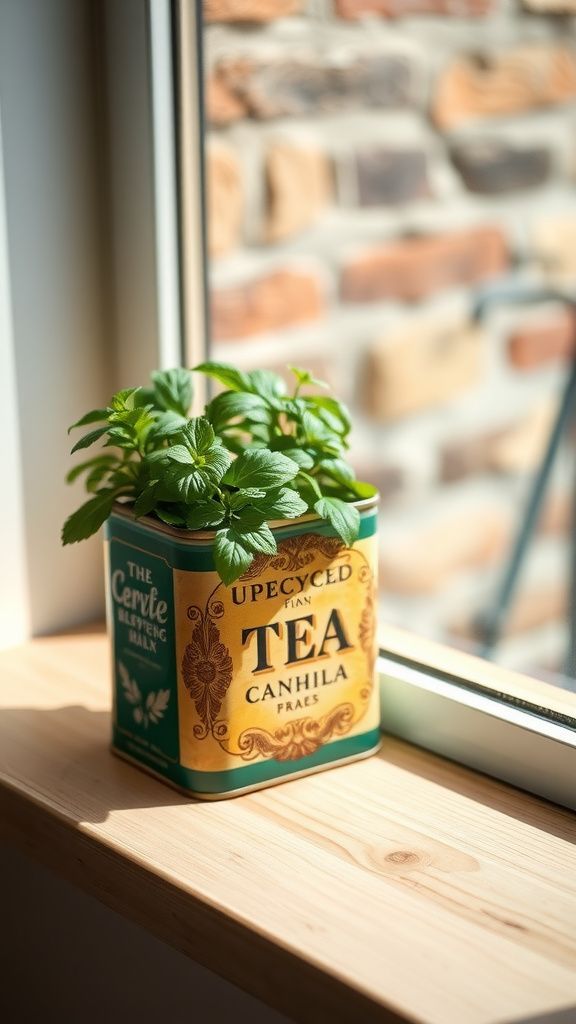
An old tin with a faded label made a surprisingly cheerful planter. The metal had warm dents and a patina that hinted at past use, and the soil inside smelled of earth and new shoots.
Tiny leaves peeked over the rim, their green vivid against the worn print on the tin. Tucking it into a sunny sill made a small corner feel collected instead of arranged.
The tactile coolness of the metal in contrast with soft leaves created a pleasing sensory pair that brought a tiny bit of garden energy indoors.
Steps
- Select a clean, empty tin and add a thin layer of small stones or coarse material to the bottom for drainage.
- Fill the tin with potting mix suitable for the chosen plant and position a small plant or herb in the center.
- Tamp the soil gently around the roots, water lightly, and place the planter in a bright spot with indirect sunlight.
- Optionally add a small label or tag indicating the plant type and simple care notes for the recipient.
Jar of fragrant bath salts for quiet evenings
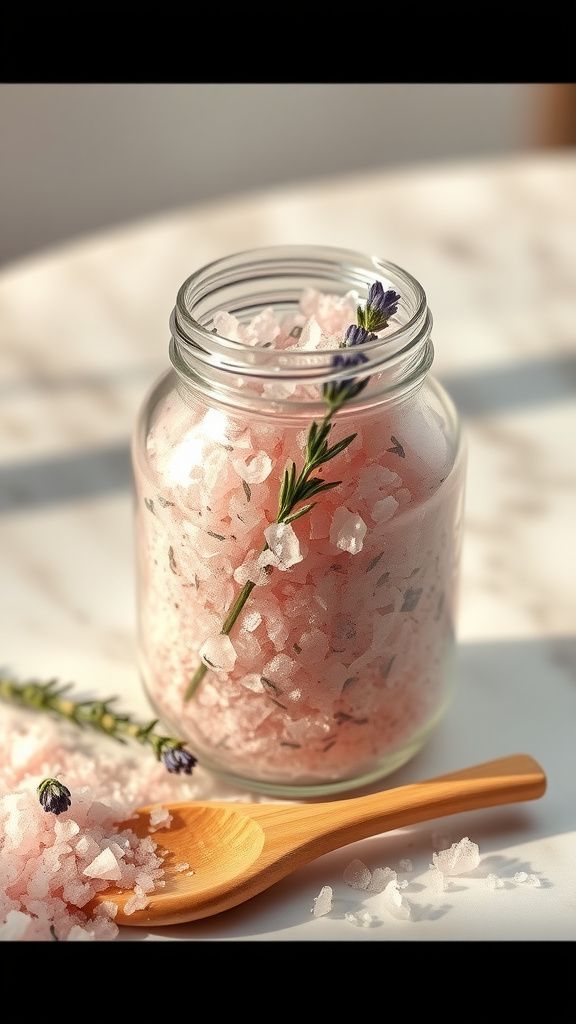
The jar of bath salts had a crystalline glimmer that looked almost edible on first glance. When the lid lifted, a soft herbal aroma rose—salty and floral in a way that felt indulgent without fuss.
The texture under a fingertip felt grainy and cool, and sprig-like bits of dried herb added visual contrast. The jar itself caught light and turned those crystals into tiny jewels.
Giving it felt like gifting a pause, a little invitation to slow down and sink into warm water with a gentle scent wrapped around the room.
Steps
- Measure coarse sea salt or Epsom salt into a large mixing bowl and stir in chosen dried herbs and essential oils sparingly.
- Mix until the scent distributes evenly across the salt crystals, adjusting with small increments if needed.
- Spoon the fragrant salt into a clean glass jar and compact lightly before sealing the lid.
- Label the jar with scent notes and a gentle reminder about water temperature and soaking time for safety.
Hand-bound recipe notebook for family treasures
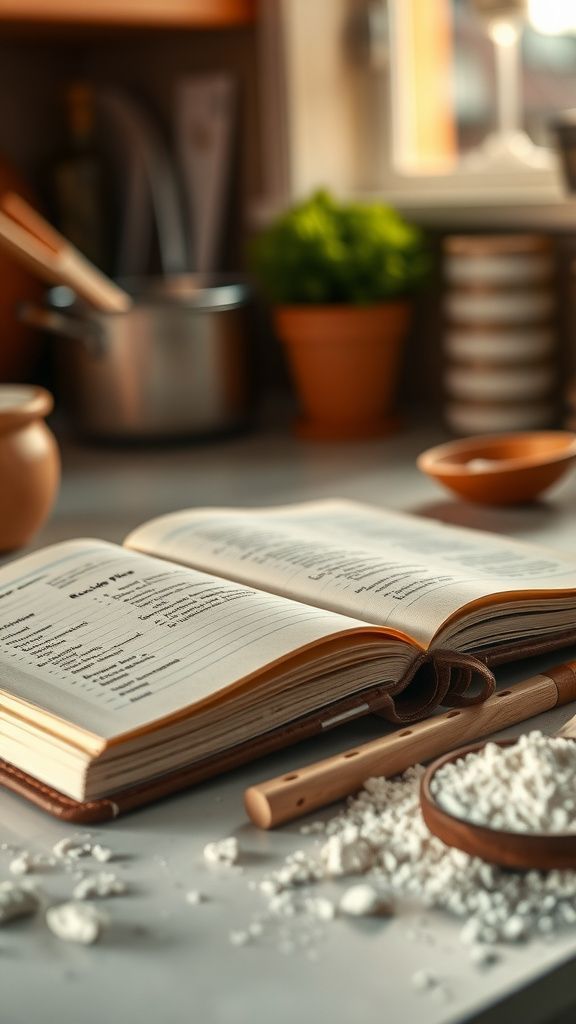
A small notebook compiled of hand-written recipes felt like patchworking family history into a single book. Pages smelled faintly of cooking oil and paper, and thumbed corners softened quickly with handling.
The cover had a textured fabric that invited touch, and my handwriting wandered into margins with tiny notes and substitutions. Flipping through gathered recipes made me think of long afternoons at the stove, and the weight of the book in my hands felt practical and intimate.
It seemed to promise meals made slowly and shared, a living heirloom for the kitchen.
Steps
- Assemble chosen recipe pages, either handwritten or printed, and organize them in a preferred order.
- Cut cover boards slightly larger than the pages and wrap them with decorative fabric or paper for a durable cover.
- Bind the pages to the cover using a simple sewing method or long-arm stapling depending on preference.
- Add a ribbon bookmark or elastic closure and label the spine with a title for a finished look.
Beaded wrap bracelet with layered texture
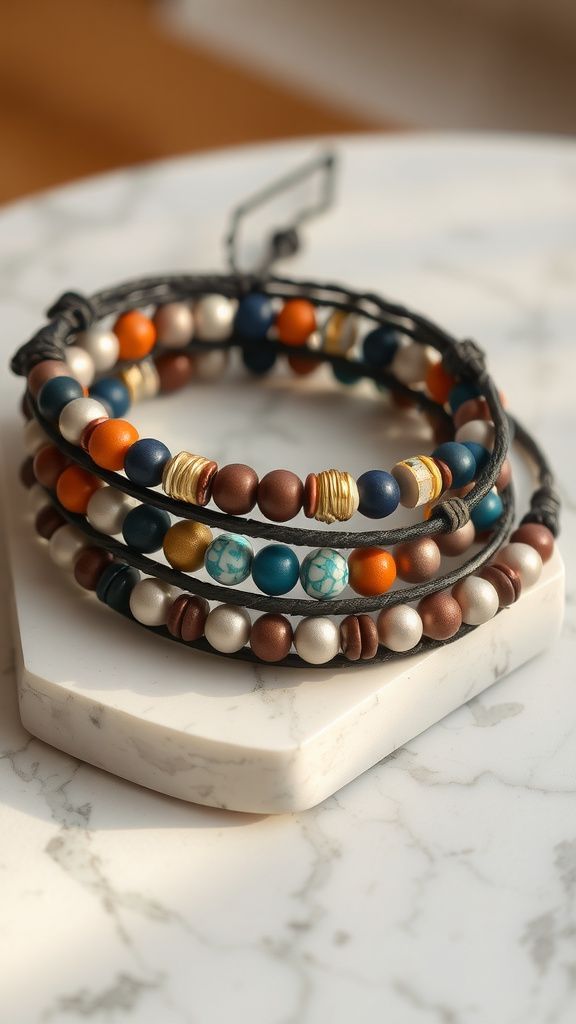
The beaded bracelet was a soft clink of glass and metal that felt light on the wrist. Tiny beads threaded together created a tactile ripple that moved like a whisper when I shifted my hand.
Colors layered against each other—matte, glossy, and metallic—giving the piece depth without fuss. The leather core had a pleasant chewiness to it, and clasps caught the light in a small flash.
Wearing it felt casual and considered at once, the sort of accessory that made an outfit feel a touch more personal and relaxed.
Steps
- Choose beads in complementary colors and textures, and arrange them along a length of cord to preview the pattern.
- Thread beads onto the cord, securing sections with small knots or crimps to hold spacing steady.
- Attach clasps or a loop-and-toggle closure at each end, checking the length for a comfortable wrap.
- Trim excess cord and tuck ends neatly, then buff any metal findings for a finished shine.
Mosaic stepping stone with colorful ceramic pieces
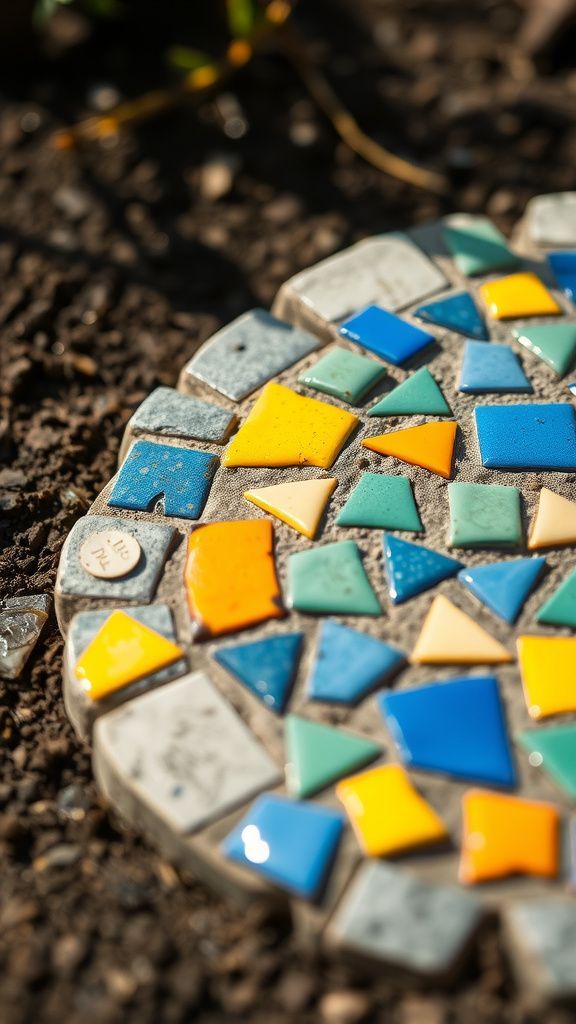
A mosaic stepping stone felt heavy and reassuring underfoot imagination. Shards of broken ceramic and tile created a patchwork that caught light in splinters, each piece fitting into the next like a tiny universe.
The surface was cool and slightly uneven to touch, and grout softened the edges into a unified plane. Colors ranged from glazed cobalt to sun-bleached pastels, and the finished round piece had the presence of something that might survive seasons of weather.
It felt like planting a small, handmade landmark into garden soil.
Steps
- Select a shallow mold and arrange cleaned tile or ceramic pieces inside the base to form a pleasing pattern.
- Mix concrete to a thick, pourable consistency and pour into the mold, pressing tiles gently until set in place.
- Allow the concrete to cure fully according to the mix instructions before removing from the mold.
- Grout between tile pieces, wipe away excess, and allow the grout to dry before sealing if desired.
Soft knitted infinity scarf for cool mornings
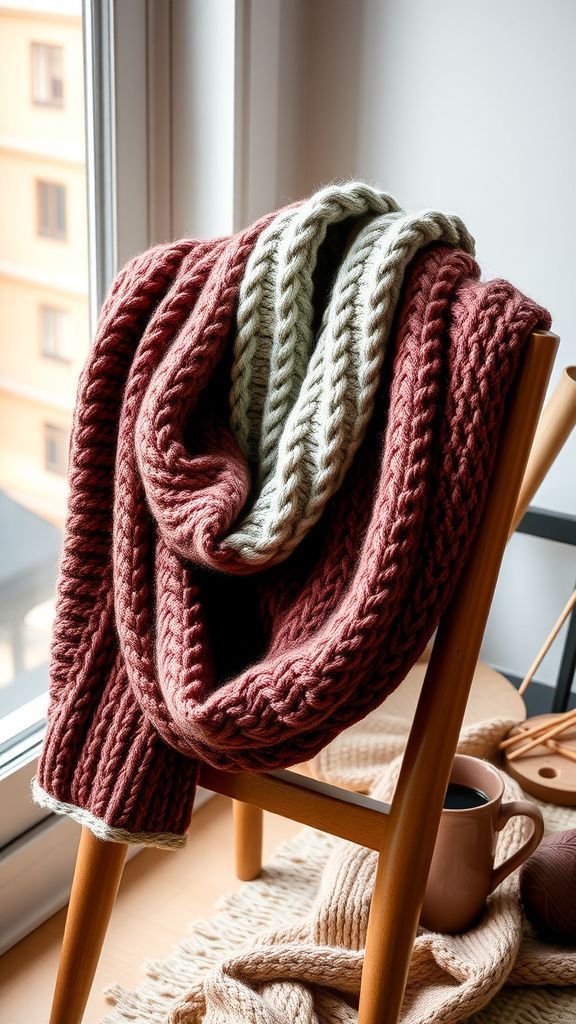
A hand-knitted scarf carried the faint aroma of yarn and the gentle give of soft stitches. Looping it around a neck felt like folding in warmth, and the fabric had a comforting elasticity when stretched.
The yarn showed tiny ridges from each stitch that caught the light differently across the surface, creating a cozy shadow-play. Color transitions blended like a slow sunset, and the weight of the scarf felt reassuring without being bulky.
It quickly became the kind of piece slipped on with a morning cup, warming hands and mood alike.
Steps
- Select a soft, medium-weight yarn and matching needles for a quick, warm fabric.
- Cast on an appropriate number of stitches and knit in the chosen stitch pattern until the piece reaches desired length.
- Bind off loosely, then seam the short ends together to form a continuous loop.
- Weave in loose yarn ends and block gently to even out the stitches if needed.
Terrazzo candle holder with speckled elegance
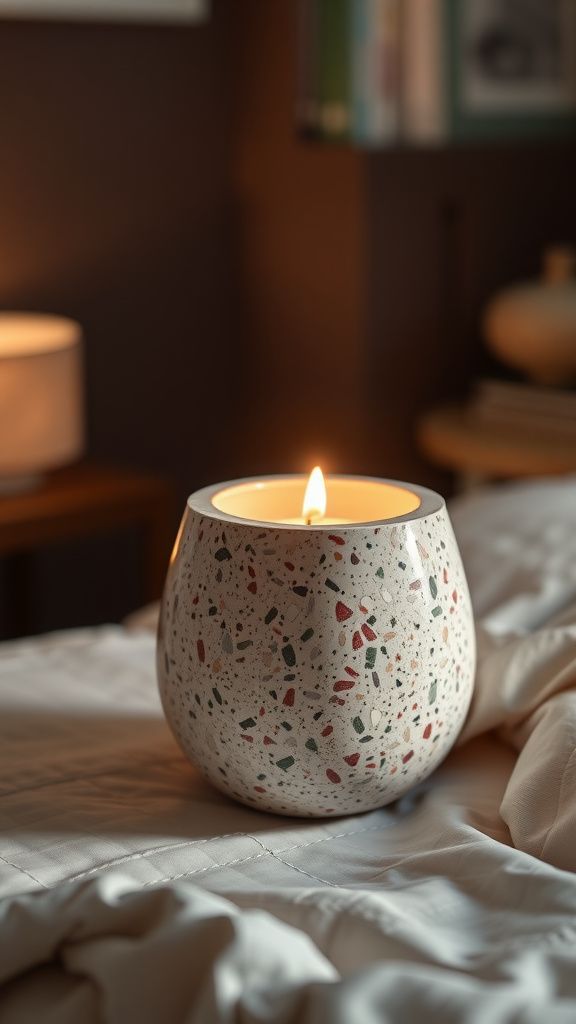
A terrazzo candle holder felt like a tiny island of mineral confetti. The speckled surface had chips of color embedded in a smooth matrix, and the heft of the piece suggested quiet permanence.
When a candle burned in the center, the light shimmered off the tiny fragments and made the surface appear almost luminous. The contrast between the cool stone feeling and the warm glow of flame created a pleasing duality.
It sat well on a bedside table, catching shadows in the evening and holding a gentle, steady light.
Steps
- Mix a terrazzo compound by combining a binder with small chips of colored stone, glass, or tile.
- Pour the mixture into a silicone mold with a central cavity for a candle, tapping gently to remove air bubbles.
- Allow the cast piece to cure fully and demold carefully, then sand edges smooth for a refined look.
- Polish the surface lightly and seat a candle snugly in the central cavity before gifting.
Stamped silver spoon with handwritten charm
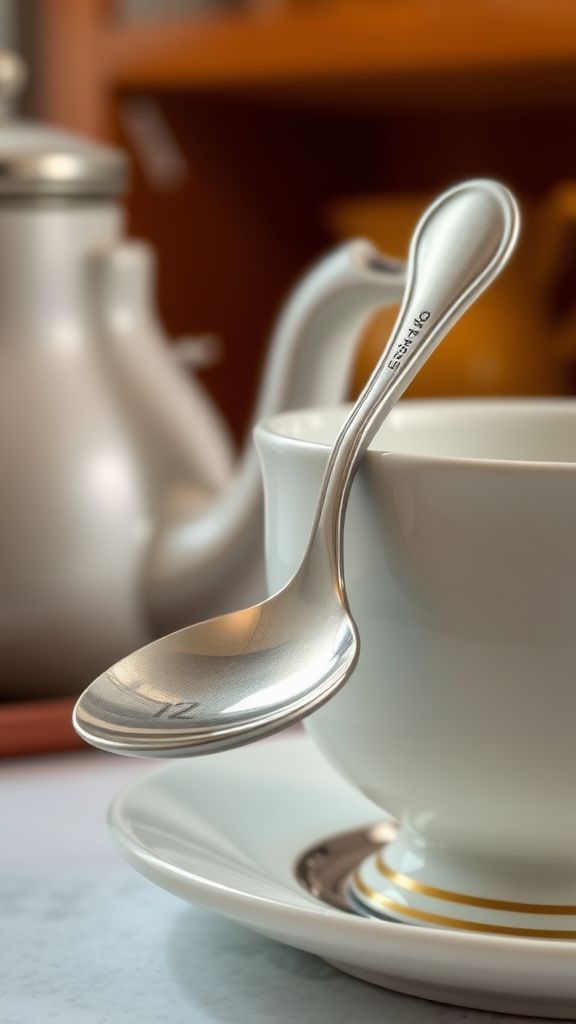
A stamped silver spoon felt like an heirloom that started in a quiet workshop. Tiny impressions formed a name along the handle, creating shallow pools of shadow that highlighted each letter.
The metal had a pleasant coolness when picked up, and a faint sheen showed where it had been polished. When placed in a jar of sugar or beside a teacup, it gave a domestic moment a touch of personality.
The sound of the spoon against ceramic was familiar and comforting, and the piece seemed to hold both function and a sweet memory.
Steps
- Choose a flat-handled spoon and clean the surface to remove any oils or tarnish.
- Position interchangeable metal letter stamps and strike firmly with a mallet to imprint the desired name or phrase.
- Polish the spoon gently to enhance the stamped impressions and remove any metal burrs.
- Optionally present the spoon in a small box with a soft lining to protect the finish.
DIY herb garden kit for sunny windowsills
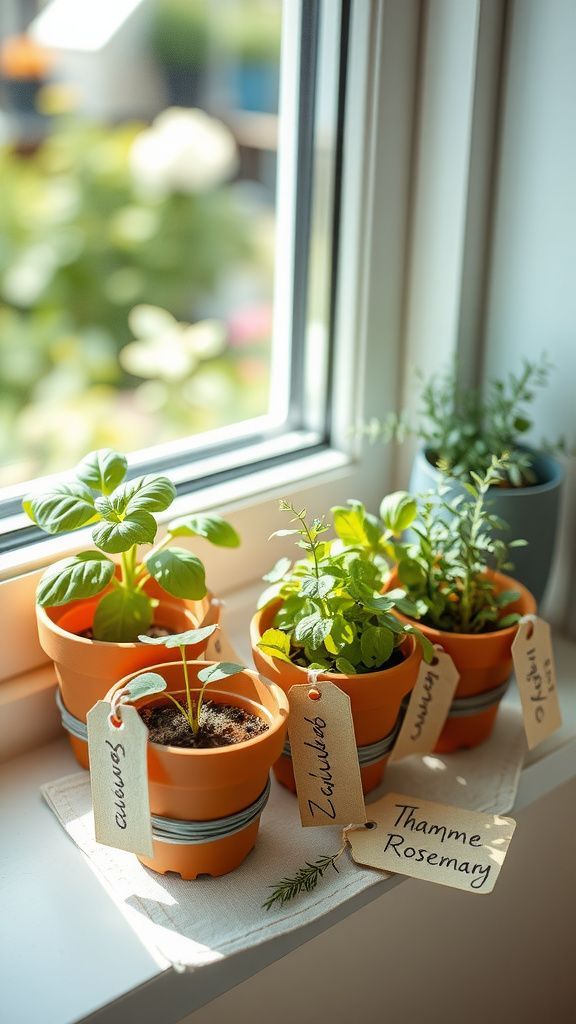
A small herb kit felt like giving a corner of summer indoors. Potting mix smelled of fresh soil, and tiny green shoots promised bright flavor in future meals.
The soil felt cool and damp, the seed packets crisp and faintly papery. Labels with little watercolor marks helped the arrangement look considered.
Placing the pots on a sunlit sill changed the way the kitchen breathed, adding a green punctuation to routine. It seemed like a patient gift, one that rewarded mild attention with sprigs of scent and the pleasure of clipping a fresh leaf.
Steps
- Select small pots or containers and add a drainage layer before filling with potting mix suitable for herbs.
- Place seeds or young herb plants into the soil at appropriate depths and water gently to settle roots.
- Label each pot with plant names and place the kit in a bright spot with indirect sunlight.
- Include simple care notes about watering frequency and ideal light for the recipient to reference.
Fabric scrap wreath with soft, layered textures
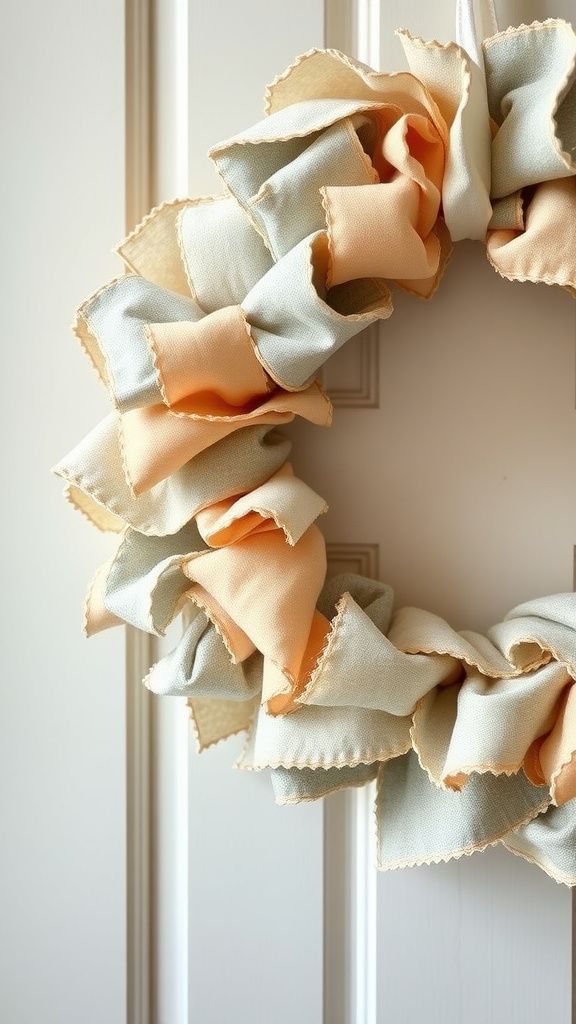
A wreath made from fabric scraps had a tactile depth that changed with every angle. Strips of cotton, linen, and ribbon overlapped to form a ring that felt full and cheerful.
The edges of the material softened into little frayed threads that caught the light, adding a lived-in look. Hanging it on a door introduced color and texture to an entryway, and the scent of familiar fabric had a faint domestic warmth.
It read as welcoming and handmade, a small herald that the home inside was both creative and comfortable.
Steps
- Gather fabric scraps and cut into uniform strips for consistent layering around the base form.
- Wrap or tie the fabric strips around a foam or wire wreath base, maintaining even coverage and density.
- Continue layering until the wreath appears full and the base is completely obscured.
- Trim stray threads for neatness and add a small ribbon loop for hanging before gifting.
Pressed leaf bookmarks with botanical simplicity
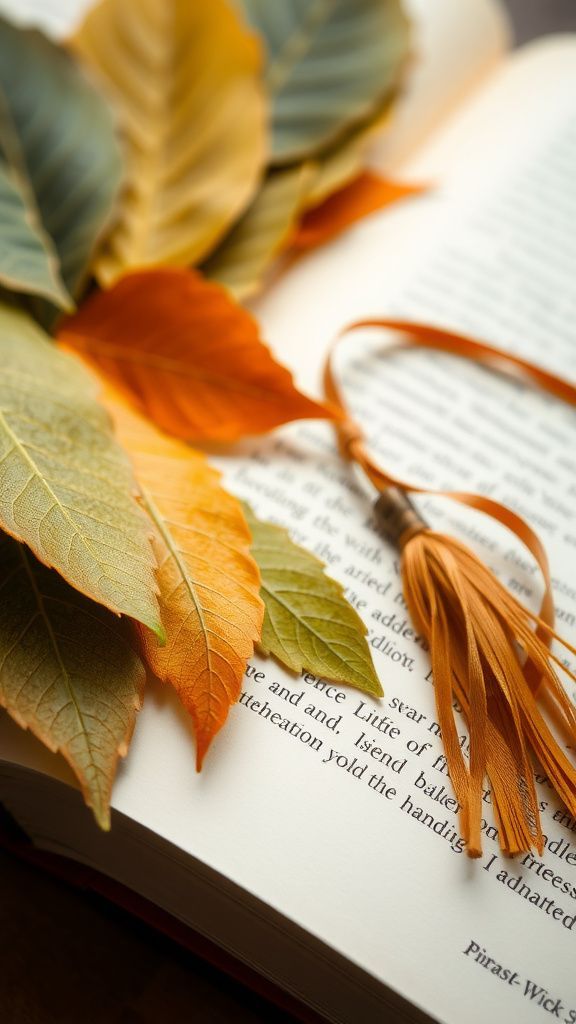
A pressed leaf bookmark felt like carrying a tiny piece of a walk in the park between pages. The leaf lay flat and papery, veins slightly darker against the pale surface, and the lamination gave a smooth, almost waxy finish.
Sliding it into a book left a faint botanical scent that transported the mind to a shady trail. The tactile difference between crisp page edges and the cooled, smoothed leaf made reading moments feel curated.
It was a quiet accessory that added a thoughtful pause to every page turned.
Steps
- Collect fresh flat leaves and press them between absorbent paper until fully dry.
- Arrange pressed leaves on a strip of sturdy paper or cardstock and laminate or sandwich between clear protective sheets.
- Trim the edges to a bookmark size and round corners if desired for a finished look.
- Add a small tassel or ribbon at the top before giving to add a handcrafted flourish.
Felt floral brooch with soft, cheerful petals
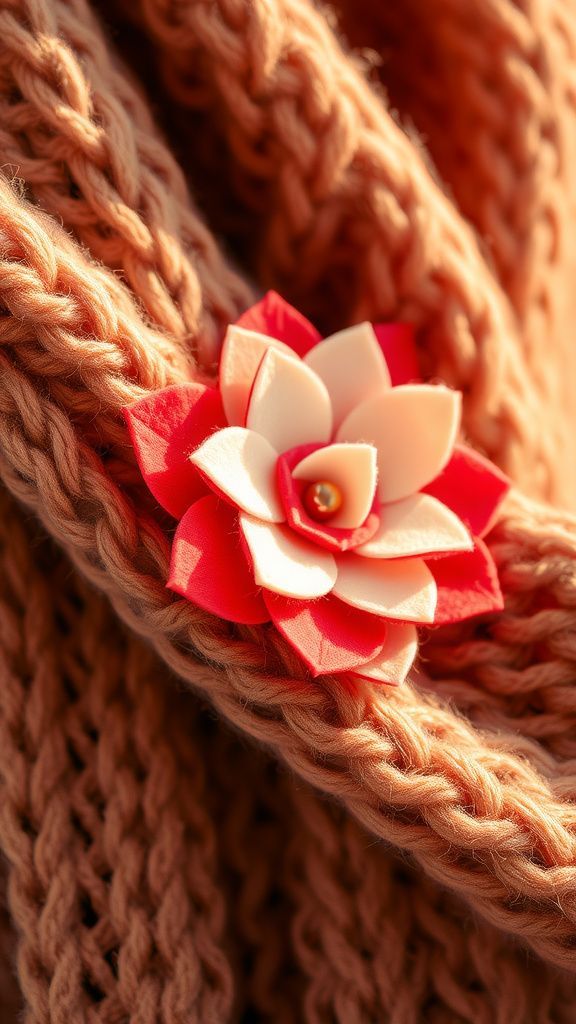
A felt brooch felt playful and affectionate pinned to a lapel or scarf. Petals cut from wool felt had a cushiony matte and held shape with a pleasant rigidity.
Layers of color created a small three-dimensional bloom that looked lively without being fragile. The back had smooth stitches anchoring a tiny pin, and the whole piece was light enough to wear all day.
Seeing it fastened to a sweater gave an ordinary outfit a lift, like a small, friendly nod. It felt like gifting someone permission to wear a little joy.
Steps
- Cut petal shapes from wool felt in coordinating colors and arrange them into a layered flower shape.
- Sew the petal layers together at the center and add a decorative center piece like a bead or small button.
- Attach a brooch pin to the back with stitches or adhesive designed for fabric attachments.
- Finish by trimming any loose threads and presenting the brooch on a small card or fabric square.
Thumbprint clay pendant carrying a tiny imprint
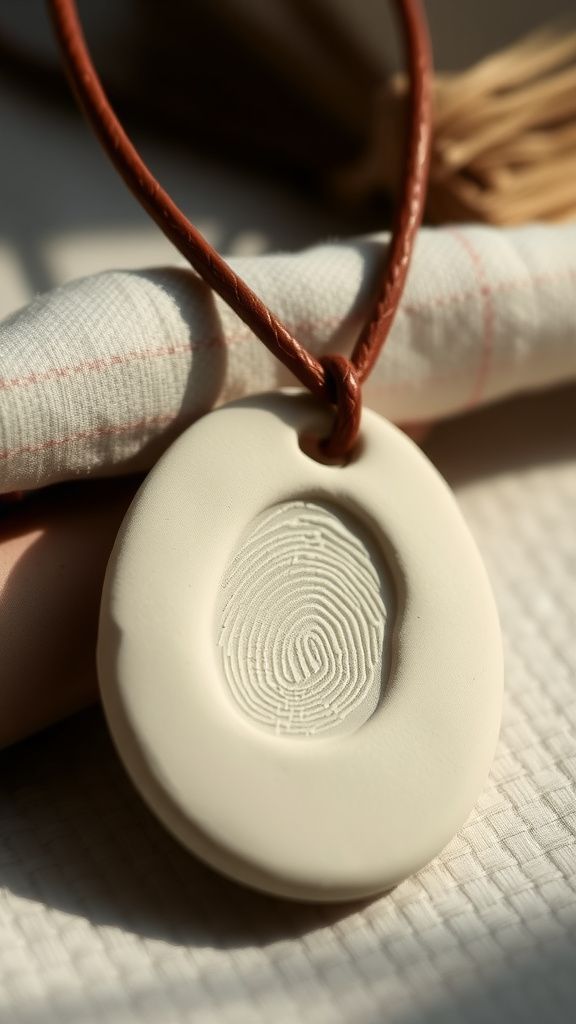
A small clay pendant with a thumbprint felt intimately personal and oddly reassuring. The impression sat in the middle like a miniature fingerprint map, edges soft from shaping.
The clay surface could be left matte or given a thin sheen that made the lines stand out. It hung quietly on a cord, and the pendant’s weight was barely noticeable but present, a subtle reminder of touch.
Wearing it brought a sense of closeness as if keeping that small mark near the heart. The pendant felt private and comforting, like a kept promise.
Steps
- Roll a small piece of clay to an even thickness and press a thumb or fingertip gently to leave an imprint.
- Cut around the impression to form a pendant shape and create a small hole near the top for hanging.
- Bake or air-dry the pendant according to clay instructions, then sand and finish with a sealant if desired.
- Thread a cord or chain through the hole and knot or clasp securely for wearing.
Spa eye pillow scented for restful naps
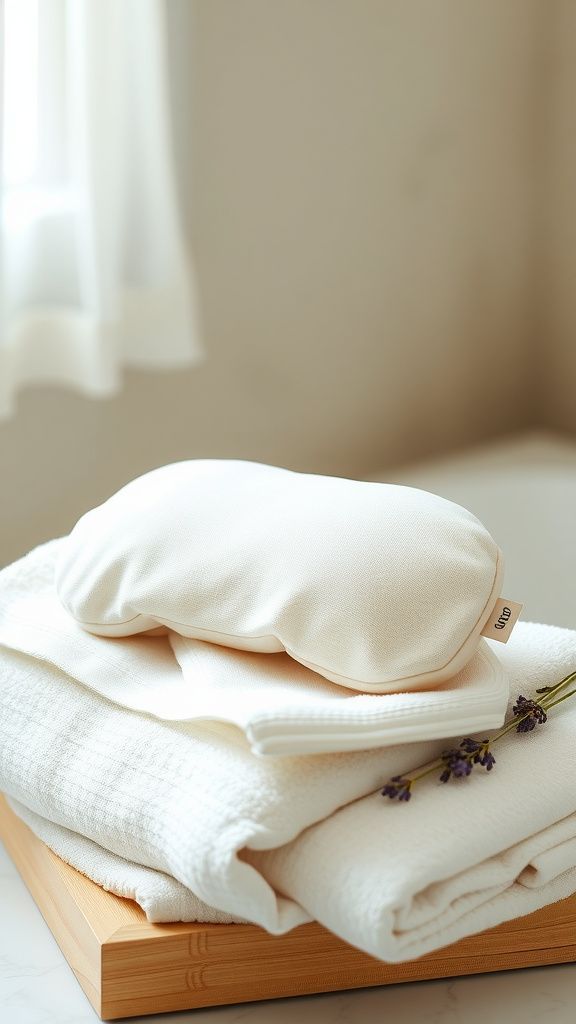
A small eye pillow felt like a soft invitation to close the day quietly. Filled with flaxseed, it had a pleasant, slightly grainy weight that settled over eyelids without fuss.
The fabric exterior was cool to the touch and the scent of lavender or chamomile unfurled softly when pressed. Laying it over sleepy eyes brought an immediate hush, and the gentle darkness felt like a tiny reset.
The overall effect was small and luxurious in a domestic scale, a wearable pause that promised a few peaceful minutes whenever needed.
Steps
- Cut a soft fabric rectangle and sew three sides, leaving a short opening for filling.
- Fill the pouch with flaxseed and a small amount of dried lavender or chamomile for scent, then finish sewing the final edge closed.
- Heat the pillow briefly in a low-heat microwave-safe manner if using heatable fillings, or chill for cold therapy depending on preference.
- Present the eye pillow in a soft bag or box with a note about gentle warming or cooling instructions.