
Story Hook

Memory: I remember the first year I decided to skip store-bought decor and invite my kids to help make our Halloween scene, and the house felt warmer even before the pumpkins appeared.
Family moment: We spent an afternoon with glue, paper and laughter, and the easiest projects created the biggest smiles, which is why handmade decorations became our family’s little tradition.
The ‘Why’
Meaningful reasons: Making decorations together turns a task into memory-making time and gives kids a sense of pride when their creations join the porch or mantel, which helps focus Halloween on fun instead of fear.
Budget sense: Choosing homemade projects keeps costs low and opens space for creativity rather than spending on expensive, single-use plastic pieces that leave you with clutter at the end of the night.
Getting Started
Quick plan: Before gathering supplies, set a simple plan for where decorations will go and which projects suit your home so the crafting time stays calm and focused.
Safety first: Pick glue, scissors and paints that match your child’s age, create a workspace you can wipe down easily, and keep hot tools for adult hands only so the experience stays cheerful.
Tools & Materials
Main checklist: The list below covers low-cost items that form the backbone of most projects and helps avoid last-minute store runs.
- White and colored cardstock or construction paper
- Elmer’s glue and glue sticks
- Washable acrylic paints and brushes
- Child-safe scissors and craft knives for adult use
- Battery tea lights and LED strings
- Old sheets, pillowcases or cheesecloth
- Markers, black tape and stickers
- Empty jars, toilet paper rolls and cardboard tubes
- Stapler and hole punch
- Optional: spray adhesive, ribbon, faux moss
Spooky Paper Lanterns
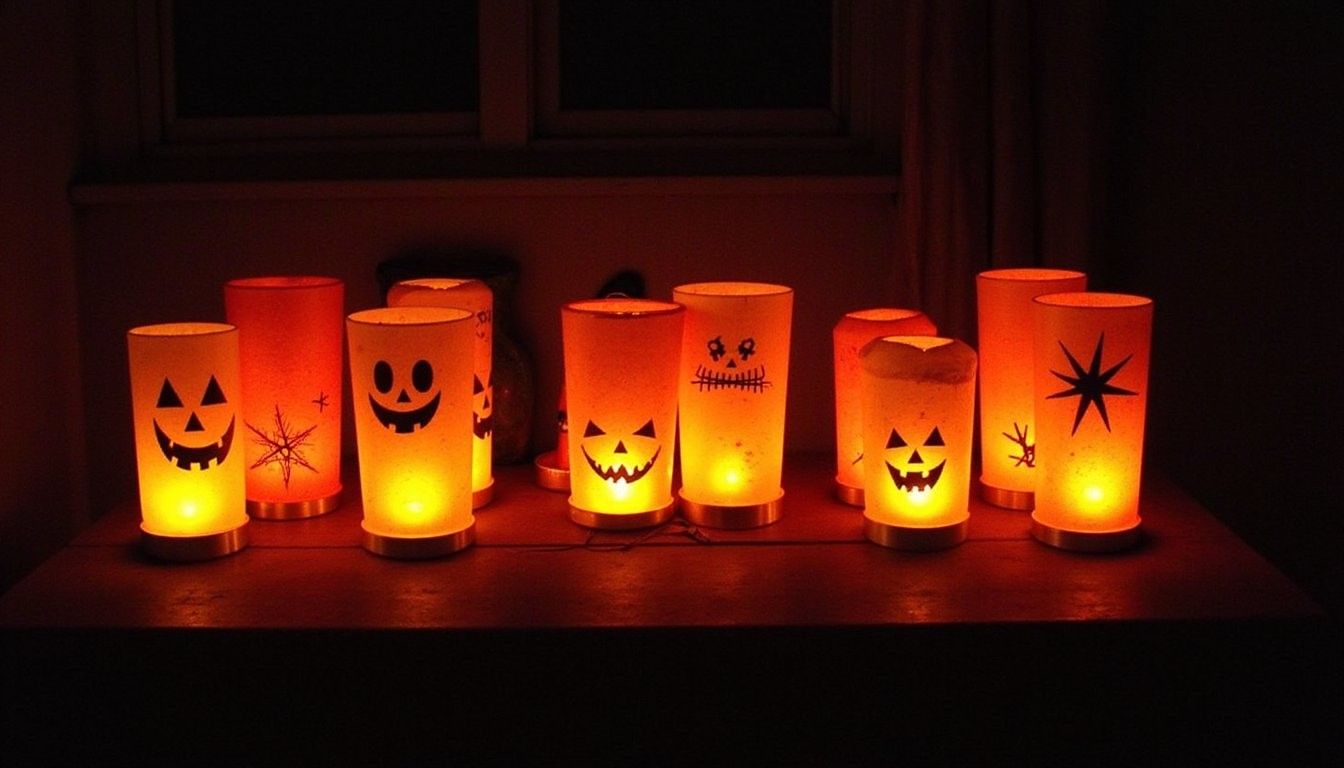
Why they work: Paper lanterns transform soft lighting into seasonal mood without sharp edges or flames, so they suit homes with small children and help define porches or corners with a cozy glow.
How to make them: Cut faces from black paper and glue them to plain paper lanterns or jar shades, or fold accordion-style paper into pumpkin shapes and secure with twine, then place a battery tea light inside for safe illumination.
Finishing touch: Add crepe paper stems, raffia bows or a light wash of watered-down brown paint for an aged look that still reads friendly rather than frightening to little trick-or-treaters.
Friendly Window Silhouettes
Kid-safe silhouettes: Cut simple shapes like cats, witches on brooms with smiling faces, or friendly ghosts from black cardstock and tape them to interior windows for a silhouette effect that stays inside and avoids spooky scares outside.
Placement tips: Use a sheet of tracing paper or vellum behind the shape to diffuse light, position battery candles or desk lamps behind the silhouettes, and vary heights so the display reads like a playful scene rather than a wall of shadows.
Interactive idea: Let older kids draw their own characters on cardstock, sign them, and trade placements each night leading up to the holiday to build excitement in a gentle, hands-on way.
Pumpkin Makeovers Without Carving
Why skip carving: Decorating real pumpkins with paint, stickers or glued accents removes sharp tools from the project and makes pumpkins last longer on porches or tables, which suits families who want low-stress displays.
Decoration ideas: Try paint-dipped halves, polka dots in contrasting colors, glued faux flowers or simple faces drawn with washable markers so kids can safely personalize their own pumpkins.
| Method | Cost | Durability |
|---|---|---|
| Paint and markers | Low | Good for weeks |
| Glue-on decorations | Low to medium | Good if kept dry |
| Fabric wraps and bows | Low | Good indoors |
Care note: Keep painted pumpkins out of direct sun and bring them indoors during heavy rain to preserve color and prevent rotting, which helps your work look fresh through the season.
Reusable Yard Art and Pathway Lights
Smart reuse: Turn items like painted milk jugs, decorated buckets, or wooden planks into outdoor guides that you can store and reuse every year for small expense and big curb appeal.
Make it safe: Use solar or battery lighting to avoid extension cords, anchor items securely against wind, and pick materials that tolerate damp conditions so displays remain tidy and low maintenance through the season.
| Project | Estimated Cost | Street Visibility |
|---|---|---|
| Milk jug ghosts with LED lights | Very low | High |
| Painted plywood signs | Low | Medium |
| String-lit fairy pathway | Low to medium | High |
Community idea: Invite neighbors to drop off clean plastic jugs for a communal ghost train, which stretches curbside charm without adding single-use purchases to your list.
Crafting Activities for Little Hands
Projects for young kids: Make sticker pumpkins, pom-pom spiders glued to pipe cleaner legs, or sock ghosts filled with rice so toddlers can join without access to sharp tools or messy paint palettes.
Parental role: Offer templates, pre-cut shapes and a selection of easy adhesives so children can focus on color and placement while adults handle the trickier steps to keep the process frustration-free for all ages.
Family rhythm: Set a short timer for each station so projects stay fresh and the day becomes a series of small wins rather than one long, tiring session.
Storage tip: Use a single labeled bin for seasonal craft supplies and let kids add to it each year, which simplifies future preparations and honors their growing skills.
Sustainable and Thrifty Approaches
Reuse first: Before buying new, check drawers and recycling bins for jars, fabric scraps, and cardboard that transform easily into decor and keep your budget low while reducing waste.
Thrift finds: Visit secondhand shops for picture frames to convert into spooky portraits or old tablecloths to cut into dramatic ghost silhouettes so you get good looks without high price tags.
Upcycle idea: Turn broken string lights into mason-jar lanterns or wrap PVC pipe leftovers with ribbon for simple yard stakes so scraps become showpieces with little expense.
What to Avoid
Comparing Project Types
Quick comparison: Some projects are faster and need little supervision while others require adult prep but give a more polished result, so choosing activities that match your available time makes the day smoother for everyone.
| Project Type | Time | Kid Involvement | Cost |
|---|---|---|---|
| Paper silhouettes | Short | High | Very low |
| Painted pumpkins | Medium | Medium | Low |
| Yard sculptures | Medium to long | Low | Low to medium |
Choose by schedule: Match projects to the amount of adult supervision available and pick one longer task plus a couple of quick wins so kids stay engaged without getting restless.
Finishing Touches and Display Tips
Layering displays: Group small items on trays, use books to create height, and tuck LED lights among objects so the arrangement reads thoughtful even if each piece is handmade on a budget.
Photo record: Take pictures of favorite displays to reference next year, which helps recreate the look without needing to unpack every box of supplies to remember what worked best.
Safe storage: Store fragile items between sheets of newspaper in a single plastic tub labeled by room so next season’s setup is faster and children can revisit their creations easily.
Frequently Asked Questions
Can I make decorations with toddlers? Yes, choose sticker-based crafts, sock ghosts and paint-dip ideas that avoid choking hazards and keep supervision close while letting little hands participate and feel proud of their contributions.
How do I make decorations last longer? Keep items sheltered from rain, use sealants or clear spray on paper elements if they must go outside briefly, and bring delicate pieces indoors at night to extend their life through the season.
What are low-cost lighting options? Battery tea lights, solar stake lights and repurposed fairy lights make gentle illumination without cords and usually fit within a modest budget while keeping displays safe around children.
How can busy families still decorate? Pick two small projects that take under an hour each, involve kids in one and adults in the other, and set up displays over a couple of days so the effort feels manageable instead of overwhelming.