
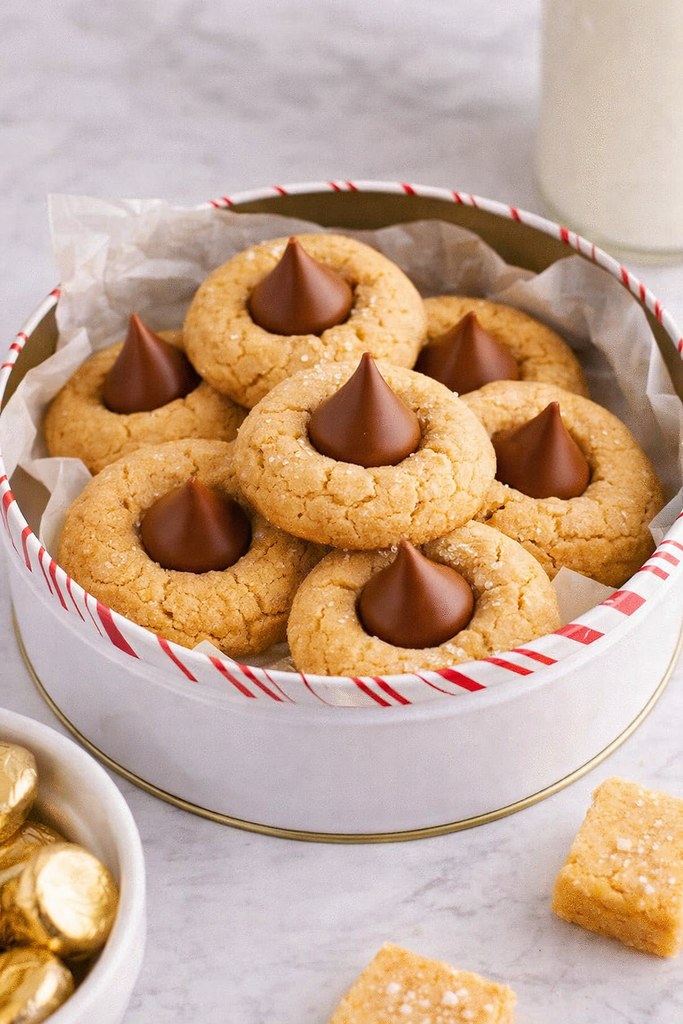
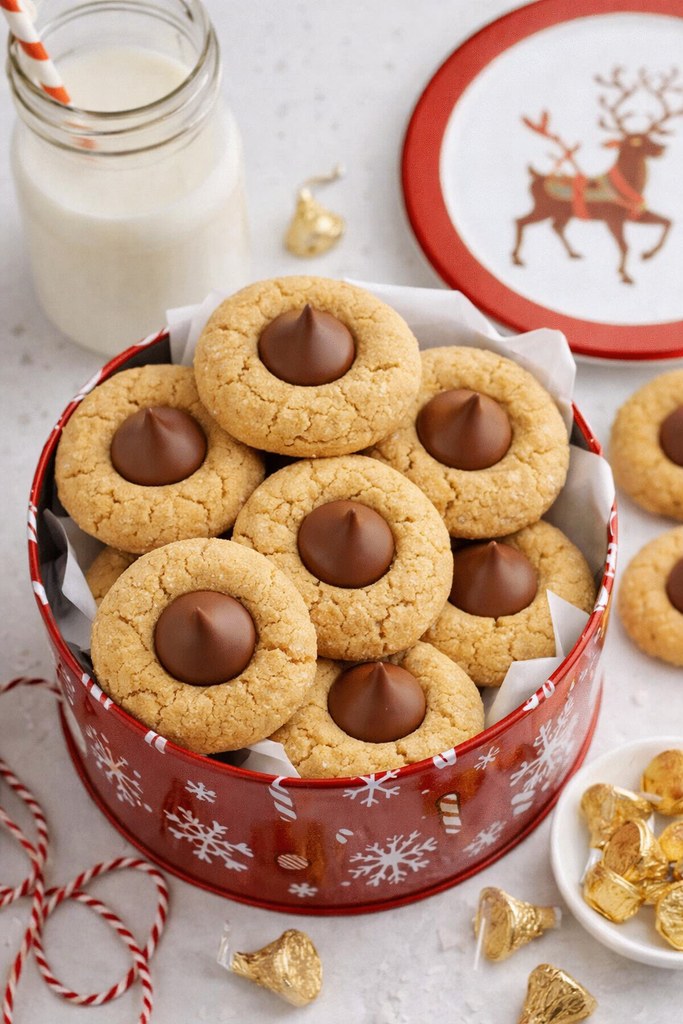
These charming peanut butter blossom confections might quickly turn into your next obsession! Soft, delectable cookies encrusted with sugar and topped with a velvety chocolate kiss — sheer bliss in every morsel. Prepared in roughly ten minutes and combined in a single bowl!
Reasons to adore these peanut butter blossoms
- Fast to Assemble: These snacks are easy to make — the batter requires about 10 minutes to combine, followed by an hour of chilling in the refrigerator. The chocolate fillings also need a brief hour in the freezer, ensuring everything is ready simultaneously.
- No Sticky Centers: By chilling the chocolate chunks prior to baking, they maintain their form and won’t turn into a gooey disaster on your just-baked cookies.
- Cupboard-Friendly: You will require just a few common baking essentials — approximately 11 overall — many of which are probably already found in your kitchen.
- Celebration Classics: While they sparkle during the festive season, these cookies with peanut butter kisses are a treat to enjoy throughout the entire year!
Ingredient Notes
- For this recipe, I chose regular all-purpose flour. I haven’t tried any gluten-free options so far, so outcomes might vary if you decide to use them.
- I opt for unsalted butter to control the seasoning according to my preference. My choice leans towards the European variety due to its more robust flavor and creamier consistency.
- Chocolate Kisses: For this variation, I utilized milk chocolate Kisses, but feel free to substitute with any flavor you prefer. I’ve also created them using mini Kisses — they come out absolutely charming!
- Peanut Butter: Ensure you choose smooth, creamy peanut butter instead of the natural variety that tends to separate. The oily type may influence the cohesion of the cookies.
- Sweetener: A combination of granulated sugar and light brown sugar provides these cookies with optimal taste and texture. Additionally, a small amount of granulated sugar is required for dusting the dough balls prior to baking.
Guidelines to Follow Sequentially
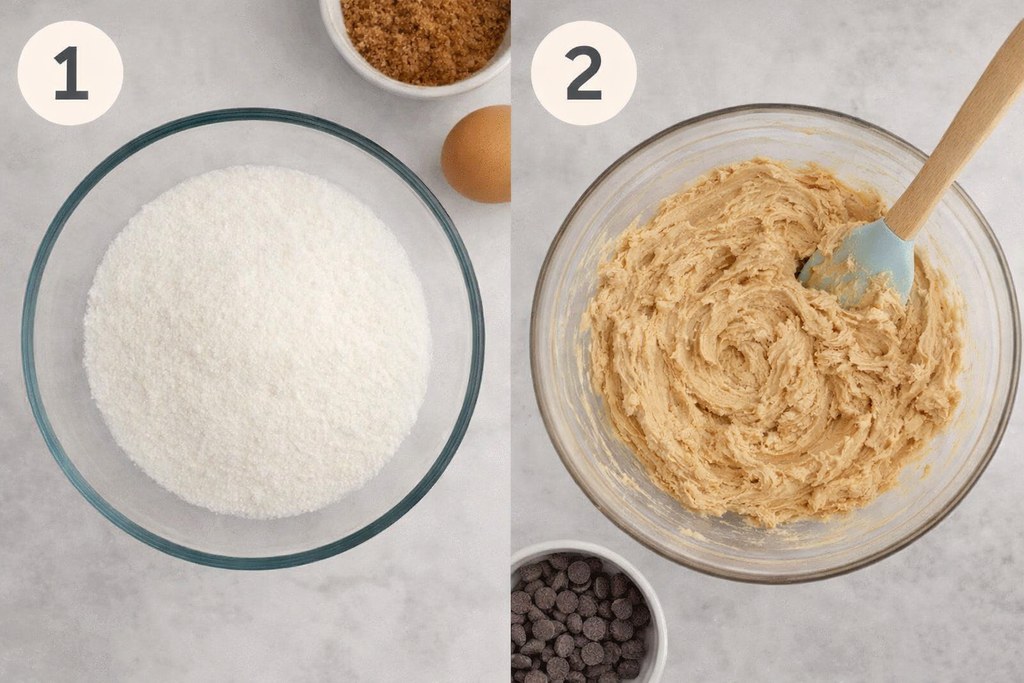
Step 1: In a different mixing bowl, mix together the dry components—flour, baking soda, and salt. Line two trays with parchment paper and set them aside for future use.
Step 2: Utilizing a stand mixer fitted with a paddle or a hand-held mixer, combine the softened butter, peanut butter, white sugar, and brown sugar until the blend is smooth and light in color. Add the egg, vanilla extract, and milk, then keep mixing until all ingredients are thoroughly combined.
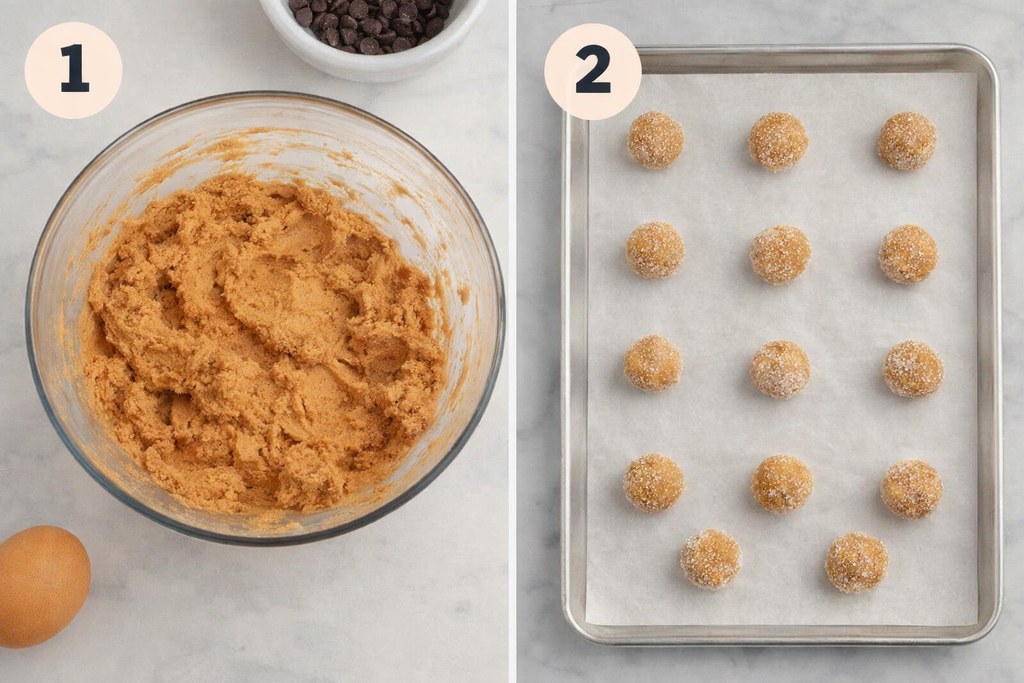
Phase Three: Carefully merge the dry ingredients with the wet ones until they are fully integrated and no traces of flour are apparent. Utilize a silicone spatula and mix by hand to maintain the dough’s softness and prevent overmixing. Wrap the dough and refrigerate it for a minimum of one hour, or extend it up to 48 hours if necessary. While the dough is chilling, take off the wrappers from the Hershey’s Kisses and place them into a sealed container or freezer bag. Store them in the freezer for approximately one hour—this precaution prevents them from melting when applied to the warm cookies afterwards.
Phase Four: Preheat your oven to 375°F (190°C) and prepare your baking sheets with either parchment paper or a silicone mat. Retrieve the chilled dough. If it has been in the refrigerator for over an hour, allow it to rest at room temperature for around 20 minutes to make it easier to handle. Take approximately 1½ tablespoons of dough for each cookie, rolling each piece into a smooth sphere using your hands. Coat each dough sphere in granulated sugar, then place them on the baking sheet, ensuring they are spaced about 2–3 inches apart. Keep shaping cookies until all the dough has been utilized.
Put the cookie mixture in the oven and allow it to bake for approximately 10 to 12 minutes. As they are baking, take the chocolate treats out of the freezer. Once the cookies appear slightly golden and exhibit small fissures on the surface, remove them. Gently press a candy into the center of each warm cookie, then let them cool completely prior to serving.

Proven Strategies and Techniques
- Exact Measurement – Always depend on a digital kitchen scale and measure everything in grams rather than utilizing cups or spoons. Accurate measurements guarantee uniform, flawlessly textured baked goods each time!
- Gently Scoop Your Flour – If you lack a scale and choose to measure with cups, softly mix your flour to aerate it, then spoon it into the cup and flatten the top. You can find the correct method online. Using too much flour results in cookies that are hard and dry rather than soft and delicate.
- Allow Ingredients to Reach Room Temperature – Prior to combining, set butter, eggs, and any other chilled components aside until they warm to room temperature. This aids in achieving a more uniform mixture for a smoother dough. Remove them from the refrigerator approximately an hour in advance.
- Tiny Cookies – Have some mini Hershey’s Kisses or petite chocolate morsels? Form your cookie dough into small pieces and decorate with those instead. They’re delightful and perfectly sized for little festive helpers!
Classic Chocolate Kiss Cookies for Any Occasion
Course: Food32
servings10
minutes13
minutes145
kcal1
hour23
minutesIngredients
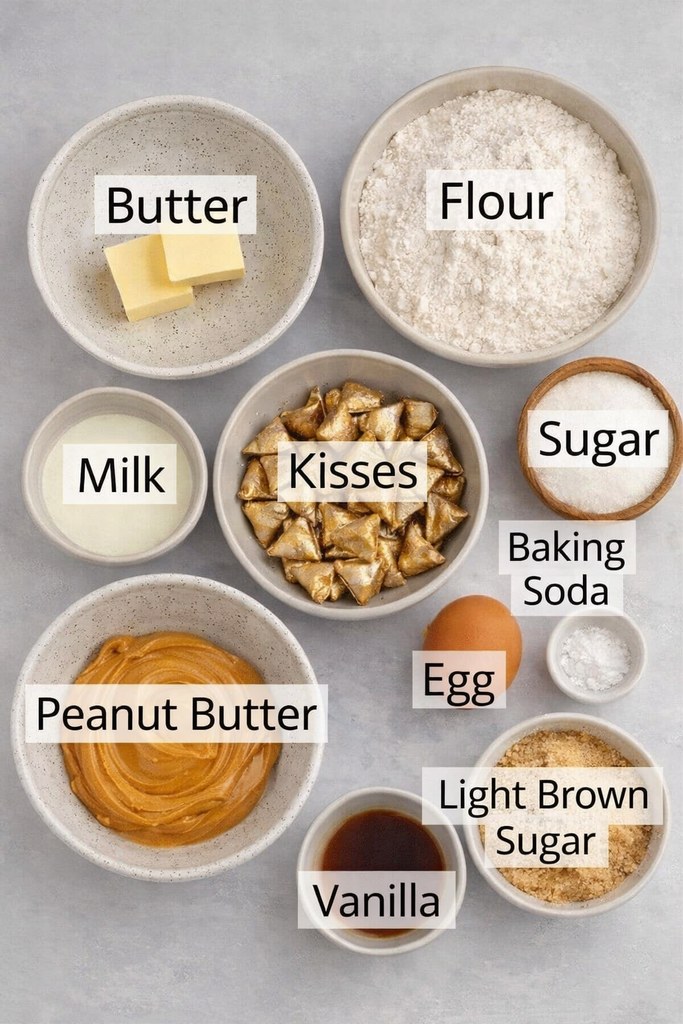
1 ½ cups all purpose flour
½ teaspoon kosher salt
1 teaspoon baking soda
½ cup granulated sugar
½ cup light brown sugar
½ cup unsalted butter room temperature
¾ cup peanut butter
1 tablespoon whole milk
1 egg room temperature
1 teaspoon vanilla extract
32 Hershey’s Kisses
½ cup sugar for rolling the cookies
Directions
- Inside a moderately sized vessel, briskly blend ground grain, mineral crystals, plus chemical leavener through whisking motions.
- Employ a countertop blending appliance equipped using a flat beater—or alternatively a roomy container paired alongside an electric handheld device—to whip softened dairy fat together alongside smooth nut paste, pale caramelized crystals, plus white sweetener at a steady pace. Continue processing several minutes until the mixture appears airy and noticeably paler.
- Introduce one shell-bound binder, aromatic pod essence, plus liquid dairy. Continue agitation at the same setting until everything merges smoothly.
- Pause mechanical motion, then add the powdered blend. Using a flexible scraper, gently combine by hand until no pale traces remain. Transfer the container into cold storage so the mixture firms for no less than sixty minutes, though an extended rest lasting up to forty-eight hours works as well.
- Remove wrappers from chocolate drops, then place them under freezing conditions for roughly sixty minutes.
- Adjust the baking chamber to three hundred seventy-five degrees on the Fahrenheit scale, equivalent to one hundred ninety Celsius, and prepare a pair of flat metal trays fitted using nonstick liner. Retrieve the chilled mixture and portion rounded scoops measuring roughly one spoonful each. Shape each portion between palms into smooth spheres, then coat fully using the reserved half-cup of crystalline sweetness. Arrange portions across the prepared trays, leaving approximately two to three inches of space between each.
- Heat for about eleven to thirteen minutes, until surfaces appear lightly amber and begin forming fissures. Remove the chocolate pieces from freezing conditions, then withdraw trays from the heated chamber. Carefully press one chocolate piece into the center of each warm round, then allow everything to reach full coolness prior to serving.