
Story Hook

A messy first attempt taught me more about composition than any Pinterest scroll ever could, after I hammered in crooked nails and watched frames slide until an entire arrangement looked accidental rather than artful.
The learning curve that followed included sketching templates, swapping thrifted frames, and discovering that a thoughtful layout and small adjustments make a gallery wall feel intentional without costing a fortune.
A small victory came when a neighbor stopped by and asked who arranged the wall, and I felt proud knowing the secret was simple planning and clever sourcing rather than an expensive budget.
The ‘Why’
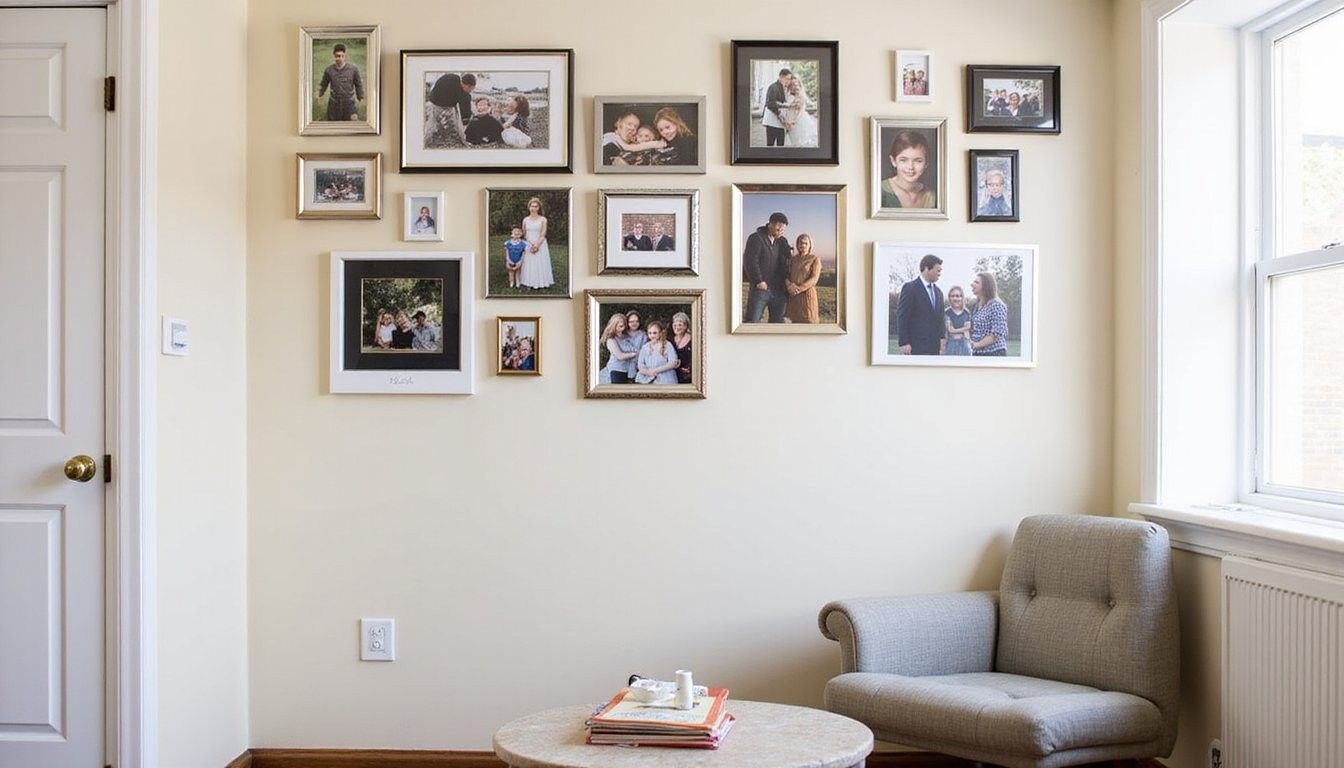
Personal warmth matters because walls are where memories and style meet, and a gallery arrangement can change a blank surface into a story without draining your wallet.
Practical impact comes from choosing a layout that balances scale, rhythm, and repetition so images feel curated and anchored, helping a room read as finished even when furniture or textiles are simple.
Introduction

Why this guide helps is that it stitches together layout tips, budget sourcing ideas, and common pitfalls into a friendly plan you can follow step by step to avoid guesswork and wasted time.
How to use the guidance is simple: read the layout ideas, use the template suggestions, pick the framing and print strategies that suit your budget, and apply the hanging and styling tips to finish the look with confidence.
Tools & Materials
- Frames in mixed sizes, thrifted finds, or budget-ready new frames.
- Prints and photos from home printing, online print services, or clipped images from secondhand books.
- Hanging hardware like picture hooks, command strips rated for your frame weights, a tape measure, and a level.
- Templates made from paper, kraft wrap, or newspaper to map the arrangement before putting holes in the wall.
- Optional props such as a thin strip of painter’s tape to mark centers and spacing guides for consistent gaps.
Layout Basics
Start with an anchor by choosing a single large piece or a bold frame to act as the visual center; this reduces decision fatigue and gives the eye a place to land so smaller pieces support rather than compete.
Mind the scale by measuring wall width and furniture below it, subtracting a margin on each side, and keeping the total arrangement width two thirds to three quarters of the furniture width so the wall looks balanced and intentional.
Arrangement Styles
Grid and symmetry deliver a crisp, modern look and are forgiving when frames are identical in size; use equal spacing and a level to keep rhythm and avoid optical tension that makes the eye jump around.
Salon-style and eclectic mixes celebrate varied frames and art, and you can plan these by sketching a central vertical axis or laying cut-paper templates on the floor to preview relationships between pieces.
| Style | Mood | Best for |
|---|---|---|
| Grid | Orderly and calm | Small prints, matching frames |
| Salon | Layered and cozy | Mixed sizes, family collections |
Budget Framing & Prints
Thrift and DIY frames can be cleaned up with spray paint or new mats to look custom, and swapping glass for acrylic reduces weight and cost while protecting prints effectively.
Affordable print options include at-home inkjet on heavier paper, economy online print services that run specials, and cutting images from secondhand books for a collaged feeling that is both artistic and frugal.
| Item | Typical Cost | Visual Impact |
|---|---|---|
| Thrift Frame (clean & paint) | $3 – $15 | High when unified |
| Online Print (8×10) | $0.50 – $5 | Medium to high |
| Custom Frame | $30 – $150+ | High |
Hanging & Spacing Tips
Spacing rules help unify an arrangement: aim for 1.5 to 3 inches between frames for a tight, gallery feel, and increase spacing for very large pieces so each artwork can breathe.
Centerline and eye level guide the entire composition by establishing a horizontal line roughly at eye height for the center of the display or by centering the arrangement on the furniture below rather than the ceiling line to create comfortable proportion.
Styling & Seasonal Refresh
Layered styling introduces small shelves, a leaning frame, or a decorative object within the arrangement to add depth and rotate pieces seasonally for a fresh look that doesn’t require new purchases every year.
Swap and rotate by keeping a small stash of alternate prints or postcards in a drawer so you can change the mood quickly for holidays or to highlight new photos without reworking the entire layout.
What to Avoid
Using inconsistent spacing makes the arrangement feel amateurish, so measure and plan spacing with tape templates or rulers before installing hooks.
Mixing heavy glass frames without secure anchors risks damage and will cost more in the long run if frames fall; choose proper hanging hardware or swap glass for lighter acrylic alternatives.
Cost vs Impact Comparison
Smart spending favors a few strategic purchases like a quality large frame or a professional print, while the rest can be thrifted or DIYed to deliver a finished look at a fraction of custom costs.
Comparison helps because seeing relative costs and visual returns lets you prioritize where to invest for the most dramatic upgrade to your space.
| Option | Estimated Cost | Visual Impact |
|---|---|---|
| Thrifted frames, painted | $10 – $40 total | High when unified |
| Online prints + economy frames | $20 – $80 total | Medium to high |
| Custom framing and fine art prints | $200+ | Very high |
Frequently Asked Questions
How high should a gallery wall be?
Rule of thumb is to center the arrangement near eye level, roughly 57 to 60 inches from the floor to the center of the group, or to center it on the piece of furniture beneath so the whole vignette reads as a single composition.
Can I mix frame styles?
Yes mixing frames works well when you use a unifying element like a single paint color or consistent mat widths to make different frames read as a coordinated collection rather than a random assortment.
What spacing should I use?
Small clusters benefit from tighter spacing around 1.5 to 2.5 inches while large pieces should have more breathing room, and measuring templates helps keep spacing consistent across the display.
Are command strips okay for frames?
Lightweight frames can be safely mounted with rated command strips, but for heavier vintage frames or glass-covered pieces you should use wall anchors and picture hooks appropriate to the weight.
How do I change a gallery without rehanging everything?
Rotate by swapping prints inside frames or leaning a framed piece on a shelf within the arrangement so the impact changes without moving nails or anchors.