
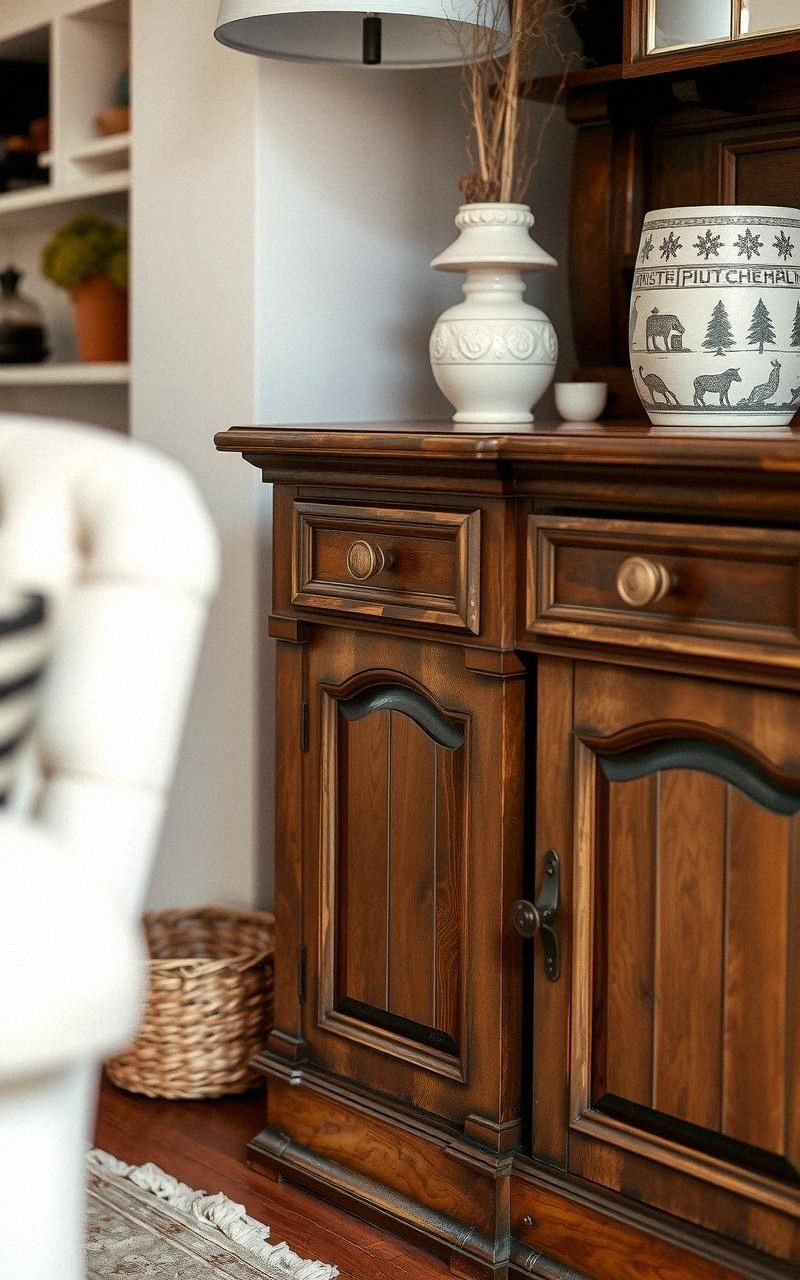
Antique furniture restyling is a wonderful way to breathe new life into cherished pieces while preserving their timeless charm. Whether it’s a vintage dresser, an ornate chair, or a classic cabinet, restyling antique furniture allows you to blend history with your personal style.
From subtle paint techniques to bold upholstery changes, these antique furniture restyling inspirations offer fresh ideas to transform your old treasures into standout pieces. I once revived a weathered side table with just a splash of color and some new hardware, and the transformation was truly rewarding.
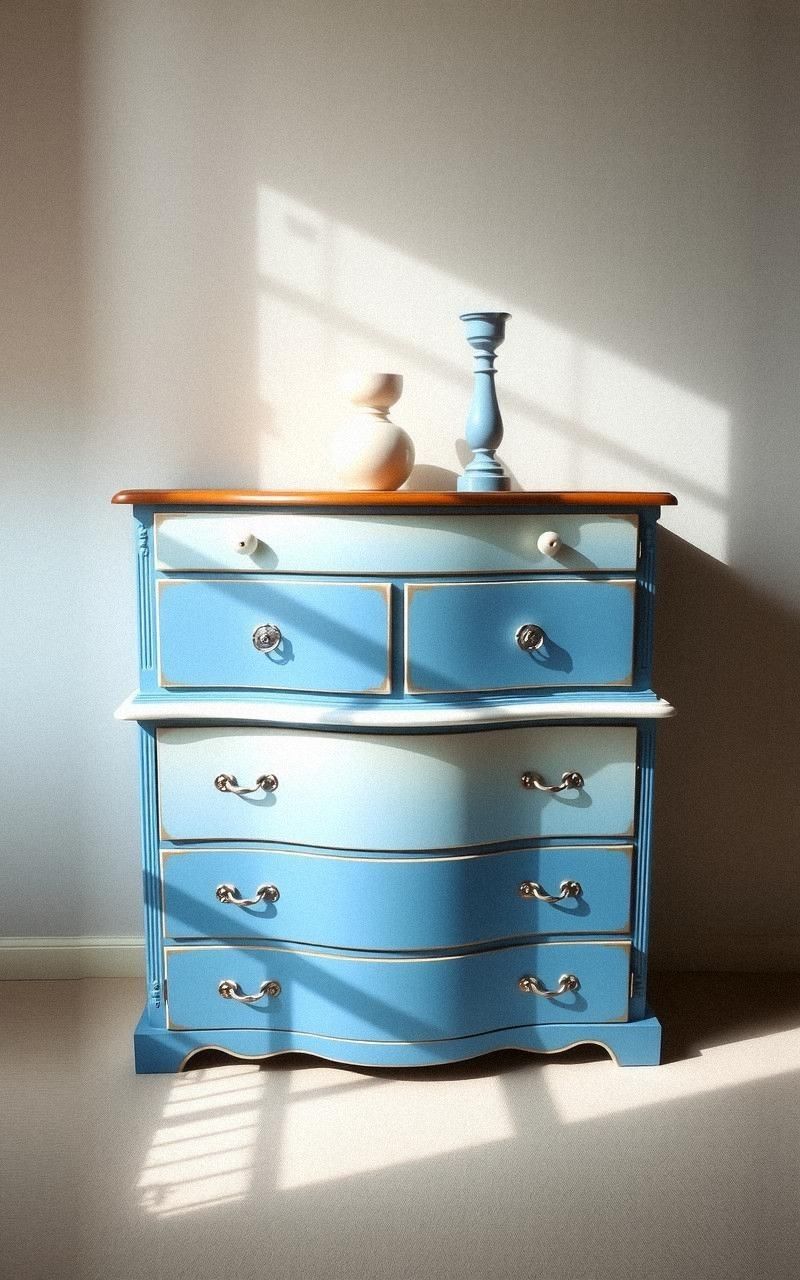
Chalk Paint Makeover for a Matte Vintage Finish
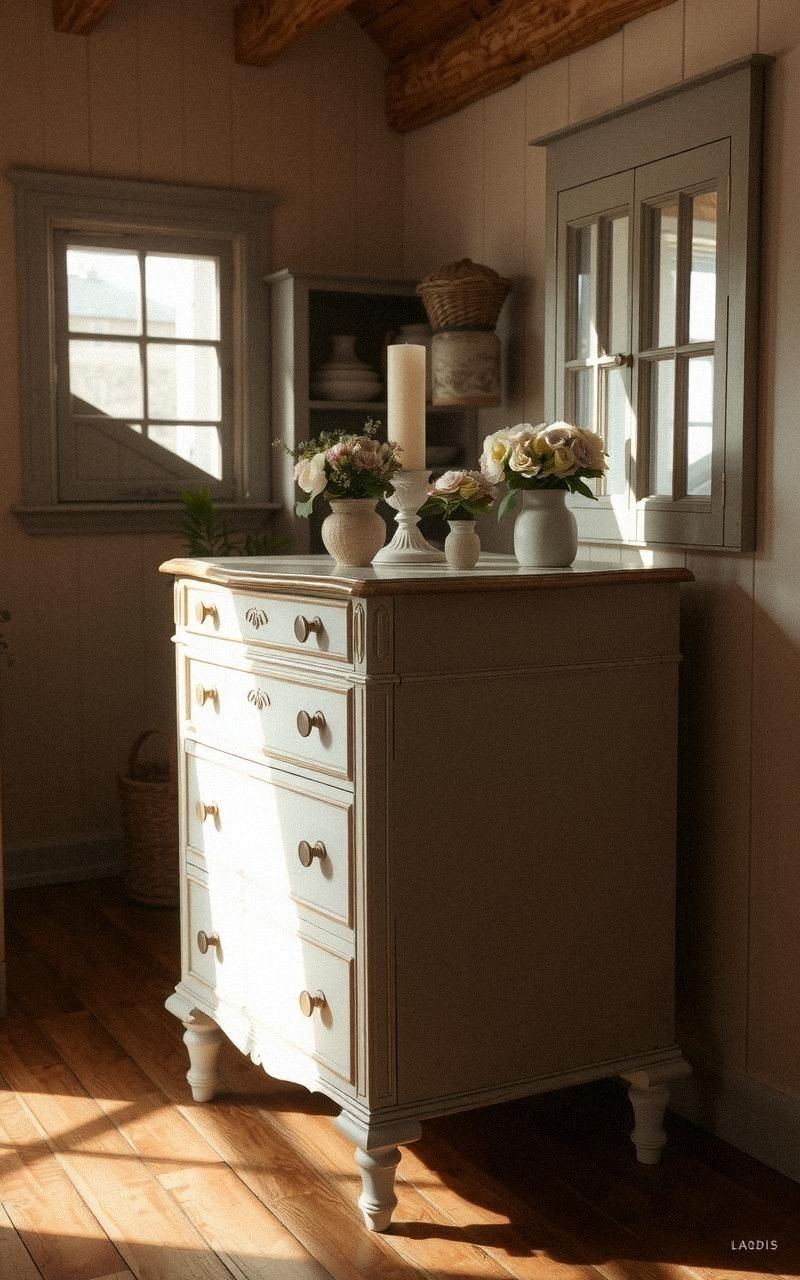
Chalk paint is perfect for giving antique furniture a soft, matte finish that highlights its vintage character. This technique requires minimal prep, making it accessible for beginners.
You can choose muted pastel shades or bold colors to complement your décor. After painting, a light sanding on edges enhances the aged look, while a wax or matte sealer protects the finish.
This restyling breathes new life into tired surfaces without hiding the beauty of the original woodwork.
Steps:
- Clean the furniture thoroughly to remove dirt and grease.
- Apply a base coat of chalk paint evenly over the surface.
- Let the paint dry completely before applying a second coat.
- Lightly sand edges and raised details to create a distressed look.
- Seal the piece with wax or matte varnish for protection.
Reupholstering Chairs with Bold Patterns
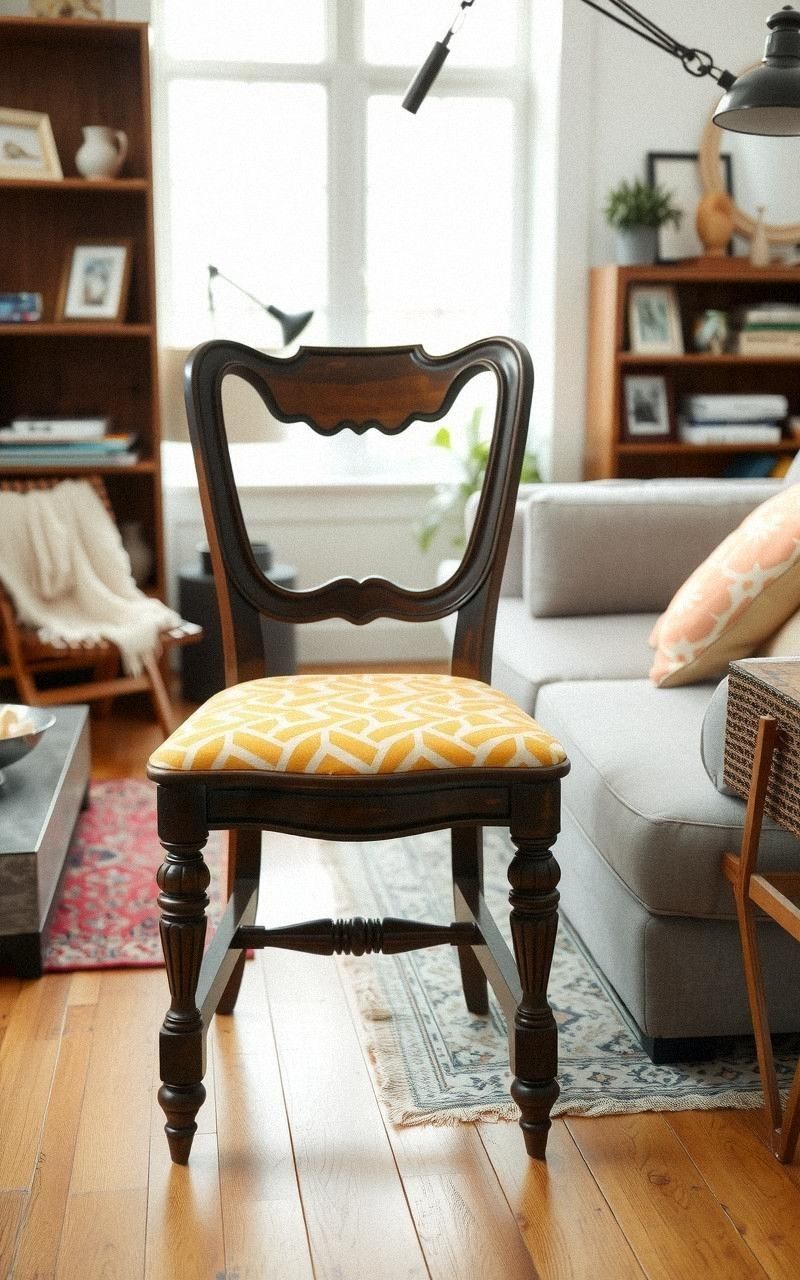
Changing the upholstery on antique chairs can dramatically update their appearance. Opt for bold, modern patterns or vibrant colors to contrast with the aged wood frame.
This approach revitalizes the piece while maintaining its structural integrity. Selecting durable fabric and padding ensures comfort and longevity.
Reupholstering allows you to customize your furniture to your taste and room theme, turning a classic chair into a true statement piece.
Steps:
- Remove the old fabric carefully using pliers and a staple remover.
- Inspect and replace any damaged padding or springs.
- Cut new fabric pieces based on the original upholstery dimensions.
- Attach the new fabric securely with a staple gun.
- Trim excess fabric and tidy edges for a polished look.
Distressed Paint for Rustic Charm
Applying a distressed paint technique creates a rustic, well-loved appearance on antique furniture. This method involves layering paint colors and then sanding or scraping parts of the surface to reveal the base paint or wood beneath.
It adds texture and character, evoking an aged, farmhouse vibe. Distressing works beautifully on pieces with detailed carvings or moldings, enhancing their vintage appeal without masking original craftsmanship.
Steps:
- Choose two contrasting paint colors: a base and a top coat.
- Paint the entire piece with the base color and let dry.
- Apply the top coat evenly over the base color.
- Once dry, gently sand areas where natural wear would occur.
- Finish with a clear protective wax or matte varnish.
Adding Gold Leaf Accents for Elegant Detailing
Gold leafing antique furniture adds a touch of elegance and grandeur. This technique highlights moldings, carvings, or edges with delicate gold foil, enhancing the piece’s intricate details.
It pairs beautifully with dark or muted paint colors, creating a luxurious contrast. Gold leaf application requires patience and precision but results in a stunning finish that elevates the furniture’s aesthetic while respecting its antique roots.
Steps:
- Clean and prepare the surface to be gilded.
- Apply adhesive size to the areas for gold leaf.
- Wait until the adhesive is tacky but not dry.
- Carefully lay gold leaf sheets onto adhesive.
- Gently press and smooth the leaf; remove excess with a soft brush.
- Seal with a clear protective coat to preserve the leaf.
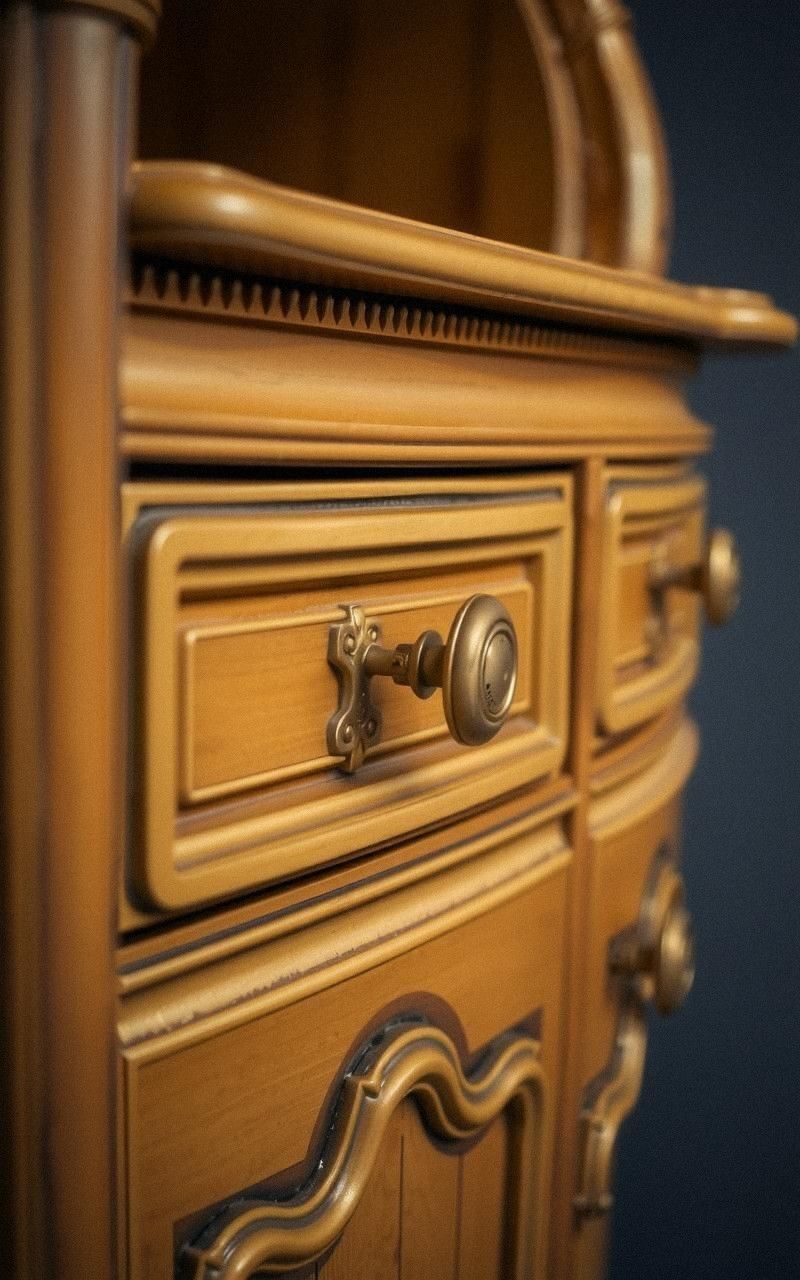
Modern Hardware Swap to Refresh Antique Pieces
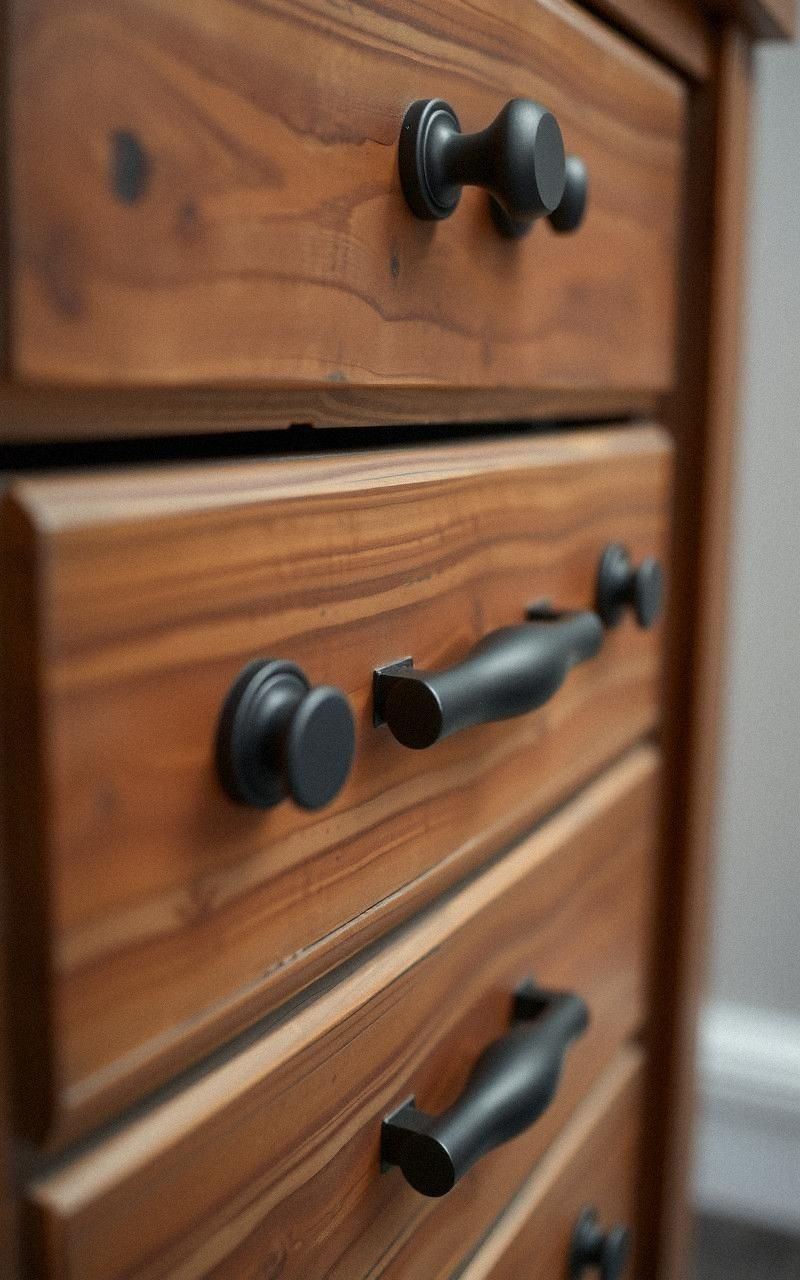
Replacing old hardware like knobs, handles, and hinges with modern alternatives instantly updates antique furniture. Sleek metal finishes such as matte black, brushed brass, or polished chrome add a contemporary flair while complementing vintage designs.
This simple change can redefine the piece’s style without major alterations. Mixing old and new elements creates an eclectic look that feels both timeless and fresh.
Steps:
- Remove existing hardware carefully to avoid damage.
- Choose new hardware that suits your design vision.
- Align new hardware with existing holes or fill and drill new ones as needed.
- Attach new hardware securely using appropriate screws.
- Test for functionality and make adjustments if necessary.
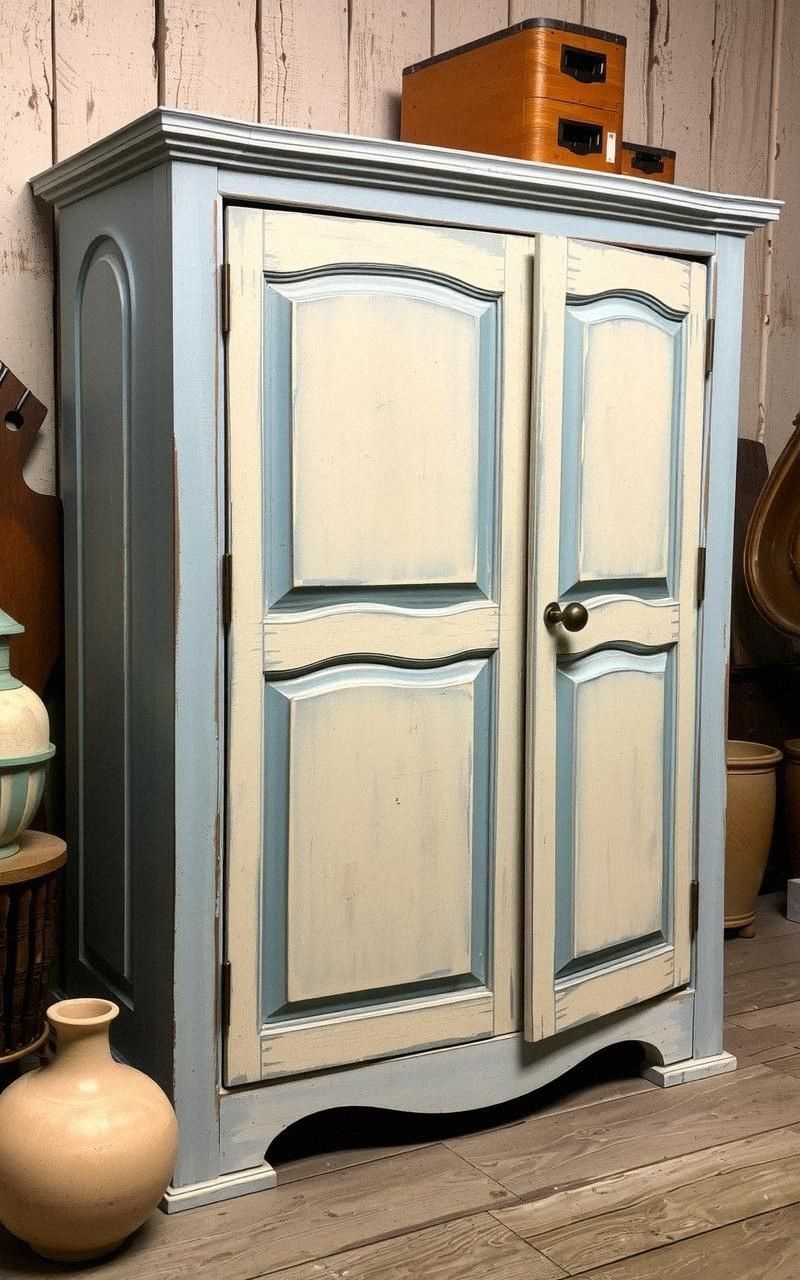
Two-Tone Painting for Visual Contrast
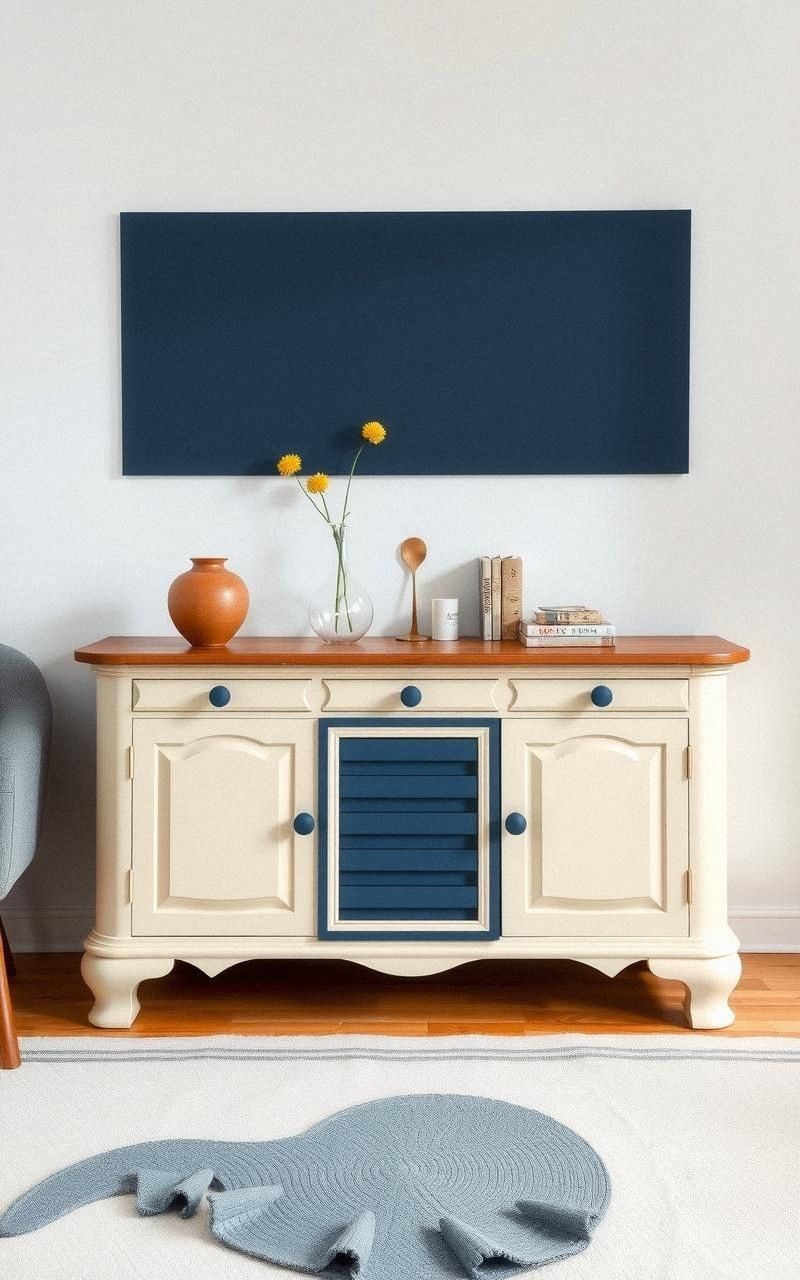
Two-tone painting on antique furniture creates eye-catching contrast that highlights the piece’s architectural features. Using complementary or contrasting colors on different sections—such as body versus drawers or legs versus top—adds depth and personality.
This technique emphasizes craftsmanship and can adapt an antique piece to suit contemporary interiors. It’s a creative way to showcase both color and form.
Steps:
- Clean and sand the furniture surface lightly.
- Choose two colors that work well together.
- Paint the first color on designated areas and let dry.
- Mask off the painted sections, then apply the second color.
- Remove masking tape carefully and touch up edges.
- Apply a protective finish to seal the paint.
Decoupage Art for Personalized Design
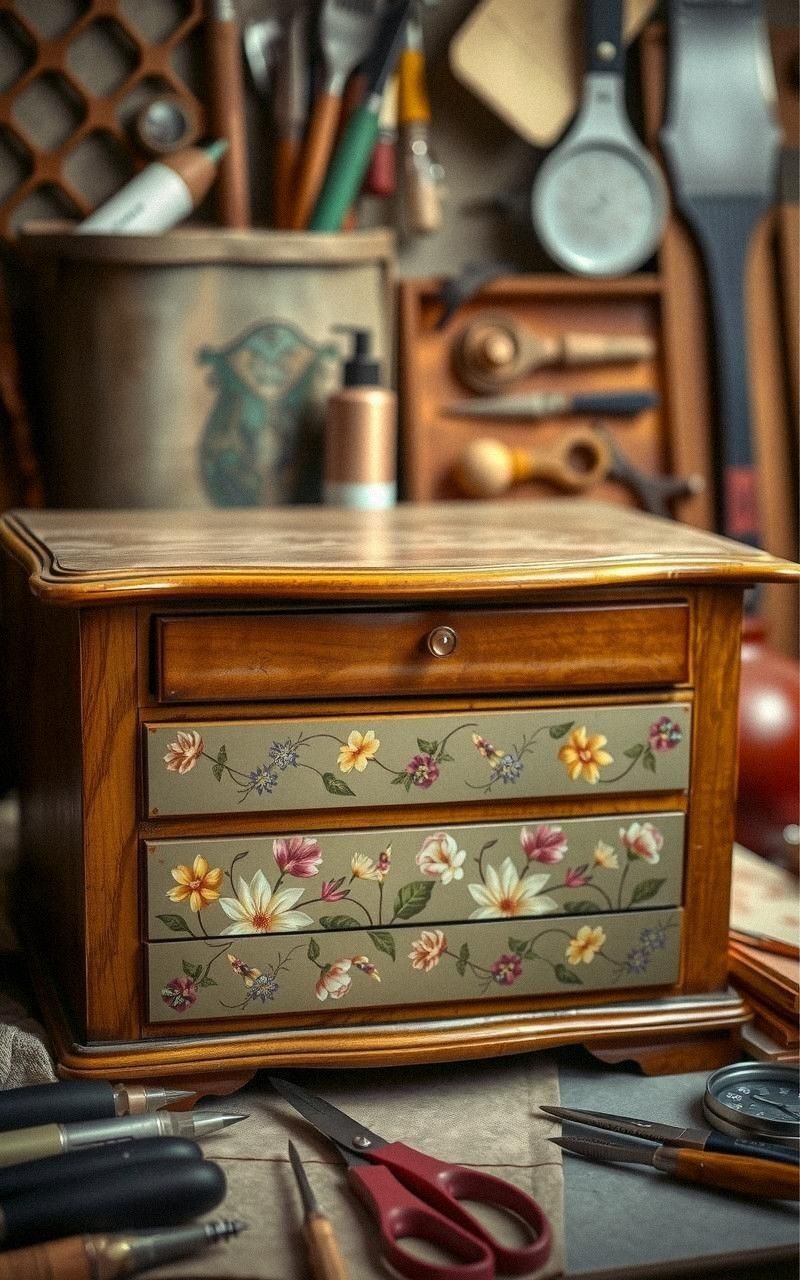
Decoupage involves adhering decorative paper or fabric to furniture surfaces, creating customized patterns or imagery. This restyling technique transforms plain antique pieces into unique art objects.
Choose vintage maps, florals, or graphic prints to reflect your personality. Once applied, seal the surface with varnish for durability.
Decoupage adds a playful, creative touch while preserving the furniture’s original structure.
Steps:
- Clean and lightly sand the furniture surface.
- Cut decorative paper or fabric to desired shapes and sizes.
- Apply decoupage glue evenly on the surface.
- Place the cutouts carefully and smooth out air bubbles.
- Once dry, apply several layers of varnish to seal.
- Let the varnish cure completely before use.
Restoring Wood with Natural Oils and Waxes
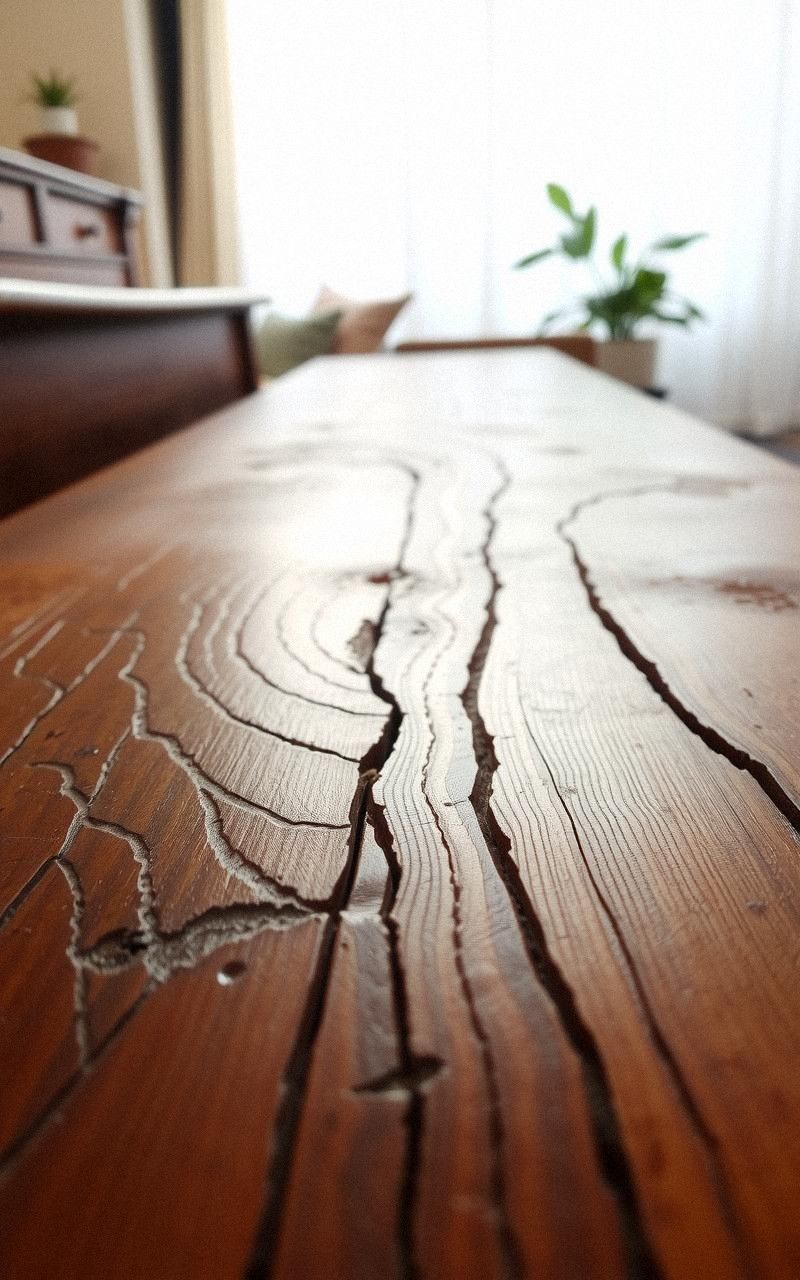
Sometimes the best way to restyle antique furniture is by enhancing its natural beauty. Using natural oils and waxes nourishes the wood, restoring its rich tones and adding a subtle sheen.
This gentle approach preserves original finishes and gives the piece a warm, inviting look. It’s ideal for furniture with beautiful wood grain or intricate carvings that you want to showcase without paint or heavy treatments.
Steps:
- Clean the wood surface with a mild soap solution and let dry.
- Lightly sand to remove any rough patches or old finish remnants.
- Apply natural oil evenly using a soft cloth.
- Allow the oil to soak in, then wipe off excess.
- After drying, buff the surface with wax for protection and shine.
- Repeat waxing periodically to maintain the finish.
Using Stencils for Decorative Patterns
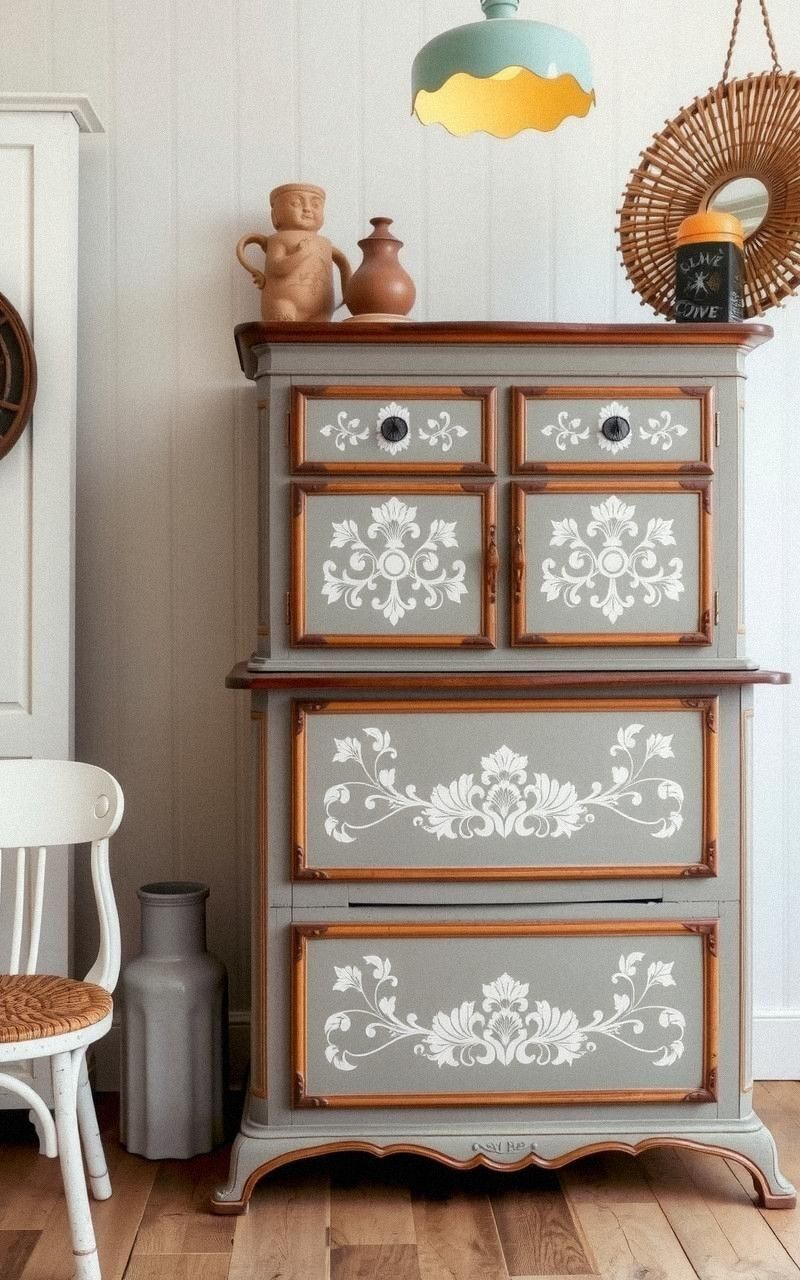
Stenciling adds decorative patterns to antique furniture, offering a personalized touch without overwhelming the original design. Choose motifs that complement the era or style of the piece, such as floral, geometric, or vintage-inspired patterns.
Stencils can be applied to tabletops, drawer fronts, or sides, creating subtle or bold accents. This technique pairs well with painted or stained finishes and allows for creative experimentation.
Steps:
- Prepare the furniture surface by cleaning and painting if desired.
- Position the stencil securely on the area to be decorated.
- Use a stencil brush or sponge to apply paint lightly over the stencil.
- Remove the stencil carefully before the paint dries.
- Repeat the pattern as needed across the desired surfaces.
- Seal with a clear coat to protect the design.
Mixing Metal and Wood for Industrial Style
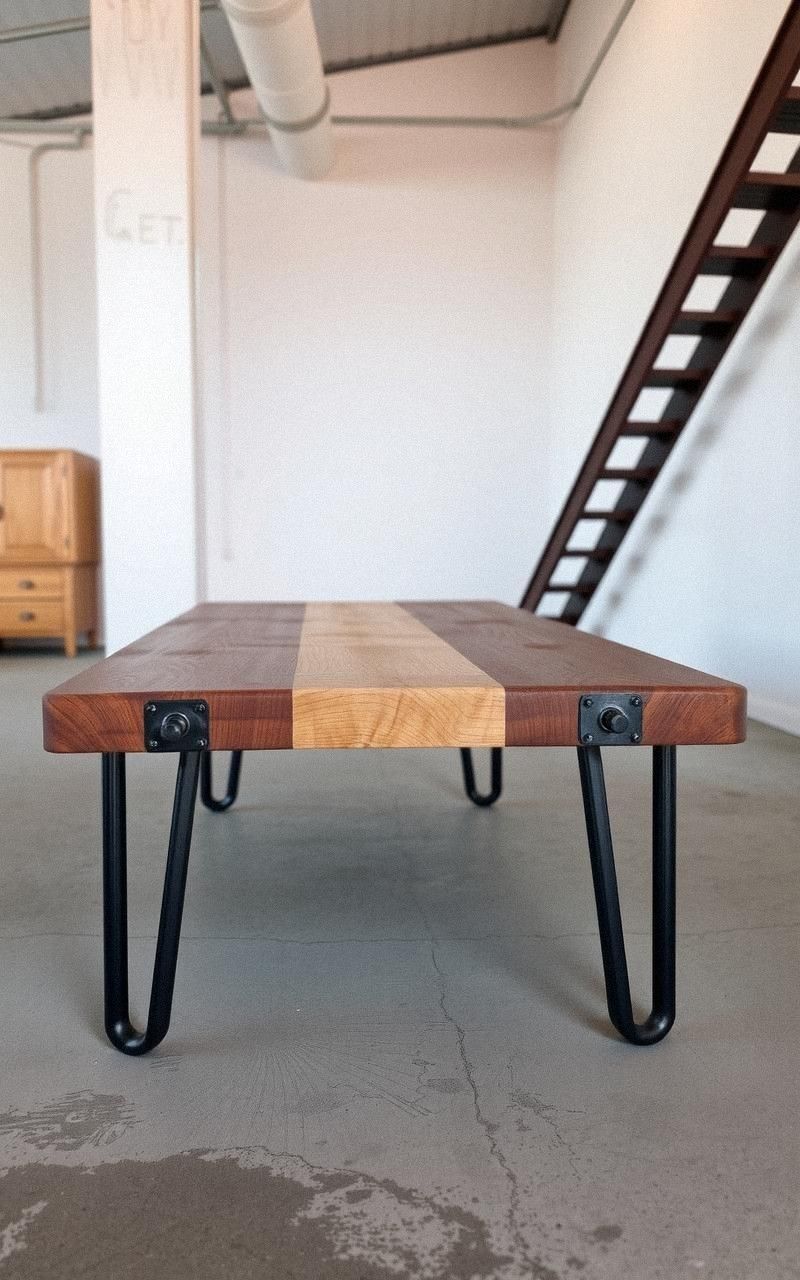
Combining metal elements with antique wooden furniture creates an industrial-inspired restyling. Adding metal legs, brackets, or accents contrasts with the warm wood and gives the piece a modern edge.
This style suits urban lofts or eclectic interiors, balancing raw textures and aged materials. It’s a way to update heavy or bulky furniture, making it lighter and visually dynamic while keeping antique charm intact.
Steps:
- Identify areas where metal can be added or replaced (legs, handles, accents).
- Source metal components that fit the style and dimensions.
- Remove or modify existing parts as needed.
- Attach metal elements securely using screws or brackets.
- Clean and finish metal surfaces to prevent rust.
- Optionally, refinish wood to complement metal tones.
Refinishing with Glossy Lacquer for Modern Shine
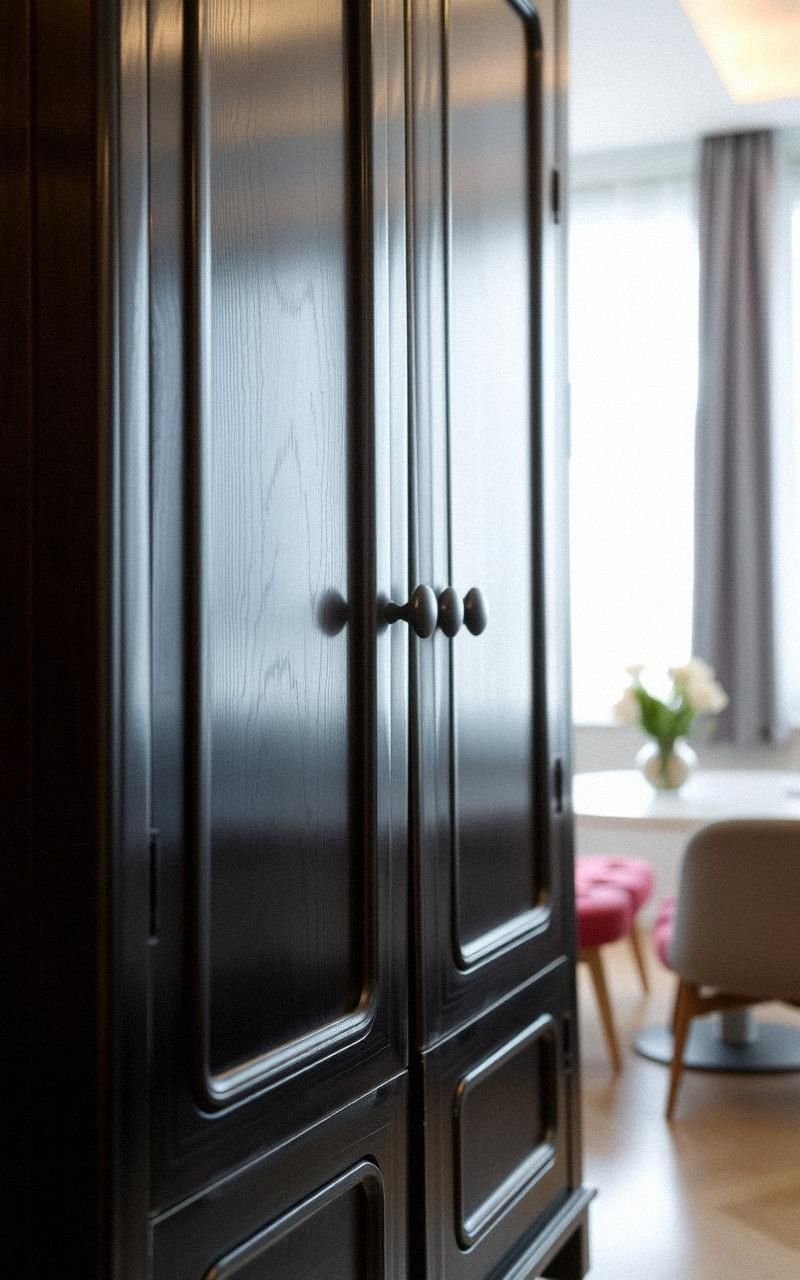
Applying a high-gloss lacquer finish transforms antique furniture with a sleek, modern vibe. This technique highlights curves and details while protecting the wood.
Glossy finishes reflect light, making pieces stand out as focal points. Refinishing requires careful sanding and application for a smooth, even surface.
It’s ideal for updating furniture with clean lines or mid-century designs, bridging old and new aesthetics.
Steps:
- Strip old finishes using a chemical stripper or sanding.
- Sand the surface smooth, removing imperfections.
- Apply multiple thin coats of glossy lacquer with a brush or spray.
- Allow each coat to dry and sand lightly between coats.
- Finish with a final polish for a mirror-like shine.
Adding Mirrored Panels for Glamorous Effect
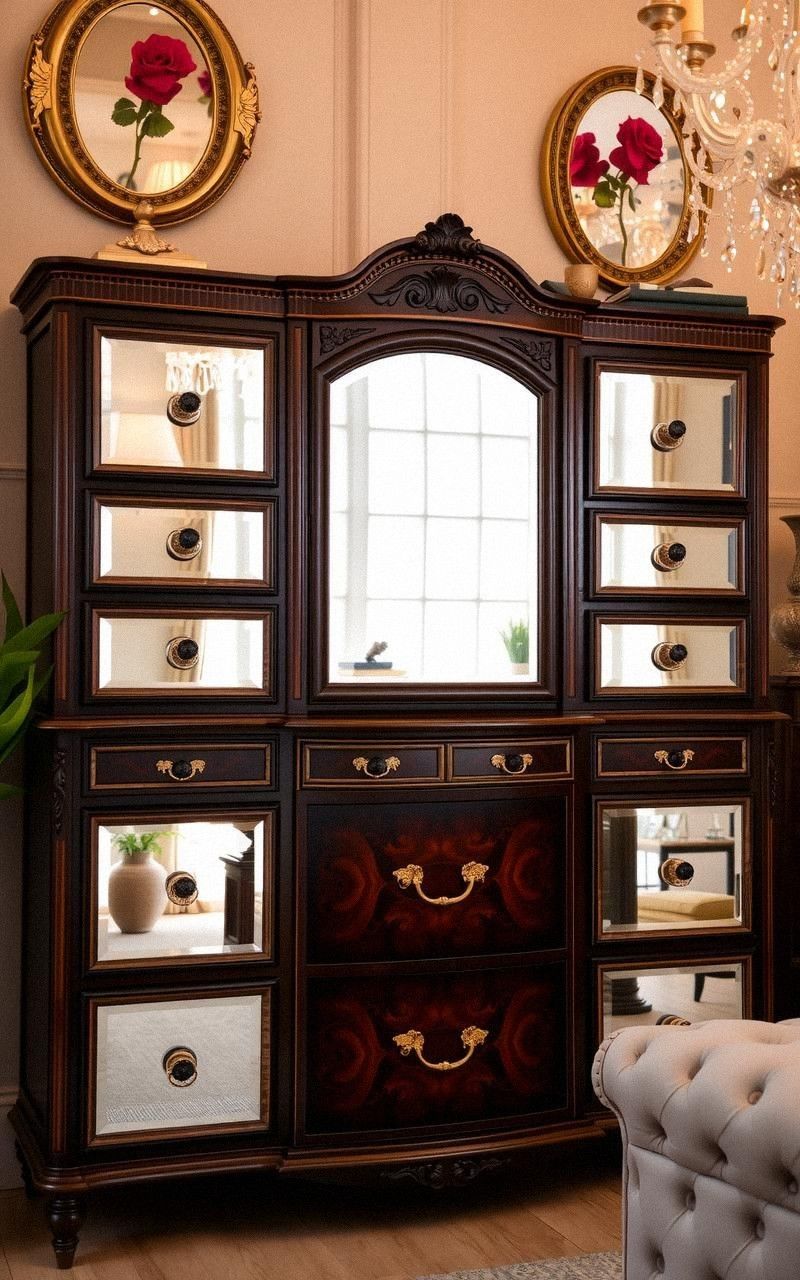
Incorporating mirrored panels into antique furniture adds glamour and light to any room. Replace parts of cabinet doors or drawer fronts with cut mirrors to create reflective surfaces.
This technique enhances the piece’s presence and blends vintage elegance with contemporary flair. Mirrored accents also make small spaces feel larger and brighter.
Careful installation ensures the antique structure remains stable and visually balanced.
Steps:
- Measure and cut mirror panels to fit door or drawer sections.
- Remove existing panels or open spaces for mirror installation.
- Attach mirrors securely using adhesive or framing.
- Seal edges to prevent damage or moisture ingress.
- Clean mirrors regularly to maintain sparkle.
Creating Ombre Paint Effects for Color Gradation
Ombre painting on antique furniture adds a trendy gradient effect that brings depth and softness to the piece. This style blends one color fading into another, often from light to dark shades.
Ombre works well on large surfaces like dressers or sideboards, giving a fresh, artistic look. The gradual transition highlights curves and edges, making the furniture a captivating centerpiece without masking its form.
Steps:
- Choose two or three harmonious paint colors.
- Apply the lightest color as a base coat.
- Blend the next color into the first while wet for smooth transition.
- Continue layering colors downward or upward for gradient effect.
- Allow paint to dry completely and apply a protective finish.
Incorporating Fabric Panels for Textural Contrast
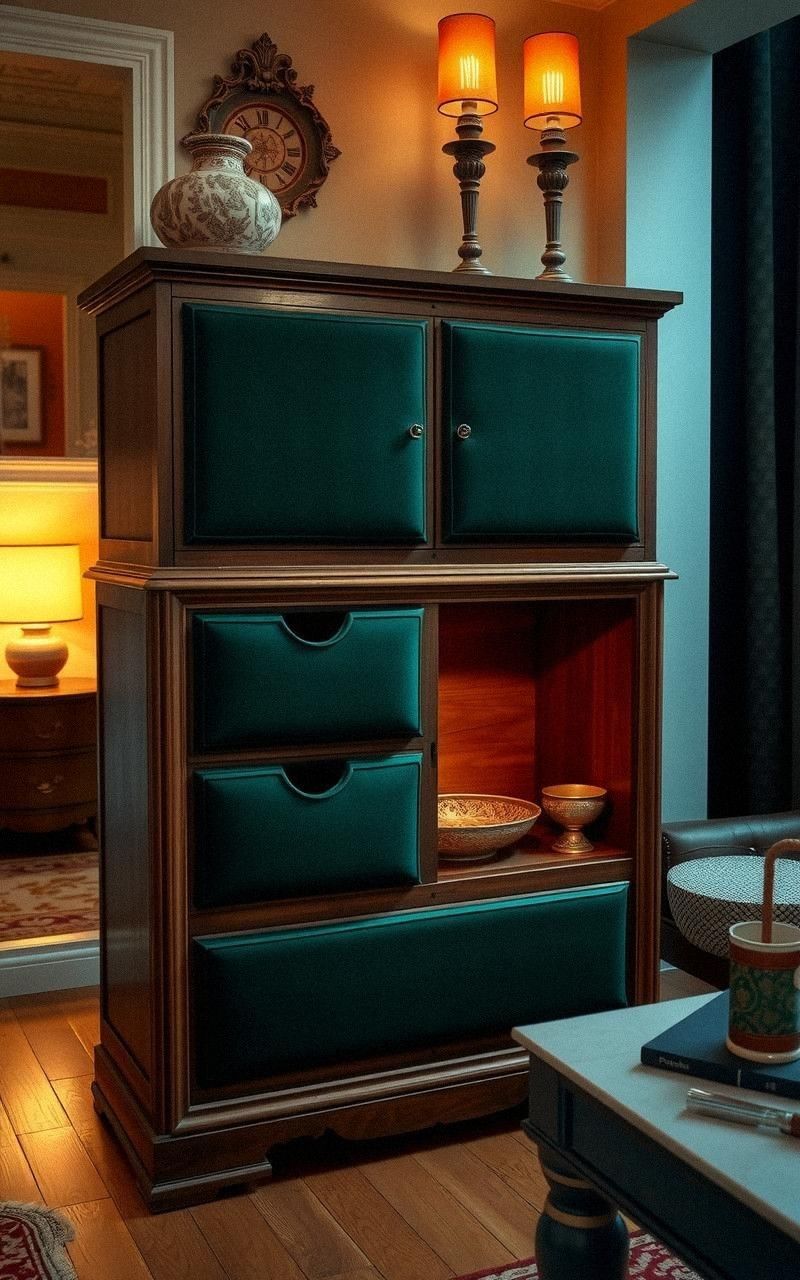
Replacing or adding fabric panels to furniture such as cabinet doors or drawer fronts introduces softness and texture. Choose luxurious fabrics like velvet, linen, or tapestry to complement wood tones.
This technique adds visual interest and can be tailored with patterns or solid colors. Fabric panels soften the look of heavier antiques and provide a tactile dimension, blending comfort with vintage style.
Steps:
- Remove existing panels or prepare flat surfaces for fabric application.
- Cut fabric pieces slightly larger than panel dimensions.
- Attach fabric using staple gun or strong adhesive on backing boards.
- Secure panels back onto furniture with fabric facing outward.
- Optionally, add trim or nailhead details for finished edges.
Painting Geometric Shapes for Contemporary Flair
Adding geometric shapes painted onto antique furniture creates a fresh, modern contrast. Triangles, squares, or abstract lines painted in bold or muted tones give old pieces a graphic update.
This approach works well on flat surfaces like table tops or drawer fronts. Geometric painting adds energy and personality, making antique furniture feel current and artistic without losing its original charm.
Steps:
- Clean and paint the furniture base color and let dry.
- Use painter’s tape to outline geometric shapes.
- Fill shapes with chosen accent colors.
- Remove tape carefully and touch up edges.
- Seal with a protective topcoat for durability.
Distressing with Sandpaper for Natural Aging
Sandpaper distressing is a simple way to create natural wear marks on antique furniture. By sanding areas that would naturally experience use, such as edges, corners, and handles, you enhance the piece’s vintage feel.
This technique works alone or after painting, giving a realistic, lived-in look without artificial effects. It’s an easy, hands-on method suitable for all skill levels to refresh furniture personality.
Steps:
- Choose areas prone to wear like edges and corners.
- Use medium to fine grit sandpaper to gently rub these spots.
- Sand gradually to avoid over-distressing.
- Wipe off dust and assess the effect.
- Optionally, apply a clear wax or finish to protect sanded areas.
Combining Paint and Stain for Layered Look
Layering paint and wood stain on antique furniture creates a rich, dimensional finish. Apply a wood stain to enhance grain and depth, then paint over sections with translucent or solid colors.
Light sanding reveals stained wood beneath the paint, adding texture and interest. This mixed media approach highlights craftsmanship and allows creative expression, blending old and new techniques seamlessly.
Steps:
- Clean and sand the furniture surface.
- Apply wood stain and let dry completely.
- Paint desired areas with chosen paint color.
- Sand painted parts lightly to reveal stained wood.
- Seal entire piece with clear protective finish.
Using Wallpaper Inserts for Decorative Touch
Inserting wallpaper into recessed panels or drawer fronts updates antique furniture with pattern and color. Choose vintage-inspired or modern wallpaper that complements the piece’s style.
This technique is reversible and adds a unique flair without permanent alteration. It’s a creative way to bring texture and design variety, especially on flat surfaces or inset sections, making your furniture a conversation starter.
Steps:
- Remove panels or open drawer fronts.
- Cut wallpaper pieces to fit panel dimensions.
- Apply wallpaper adhesive or double-sided tape to panel backs.
- Attach wallpaper carefully and smooth out bubbles.
- Reinstall panels or drawer fronts on the furniture.
Refinishing with Milk Paint for Antique Authenticity
Milk paint offers an authentic, matte finish often seen on antiques. It’s natural, eco-friendly, and creates a slightly uneven texture that enhances vintage charm.
Milk paint chips and cracks over time, giving a beautiful aged effect. It’s excellent for restoring older pieces while preserving their character.
Using milk paint can make your furniture look like a true heirloom with a story to tell.
Steps:
- Clean and lightly sand the furniture surface.
- Mix milk paint according to manufacturer instructions.
- Apply the paint evenly with a brush.
- Allow to dry and apply a second coat if needed.
- Seal with natural oil or wax for protection.
Inlaying Decorative Tiles for Artistic Flair
Adding decorative tiles to antique furniture surfaces like tabletops or drawer fronts creates artistic focal points. Choose ceramic, mosaic, or encaustic tiles that match your style.
Tiles add color, texture, and durability. This technique combines craftsmanship and creativity, turning furniture into functional art.
Proper sealing and grout work ensure the tiles last and integrate smoothly with the piece.
Steps:
- Remove or prepare the surface area for tile placement.
- Arrange tiles to design desired pattern.
- Apply tile adhesive and set tiles firmly.
- Grout between tiles and clean excess grout.
- Seal tiles and grout to protect against wear.
Using Metallic Paints for Subtle Shine
Metallic paints add a subtle shimmer to antique furniture, enhancing details without overpowering the original look. Bronze, silver, or gold metallics can be brushed onto carvings, edges, or flat surfaces for a delicate glow.
This restyling method brings a hint of glamour and sophistication, perfect for accent pieces that need a little sparkle while maintaining vintage elegance.
Steps:
- Clean and prep the furniture surface.
- Apply base paint if desired and let dry.
- Use a small brush to apply metallic paint on details or surfaces.
- Layer coats for desired intensity, allowing drying time.
- Seal with a clear finish to protect the metallic paint.