
I fell into a weekend habit of shaping small dishes from air dry clay, and it quickly became a quiet corner of my life. Playing with textures and finishes while listening to music felt like tiny meditations, and the results—a handful of uneven, lovable trays—started living on my dresser.
Making Air Dry Clay Jewelry Dish Crafts has a way of turning small moments into miniature rituals.
Sometimes a pressed leaf or a dusting of mica transforms a lump of clay into something that makes reaching for a ring feel gentler and a bit more joyful.
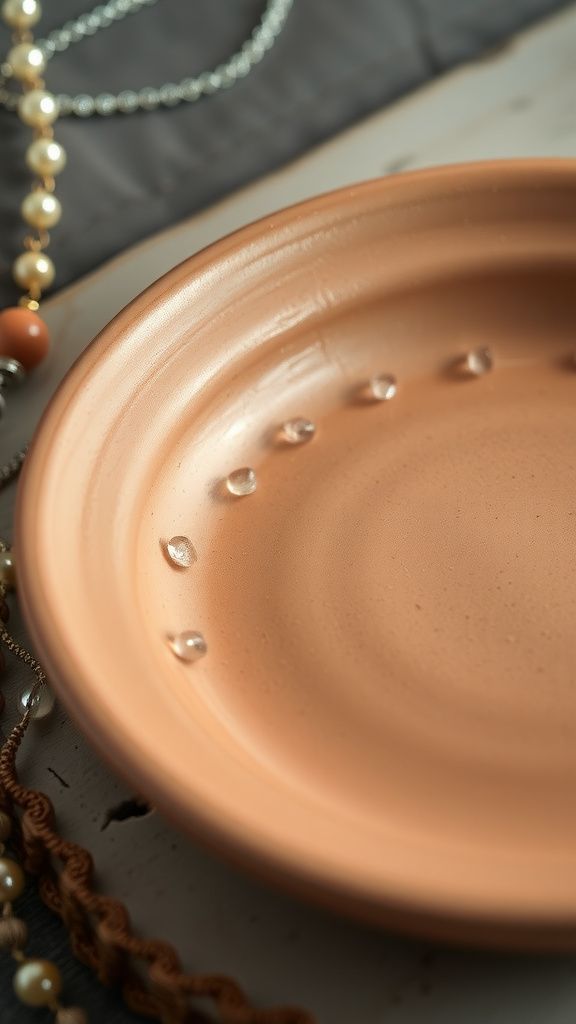
Pressed wildflower ring dish with soft pastel glaze
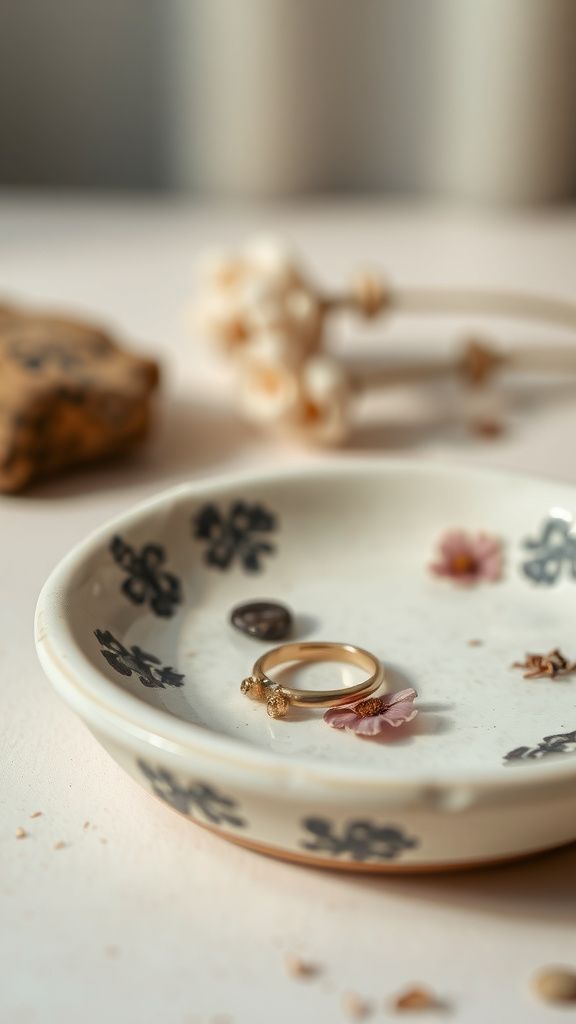
I kept a packet of dried wildflowers on my desk and one rainy afternoon they met a slab of clay. The surface picked up faint petal veins and tiny stems, leaving an organic scatter that felt almost accidental.
A pale wash of pastel settled into the imprints, softening edges and adding a whisper of color. The dish sat cool and slightly grainy beneath my fingertips, catching light in the shallow hollows.
It became a small, delicate place for a ring, full of the quiet memory of that rainy day.
Steps
- Knead a small ball of air dry clay until it is pliable and smooth.
- Flatten the clay to an even thickness with a rolling tool and lay a dried wildflower gently on top.
- Press the flower lightly into the clay surface to leave an imprint, then remove the plant material carefully.
- Smooth the rim with a damp fingertip and shape the dish into a shallow bowl form.
- Allow the piece to dry fully before applying a thin pastel wash and sealing with a matte varnish.
Marbled swirl jewelry tray with cool stone feel
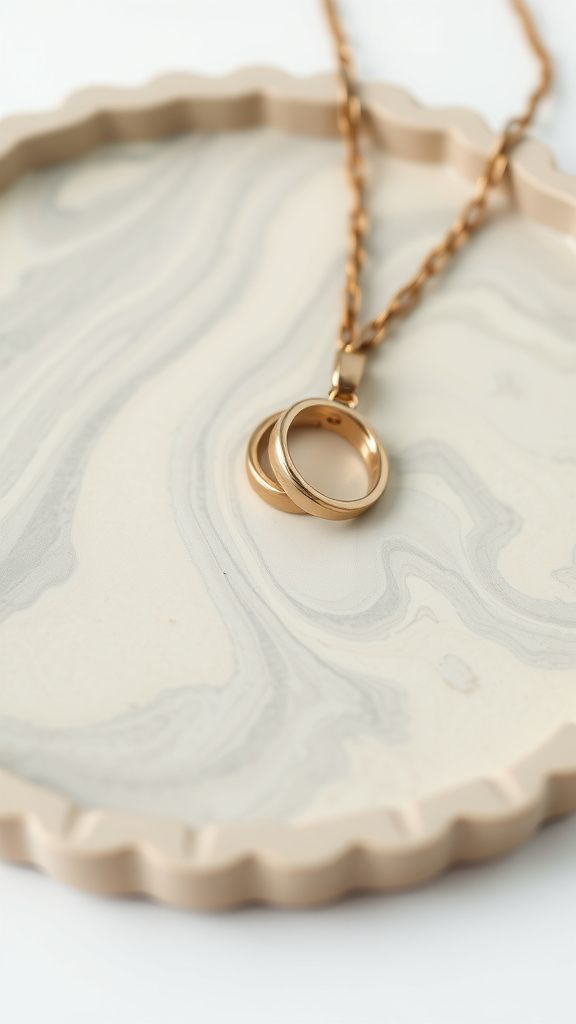
There was something soothing about twisting two colors of clay until they settled into a marbled flow. The surface looked like veined stone, with soft ribbons of color curling around the center.
When the tray dried, it had a cool, slightly chalky touch that contrasted with the visual suggestion of polished marble. Tiny air pockets gave a subtle texture under the fingertips.
The piece sat on my bedside table and slowly picked up the soft scuffs of daily life, which only added to its quiet character.
Steps
- Select two or three clay colors and roll small ropes of each shade.
- Twist the ropes together lightly to form a marbled pattern without overmixing.
- Flatten the marbled clay into a slab and shape it into a shallow tray with gently raised edges.
- Smooth the rim and surface with a damp sponge before letting the tray air dry completely.
- Lightly sand any rough spots and apply a protective finish for a stone-like sheen.
Tiny crescent moon dish for delicate necklaces
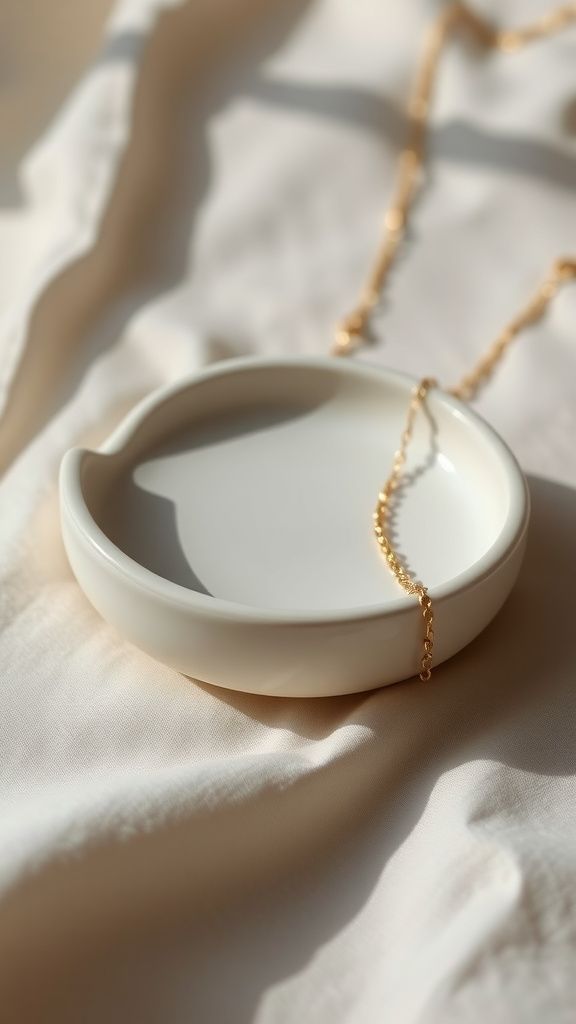
Shaping a small crescent felt like making a miniature arc of evening sky. The hollow caught light in a way that made tiny chains gleam, and the clay surface held faint fingerprints that felt comforting rather than imperfect.
I liked the subtle shadow the crescent cast at certain hours, a little reminder of the slow change of light through the day. A dusting of pearlescent pigment gave a soft glow at the curve, evoking moonlight without shine that felt showy.
Steps
- Form a small coil of clay and flatten it into a crescent silhouette.
- Gently cup the crescent into a shallow curve to create a dish profile.
- Smooth the edges with a slightly damp fingertip and refine the curve.
- Let the piece dry thoroughly, then add a light wash of pearlescent paint along the inner curve.
- Seal with a clear matte varnish to preserve the soft glow.
Textured leaf bowl that caught my eye
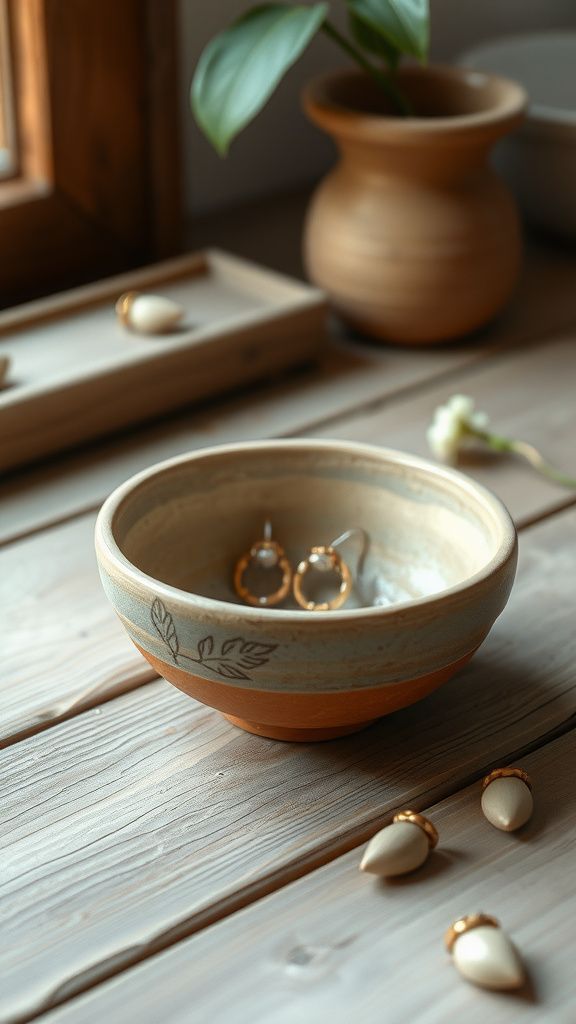
I remember pressing a fresh leaf into clay and being surprised by how clearly the veining translated into the bowl’s surface. The tiny ridges and valleys created a landscape to run fingertips over, and the clay felt cool against my skin.
A light wash darkened the grooves and made the pattern read like weathered copper. The bowl held small treasures and also a small sense of place, like a walk through damp foliage folded into a little domestic object that fit comfortably in a palm.
Steps
- Roll out a circular slab of clay to a uniform thickness.
- Lay a clean leaf onto the slab and press gently to transfer the vein pattern.
- Remove the leaf and lift the slab onto a rounded mold to form a bowl shape.
- Refine the rim and allow the bowl to dry completely before applying a patina-like wash.
- Seal the finished surface with a clear protective coat for durability.
Geode edge dish with glittering mica veins
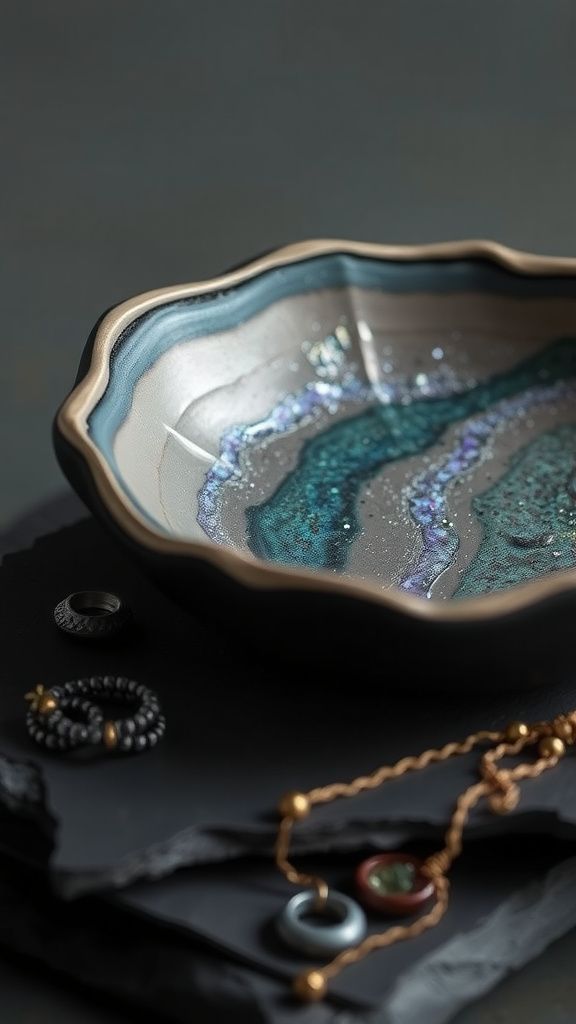
There was a playful moment when a raw slab of clay met powdered mica and a sharp tool to suggest a geode opening. The inner edge caught light in tiny flashes and the roughness surrounding the glittering veins felt tactile and slightly surprising.
Handling the dish revealed contrast between the matte body and the luminous inner rim. It sat on a vanity and reflected morning light into tiny glints, making ordinary moments feel a little more whimsical and lending a small drama to keys and rings.
Steps
- Shape a shallow oval dish from air dry clay, leaving one section with a thicker edge.
- Carve a shallow channel along the thicker edge to mimic a geode cavity.
- Mix mica powder with a clear medium and fill the carved channel with the mixture.
- Allow the piece to dry fully, then clean up any excess and enhance the sparkle with another thin layer.
- Seal the entire dish while preserving the matte exterior and shimmering interior.
Minimalist oval tray with brushed metallic rim
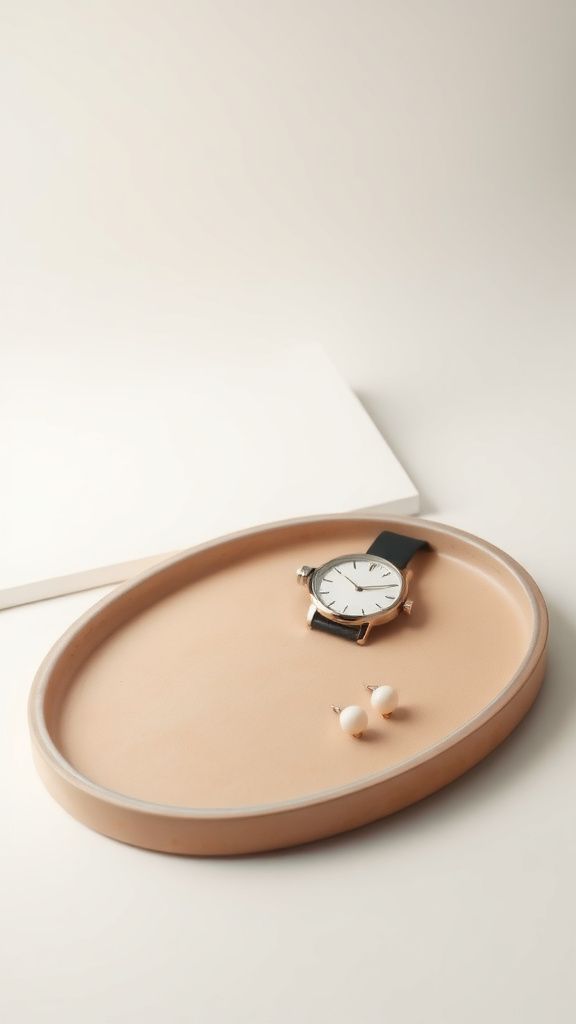
Simplicity felt intentional when a clean oval took shape and a thin band of metallic pigment traced its rim. The tray remained quiet in shape and voice, but the metallic edge added a small punctuation that caught attention without shouting.
The clay kept a fine-grained, satiny feel, and the rim’s hint of sheen played with the light as objects moved across the surface. It became the go-to spot for a watch and a few earrings, a modest accent on a nightstand that felt thoughtfully composed.
Steps
- Flatten a slab of clay into an oval and gently lift the edges to form a low tray.
- Smooth the rim thoroughly with a damp tool to create a refined edge.
- Once dry, apply a thin line of metallic paint or leaf along the rim for a brushed effect.
- Allow the metallic detail to cure, then add a protective finish to unify the surface.
- Buff the metallic rim lightly for a soft sheen if desired.
Terrazzo speckled ring holder in soft tones
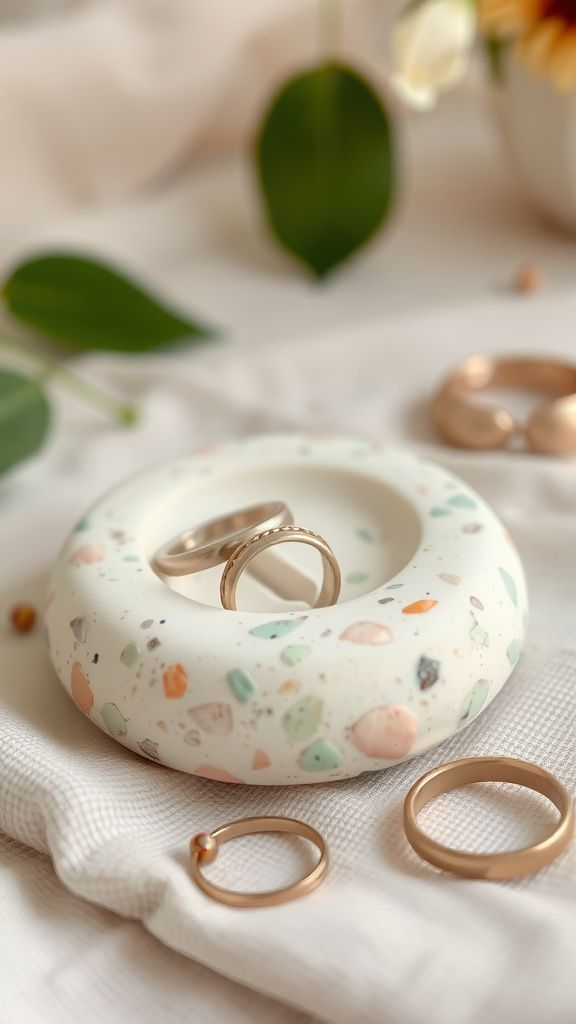
Mixing tiny flecks of colored clay into a pale base created a terrazzo-like field that felt both nostalgic and modern. The little chips sat like confetti beneath a smooth surface, catching the eye without demanding it.
The holder felt pleasantly substantial in the hand, with a slight tooth under a thumb. The palette leaned toward muted pastels, which made it easy to match with room tones.
It lived on a dresser where light found the speckles and refracted them into small, private celebrations throughout the day.
Steps
- Knead small scraps of colored clay into tiny chips and mix them into a larger amount of pale clay.
- Roll the mixed clay into a slab and shape it into a shallow ring holder with a raised center.
- Smooth the surface gently to reveal the embedded chips and round the edges.
- Let the piece dry completely before sanding any rough spots and applying a matte sealant.
- Optionally buff the surface for a softer feel once the sealant has cured.
Imprinted lace dish that smells faintly floral
Pressing an old lace scrap into clay left a delicate network of threads, a pattern that read like fine architecture. The imprint caught tiny shadows and held a softness that contrasted with the cool clay surface.
There was a faint lingering scent from the fabric, a floral memory that made the dish feel heirloom-like. Light skimmed across the raised threads, making the pattern more pronounced at certain angles.
It rested near a window and collected small shiny things, the lace impression giving every piece a gentle stage.
Steps
- Roll a slab of clay to an even thickness and lay a piece of lace on top.
- Press the lace into the clay firmly to transfer the textile pattern, then remove the fabric carefully.
- Shape the slab into a shallow dish, smoothing the rim with a damp tool.
- Allow the dish to dry fully before applying a soft wash to highlight the lace details.
- Seal with a clear matte varnish to preserve pattern and scent notes.
Pet paw keepsake dish with warm clay texture
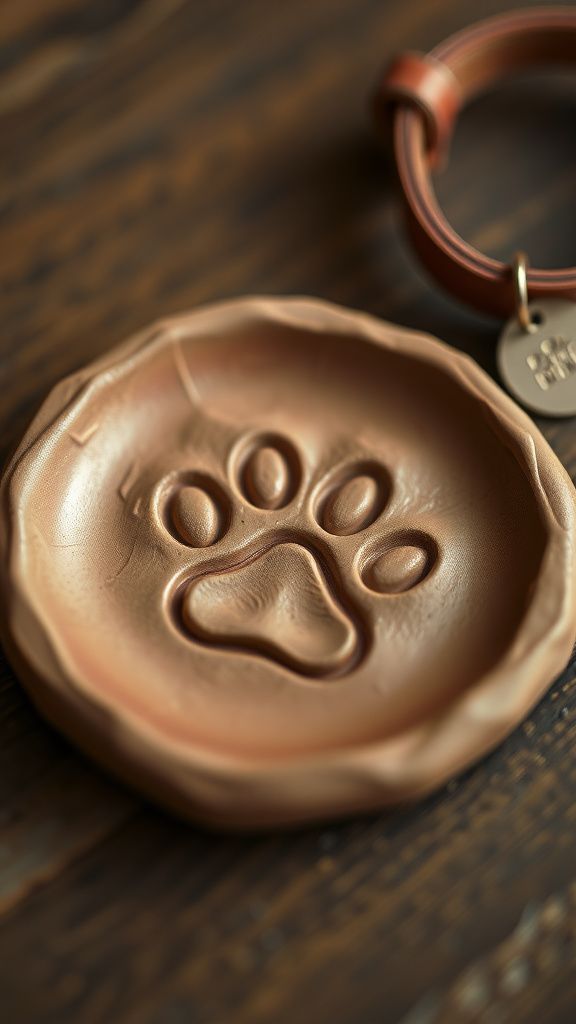
An accidental smudge turned into a plan to press a tiny paw into clay, and the resulting impression felt full of gentle presence. The edges of the print caught residual fur fibers in the pattern, and the clay held the warmth of a moment.
The surface had a homely, tactile roughness that invited touch, and the dish seemed to hold a small story better than words could. It rested on a shelf amid other small objects, each one lending a quiet companionship to the everyday scene.
Steps
- Flatten a small amount of clay into a gentle oval and smooth the surface with a damp fingertip.
- Gently press the pet’s clean paw into the clay to create a clear impression.
- Refine the dish shape and edge, then allow the piece to air dry fully.
- Once dry, gently clean the impression area and apply a sealing coat to protect the keepsake.
- Optionally add a small label or tiny paint accent to mark a date or name.
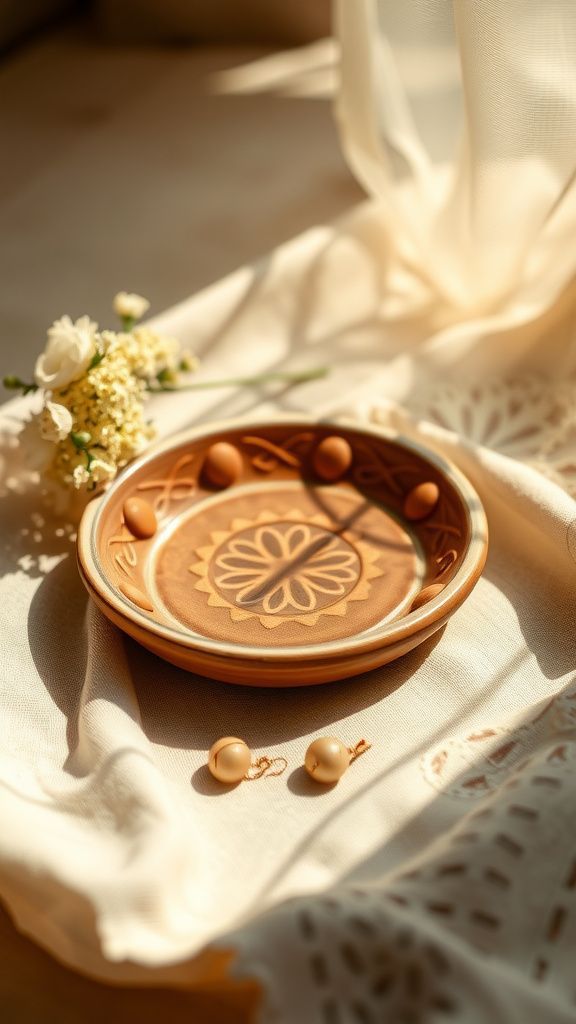
Sunburst tile dish catching morning light just right
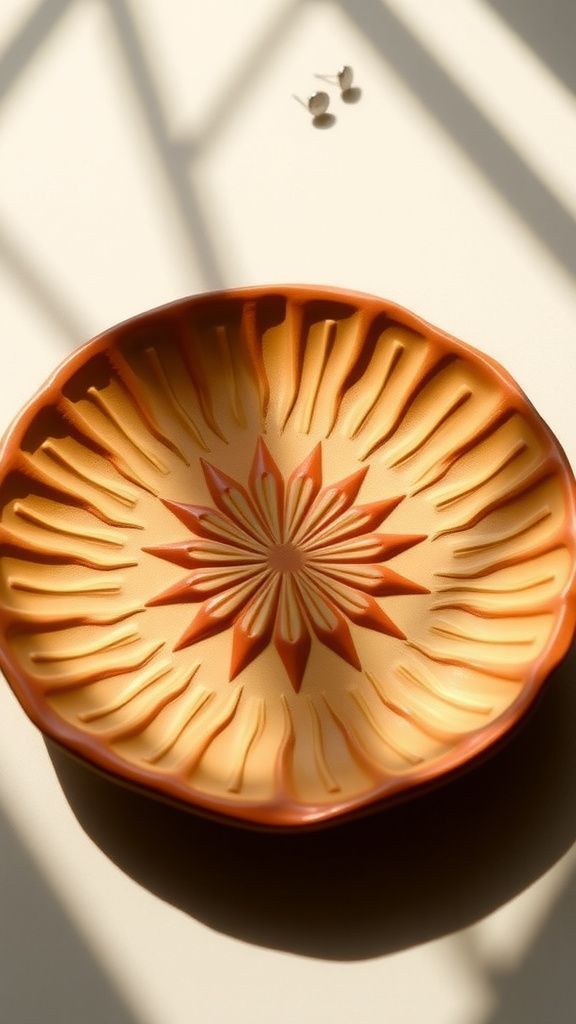
A stamped sunburst motif seemed to brighten the whole piece, the rays carved into the clay playing with shadows as the sun moved. The tile felt gently heavy and solid, grounding the scattered jewelry it gathered each morning.
The raised lines were a little crisp under a fingertip, softened by a light wash that pulled color into the recesses. Placed near a window, the tile mirrored the day’s changes; a beam of light turned the center into a small golden stage where a single pair of studs looked almost ceremonial.
Steps
- Cut a square or tile shape from rolled clay and smooth the edges.
- Stamp or carve a sunburst motif into the center, creating shallow rays.
- Slightly bevel the edges and allow the tile to dry flat to retain shape.
- Apply a color wash to accentuate the carved lines and seal with a matte finish.
- Place on a windowsill or dresser to catch changing light.
Hand-carved geometric catchall with satisfying lines

A small geometric dish felt architectural in a way that made me arrange jewelry as if staging a tiny exhibition. Clean cut facets created crisp shadow play, and the edges offered a pleasing tactile cadence when handled.
The clay surface had a fine grain that caught a pale wash in the corners, deepening the impression of depth. It held cufflinks and a watch with quiet confidence, a small functional sculpture that made the act of putting things down feel deliberate and small-scale ceremonial.
Steps
- Form a slab of clay and cut a geometric outline such as hexagon or rectangle.
- Carve shallow facets or lines with a pointed tool to create crisp geometry.
- Gently round the rim and allow the piece to dry completely on a flat surface.
- Highlight the carved lines with a thin glaze wash and seal with a protective finish.
- Optionally sand any rough edges once fully cured for a smoother feel.
Tiny shell-edged dish smelling of sea breeze
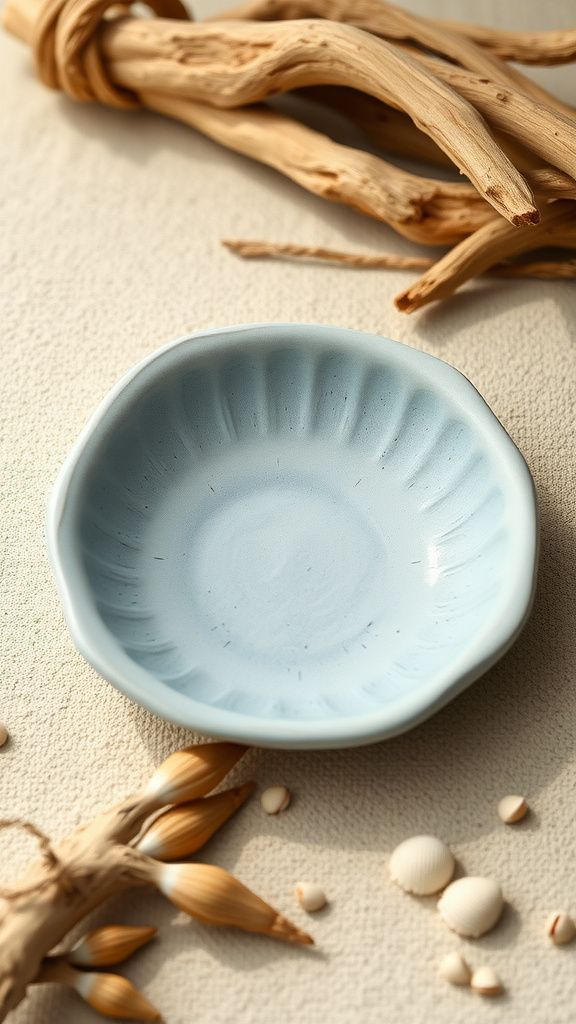
A ragged shell rim impressed into clay brought the shoreline to mind, the irregular teeth of the shell leaving a coastline around the dish. The resulting edge had a tactile, almost whispery quality and the surface bore tiny pits like sand.
A soft blue-gray wash pooled in hollows, suggesting tide pools and distant water. The dish carried a faint memory of salt air, a scent that made the object feel like a small piece of the coast tucked into everyday life at home.
Steps
- Press a clean shell into the edge of a flattened clay disc to transfer its texture.
- Refine the overall dish shape, ensuring the shell-impressed edge remains distinct.
- Allow the piece to dry fully, keeping it level to retain the shape.
- Add a gentle blue-gray wash to accentuate hollows and seal with a matte varnish.
- Display with small sea-themed jewelry or keepsakes.
Stained glass inspired pieces with translucent glazes
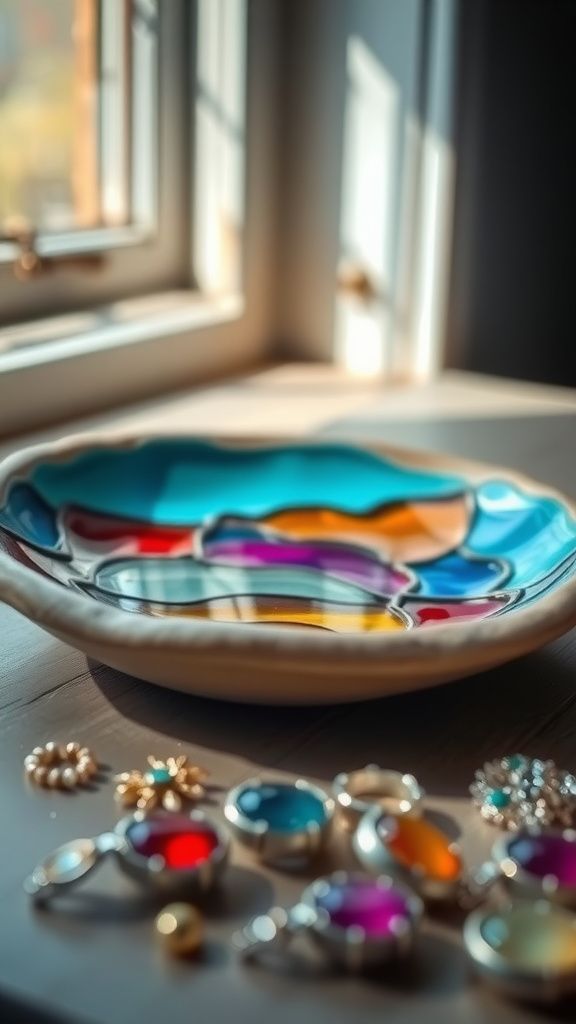
Small fragments of colored translucent medium were nestled into shallow wells in clay to mimic a stained glass feel. Light passing through the glazed areas created jewel-like color fields that shifted with angle.
The surrounding matte clay provided a quiet frame, making each colored fragment glow more intensely. Holding one to the window revealed tiny internal textures, like a miniature chapel window for jewelry.
The combination of solid earthiness and luminous color often felt like a tiny act of reverence for everyday objects.
Steps
- Create shallow recesses in a clay base where translucent colored glazes or resins will sit.
- Fill the wells with translucent pigment or resin and allow to settle.
- Smooth edges around each filled area and let the piece cure until fully set.
- Sand lightly if needed and seal the matte clay sections to balance with the glossy inserts.
- Place near light to appreciate the stained glass effect.
Bold imprinted type initial dish for rings

A single bold letter pressed into wet clay made an object feel personal in an instant. The letter sat proud in the center, edges clean and shadowed, and the surrounding surface retained fingertip marks that softened the formality.
A neutral background color let the initial read clearly, while a faint antiquing glaze in the letter’s grooves gave it weight. The dish became a small daily anchor for a single ring, the initial turning a mundane routine into a tiny, intimate ritual that felt quietly cheerful.
Steps
- Roll out a small round or square slab of clay and smooth the surface.
- Press a letter stamp or small type into the center to create a clear impression.
- Shape the piece into a shallow dish and refine the rim with a damp tool.
- Allow the dish to dry, then darken the letter groove with a wash to increase contrast.
- Seal with a clear finish to preserve the personalized detail.
Boho fringe-inspired platter with uneven edges

A rim that looked hand-frayed suggested a textile influence, and the irregular edge gave the platter a lively, relaxed character. Touching along the rim revealed a series of tiny ridges and hollows, a tactile rhythm that felt casual and inviting.
Earthy pigments pooled in crevices, creating a weathered palette that reminded me of festival fabrics and worn-in shawls. The platter collected small bangles and pins in a way that felt unforced, like an easy companion on a dresser rather than something precious that must be protected.
Steps
- Form an oval or round slab and gently manipulate the perimeter to create uneven, fringe-like edges.
- Texture the rim with a small tool to emphasize a hand-frayed appearance.
- Allow the platter to dry flat to preserve the shape.
- Apply muted earth tones to accentuate crevices and seal with a matte finish.
- Use as a decorative catchall for lightweight jewelry and accessories.
Mini hexagon stackable dishes for tiny treasures
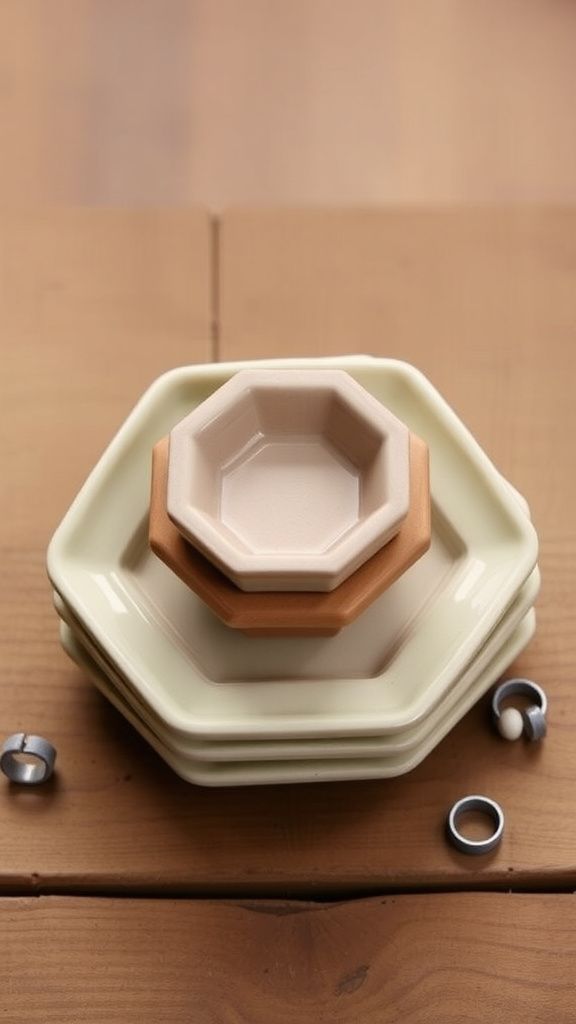
A set of small hexagons felt like a tiny building kit when stacked together, creating little architectural plays on a dresser. Each dish had straight edges that met with satisfying alignment, and the surfaces bore slightly different tones from subtle glazes.
Picking one up revealed a soft grain and a light coolness that contrasted with the warm wood beneath. The stack made a compact, tidy display, and breaking the stack for use felt like releasing a mini collection of neatly kept secrets into a single, momentary scatter.
Steps
- Cut multiple hexagon shapes from rolled clay using a template for uniformity.
- Refine the edges of each hexagon and slightly raise the rim to create shallow dishes.
- Allow all pieces to dry fully, ensuring they remain flat.
- Apply coordinating washes or glazes to each hexagon and seal with a protective finish.
- Stack and arrange as desired to create a compact storage grouping.
Pearlescent moon phase dish reflecting dim lamplight
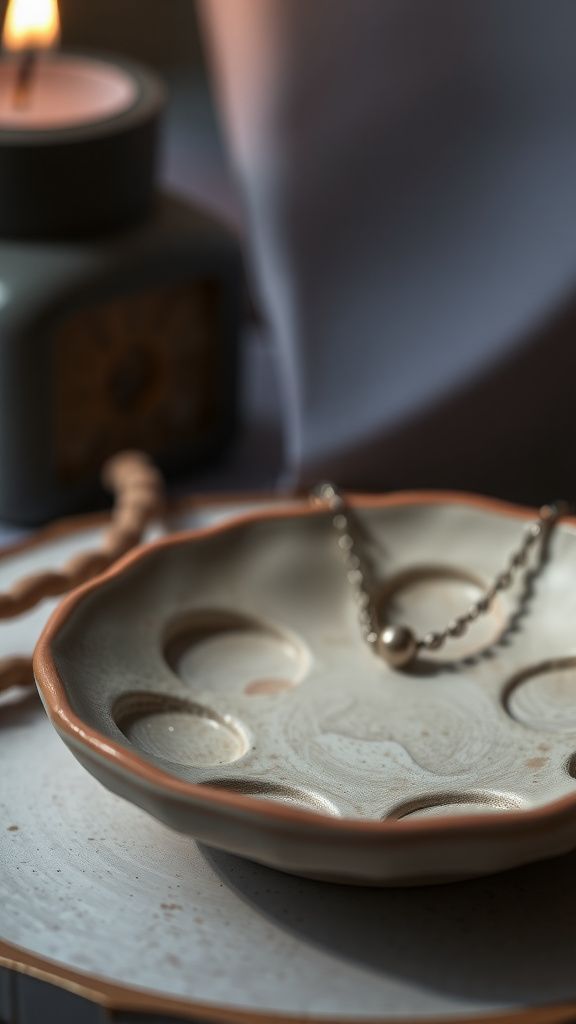
A sequence of tiny embossed moons traced across the dish, each phase catching pearlescent pigment differently and creating a soft gradient of sheen. The inner hollows seemed to hold light, reflecting the lamp at dusk in a way that felt calming.
The clay body retained a quiet matte, letting the pearlescent notes stand out without dominating. When the room grew quiet, the dish looked like a compact night sky, modest but present, offering a small ceremonial pause when slipping off jewelry before bed.
Steps
- Flatten a circular clay slab and emboss moon shapes or phases with a small tool.
- Shape the slab into a shallow dish and smooth the rim.
- Once dry, apply a pearlescent wash to the embossed moons to catch light differently.
- Seal with a matte varnish on the surrounding surface while preserving sheen in the moons.
- Place near a lamp or window to appreciate subtle reflections.
Textured bark dish that feels oddly grounding
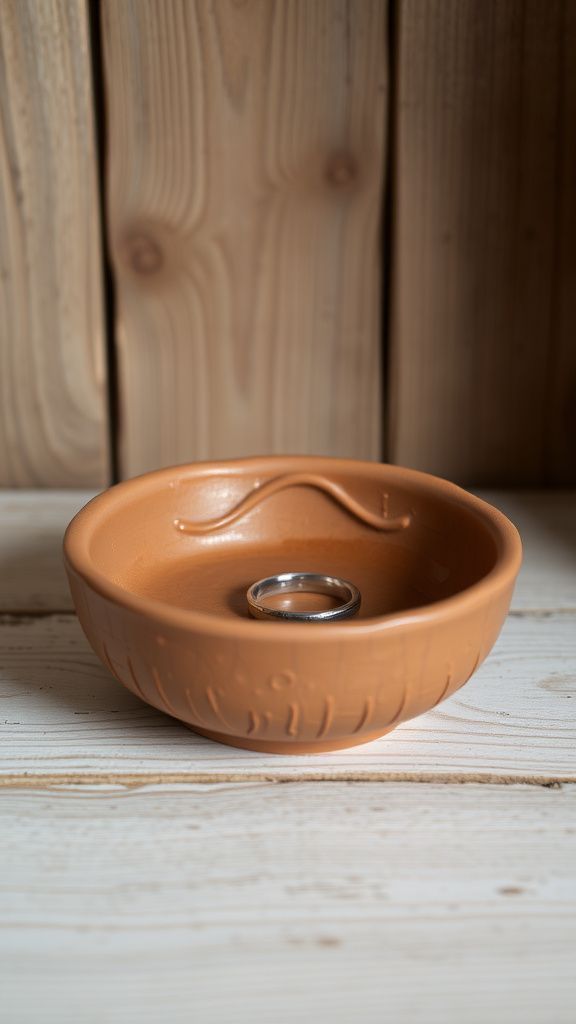
A bark-like impression wrapped around the dish’s exterior, offering a tactile reminder of trees and a walk in the cold. The grooves were deep enough to hold faint shadows, and the clay carried the scent of raw earth.
Running fingertips across the surface elicited a small, calming focus, as if touching wood even though the material was clay. A muted brown wash emphasized the ridges, and the result felt sturdy and plainspoken, a small object that invited being handled and lived with instead of kept out of sight.
Steps
- Roll a slab of clay and press a bark-textured object or tool into the exterior to create grooves.
- Shape the slab into a shallow dish, preserving the textured outer surface.
- Smooth the rim and let the piece dry fully on a flat surface.
- Apply a brown or umber wash to accentuate the grooves and seal with a matte finish.
- Optionally add a soft sanded edge for a more natural look.
Color-blocked sectional tray with crisp, soft tones
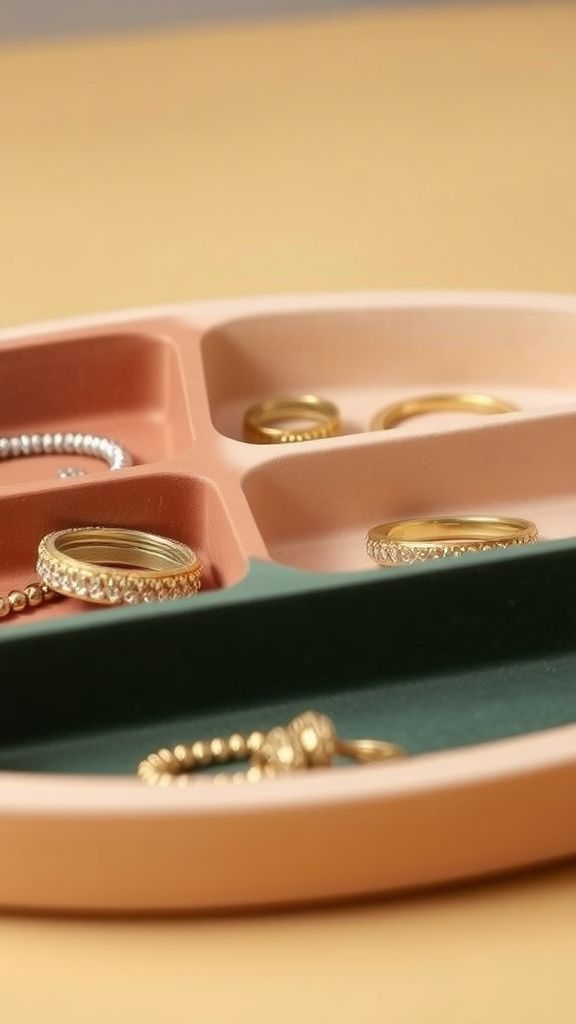
Dividing a tray into color fields created a small stage for organizing pieces with quiet clarity. Each zone had a slightly different finish and the transitions read cleanly, like a painted grid softened by clay’s natural matte.
The colors were chosen to feel calm together, muted pastels and neutral stone tones, and the tray offered a tiny choreography for daily items. Handling the tray was pleasing because each section felt deliberately thought-out, and it made sorting small things feel pleasantly finite and uncomplicated.
Steps
- Roll out a rectangular slab of clay and mark the desired color-blocked sections lightly.
- Apply thin layers of colored slip or underglaze to each section, keeping borders crisp.
- Create low dividers or subtle ridges between sections if desired.
- Allow the tray to dry thoroughly before sealing with a matte varnish.
- Use the finished tray to separate rings, earrings, and small finds.
Embedded bead rim dish with tiny clinking beads
A row of tiny glass beads nestled along the rim gave the dish a playful musical quality when moved. The beads were partially set into the clay so they felt secure but still offered a subtle contrast between smooth glass and chalky clay.
Light struck the beads differently than the body, creating tiny points of brightness. The rim’s tactile diversity invited gentle handling and the occasional soft clink made the object feel alive in a quiet way, like a small companion that responded to motion with a brief, cheerful note.
Steps
- Press small glass or ceramic beads partially into the rim of a shaped clay dish while wet.
- Ensure each bead is seated securely without breaking the surrounding clay wall.
- Smooth the inner surface and allow the dish to dry fully with beads in place.
- Once dry, clean around the beads and apply a sealant to the clay while leaving the beads glossy.
- Handle gently to enjoy the soft clinking sound as jewelry is placed inside.
Stargazer glaze dish with speckled night sky
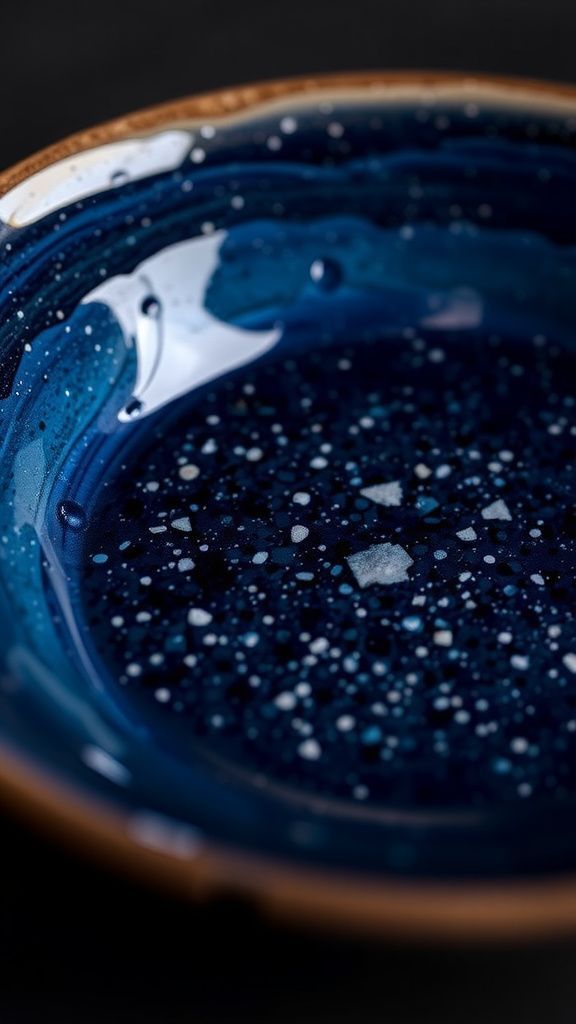
A sponge-splattered glaze produced a speckled field that reminded me of watching stars from a backyard. The dark base toned down to near-black in places, while flecks of white and metallic shimmer created constellations.
The dish felt like a small platter of night, capturing the hush of late hours. Handling it at dusk made the speckles catch lamp light and become tiny points of interest.
It became a place for small, singular items that deserved attention, like a pair of earrings saved for an evening out.
Steps
- Shape a shallow dish and allow it to dry to a leather-hard state.
- Apply a dark base glaze or paint and let it dry slightly.
- Flick or sponge small droplets of lighter glaze or metallic pigment to create a speckled star effect.
- Let the piece cure fully, then seal with a compatible finish to preserve the speckle texture.
- Display under soft lighting to enhance the night-sky impression.