
Hook & TL;DR
Small changes can free up surprising space by turning ignored corners and odd recesses into practical storage that feels intentional and polished, and with a few measured moves you can multiply usable storage without a full remodel.
Key Takeaways
- Measure first: accurate dimensions guide every smart choice.
- Prioritize accessibility: place everyday items where you can reach them easily.
- Mix built-in and modular: combine permanent fixes with flexible pieces for best results.
- Work with odd angles: custom shelves or angled rods turn awkward into attractive.
Introduction
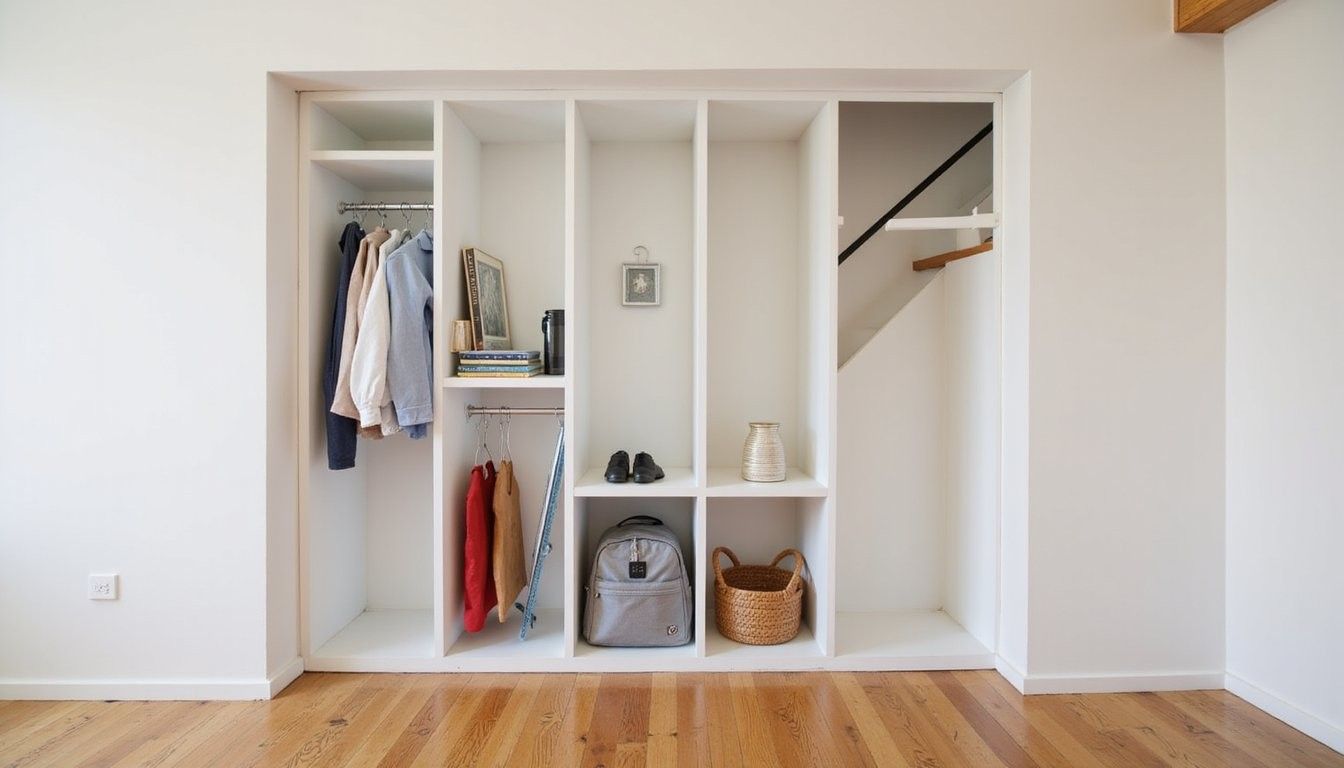
Many homes hide storage potential in plain sight where a shallow recess, an under-stairs cavity, or an angled eave looks unusable but can become tidy and practical with planning and the right approach.
Making the most of odd corners saves money and adds convenience because you avoid moving walls while increasing the sense of order, and a thoughtful combination of shelves, hooks, and bins keeps items visible and accessible.
Tools & Materials
Gathering the right tools streamlines the project so you can cut, mount, and adjust without interruption, and having a checklist keeps installation neat and fast.
- Tape measure, spirit level, pencil
- Stud finder or tapping method
- Circular saw or jigsaw (for custom shelves)
- Drill with screw bits and anchors
- Adjustable shelving brackets and rails
- Pre-made cubbies, modular shelving units, and slim rolling drawers
- Hooks, tension rods, and slim hangers
- Baskets, bins, and drawer dividers
Plan and Measure Strategically

Take precise measurements and note obstacles including baseboards, studs, electrical outlets, and any sloping ceilings so your chosen solution fits seamlessly and avoids last-minute adjustments that lengthen the project.
Create a use-first plan by sketching what will live in the space—coats, shoes, linens, seasonal items—and then design shelves, rods, and drawers around those needs to ensure everything has a proper place.
Built-ins and Simple Carpentry
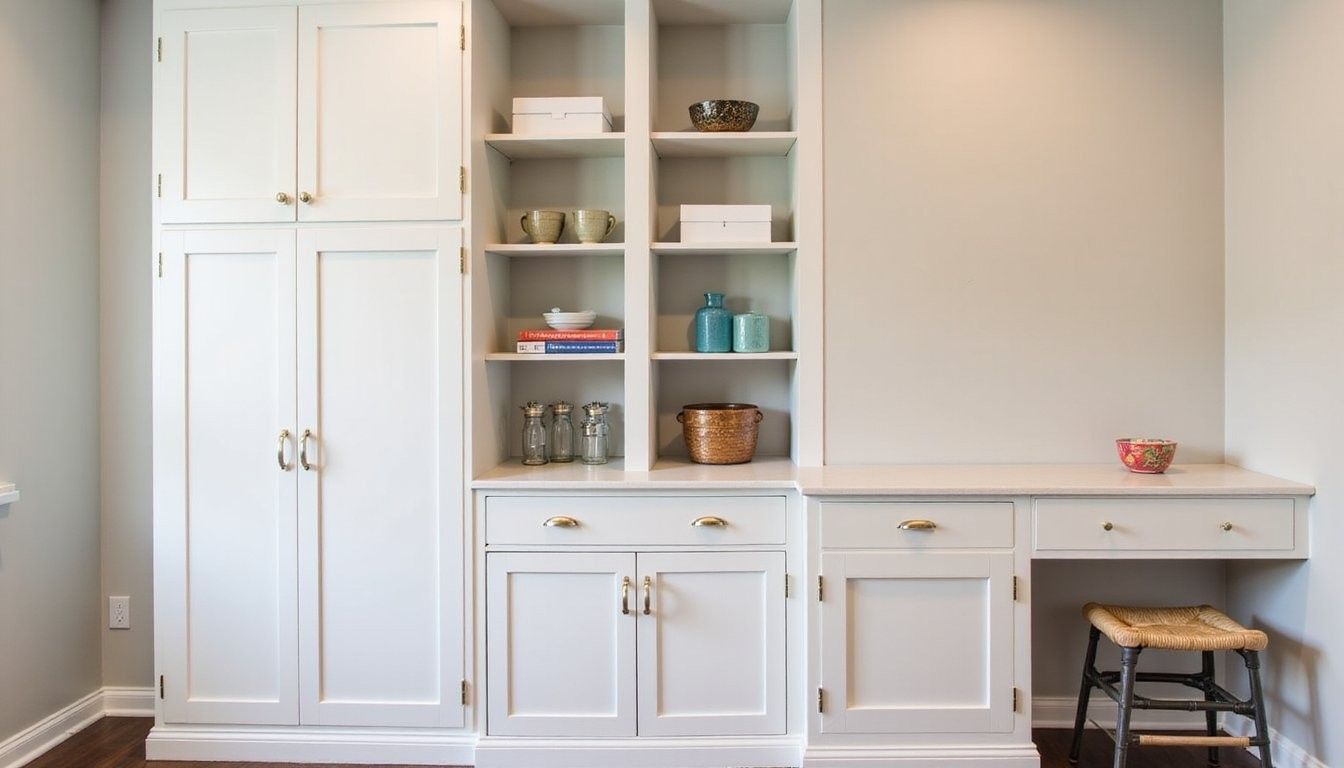
Custom built-ins make the most of odd shapes by following the exact contours of a nook so every inch contributes storage, and simple carpentry like trimmed shelving or shallow drawers can transform awkward geometry into a polished feature that blends with room trim.
Start with a sturdy foundation by anchoring shelves into studs or using heavy-duty wall anchors and finishing with trim to hide gaps, which gives a high-end look while keeping shelves safe for heavier items.
Modular & Off-the-shelf Organizers
Modular systems offer flexibility without construction because adjustable shelves, stackable cubes, and slim drawer units can be reconfigured as needs change and installed quickly using minimal tools and time.
Choose adaptable pieces for uncertain layouts such as narrow rolling drawers for deep but tight recesses and adjustable shelving for tall spaces, which lets you test arrangements before committing to permanent changes.
Doors, Corners, and Unusual Spaces
Do not overlook the back of doors and small corner pockets where slim racks, over-door organizers, and corner carousels can add hanging space, accessory storage, and shoe organization without changing the closet footprint.
Work with odd angles by cutting custom panels or using angled shelving brackets so shelves follow the slope of a ceiling or an under-stair angle, turning what feels awkward into a charming built-in nook that holds folded linens or baskets.
Cost, Impact, and Comparison
Compare price against daily convenience since some approaches are inexpensive and fast while others cost more up front but offer longevity and a custom finish that raises usability and the home’s perceived value.
| Solution | Typical Cost | Ease of Install | Longevity |
|---|---|---|---|
| Over-door organizers | Low ($20–$80) | Very easy | Moderate |
| Modular cubbies | Medium ($100–$400) | Easy to medium | High |
| Custom built-ins | High ($400+) | Requires tools or pro | Very high |
Quick Decision Guide
Match the solution to your time and budget by choosing a quick modular approach for renters, a semi-custom route for committed homeowners, and full built-ins where resale or long-term use justifies the investment, and let function guide finish choices like paint or trim style.
| Scenario | Best Fit | Notes |
|---|---|---|
| Renter | Modular over-door or tension rods | No wall damage |
| Small budget | DIY shelves and baskets | High return on small spend |
| Long-term solution | Custom built-ins | Best finish and durability |
Common Mistakes
Another frequent misstep is overloading shallow shelves which can cause sagging or wall damage if anchors and brackets aren’t rated for the planned weight, so choose materials and fixings that match the load.
Small Upgrades That Pay Off
Switching to slimmer hangers and graded storage bins increases capacity instantly because it reduces wasted space between garments and groups similar items together so you can find what you need without digging through piles.
Adding pulls, labels on bins, and consistent basket sizes creates visual order which encourages maintenance and keeps the nook tidy, making stored items easier to reach and return to their place each day.
A Simple Boolean Guide
Quick yes/no checks help choose an approach by clarifying whether a space has depth, headroom, and anchoring points, which then points you toward modular, built-in, or door-mounted options based on capability rather than guesswork.
| Question | Yes | No |
|---|---|---|
| Is there at least 10″ depth? | Use shelves and bins | Consider shallow hooks or slim hangers |
| Is ceiling sloped? | Plan angled shelves | Standard shelving works |
Finishing Touches
Finishes and lighting turn storage into a design feature so paint inside the nook a complementary color, add LED strip lighting for visibility, and choose matching baskets or bins to keep the look cohesive and pleasing to the eye.
Soft-close hardware and concealed mounts elevate the feel by making drawers and doors glide quietly and keeping visible fixings to a minimum, which helps integrated storage blend with surrounding millwork.
What to Expect During Installation
Most small conversions take a weekend when you have clear measurements, tools, and pre-cut materials, while more complex custom work may need a professional and a few additional days for finishing and trim work.
Allow time for testing and tweaking like adjusting shelf heights and repositioning hooks after living with the new layout for a few days so you can fine-tune access and sightlines for daily use.
FAQ
How do I know if a nook is worth converting? Measure depth and height and think about what you want to store, then compare how often you will access those items versus the cost of conversion to decide if the change adds meaningful convenience.
Can renters implement these ideas without damage? Yes, renter-friendly options like tension rods, over-door organizers, and freestanding modular cubes provide extra storage without drilling into walls and can be removed cleanly.
Is custom carpentry necessary for odd angles? Not always, because angled brackets, trimmed stock shelving, and clever stacking can often adapt off-the-shelf pieces to nonstandard geometry without full custom cabinetry.
How do I maximize visibility in deep recesses? Use pull-out drawers or sliding baskets and add battery-powered LED strips to illuminate shelves so items at the back are easy to see and retrieve.