
These traditional spiced molasses cookies are soft, chewy, and packed with deep flavor. Each bite is infused with warm aromas and features lovely crinkled surfaces, making them easy to prepare and perfect for holiday celebrations.
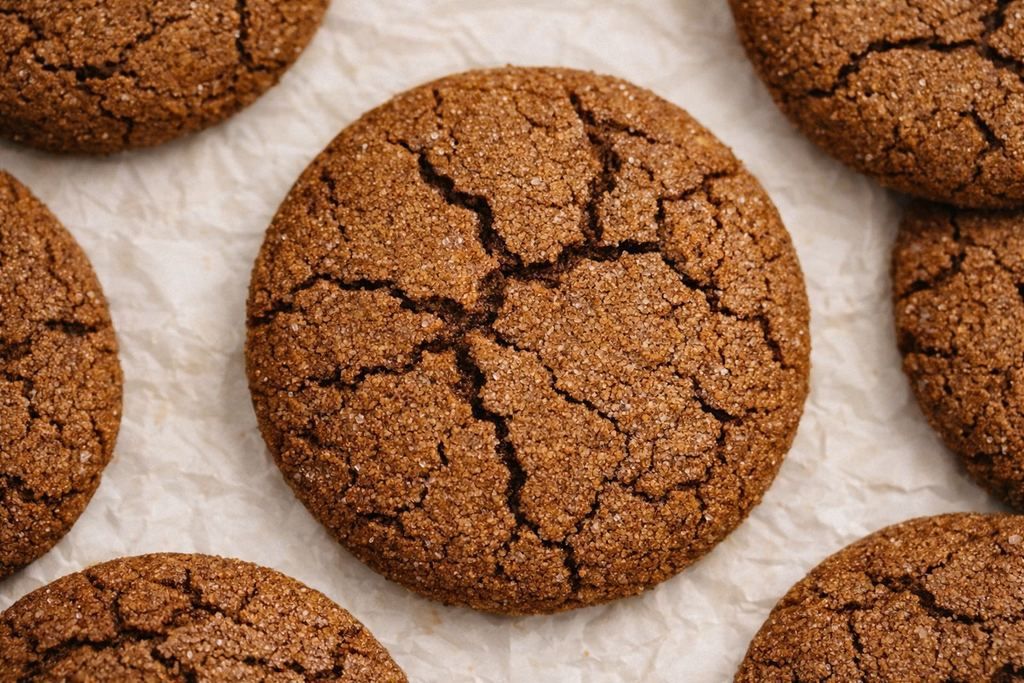
The season for cookies is undoubtedly my most cherished time of the year! On occasions when I’m not inclined to embellish elaborate cookies (such as flawlessly shaped sugar varieties), I opt for a timeless favorite—molasses crinkle cookies. These flavorful delights remain delightfully tender for several days and are adorned with a sugary layer that forms those distinctive crackled surfaces during baking.
The dough requires some time to relax and cool down, but the wait is absolutely worthwhile. Baking them at a slightly elevated temperature allows them to rise swiftly and then softly settle, creating those lovely creases and that delightful chewy consistency.
Reasons to adore these molasses crinkle cookies!
- You can prepare these using common pantry essentials that are probably stored in your cabinets.
- The mixture forms in roughly ten minutes, and afterward, it only requires a brief period in the refrigerator before it is prepared for baking.
- Just prior to baking, every dough ball is rolled in granulated sugar, resulting in a delightful shiny exterior.
- You will have twenty-four cookies in total — perfect for giving away or presenting as a gift.
- These flavored goodies become exceptionally soft and maintain their chewy consistency for a number of days, thanks to a unique element.
Ingredients Needed
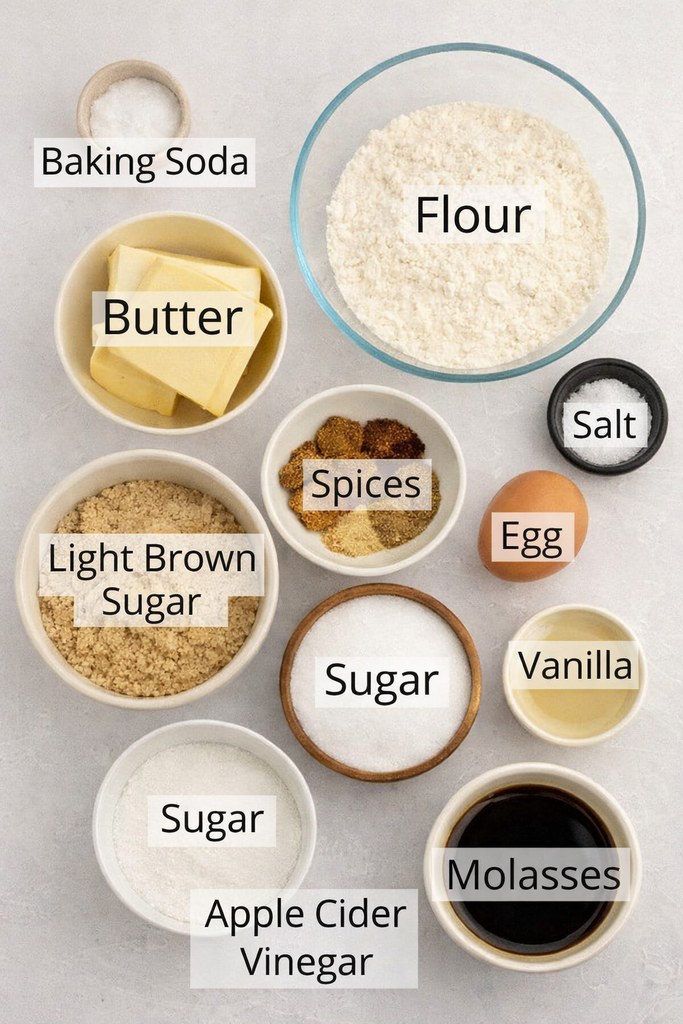
- Flour: I have only utilized regular white flour for this so far. If you try a gluten-free mixture, I would be eager to know the results!
- Molasses: Ensure that you opt for unsulphured molasses to achieve the finest taste. If you’re in the UK, black treacle serves as an excellent substitute and functions wonderfully.
- I favor unsalted butter of the European variety because it contains a greater fat percentage, which enhances the dough’s flavor and provides a creamier consistency.
- Seasonings: The mixture I utilize consists of ginger, cinnamon, nutmeg, cloves, and allspice. Using freshly ground seasonings will enhance the aroma and taste of your cookies, whereas stale spices may result in a dull and lifeless flavor.
- Apple Cider Vinegar: This is the unexpected enhancer! It interacts with baking soda to produce a fluffier, somewhat softer cookie. I initially discovered this suggestion from Claire Saffitz’s “Dessert Person.” If you lack it, feel free to omit it — the cookies will still be delicious, although they might not puff up as much or develop as many charming fissures.
Gradual Guidance Directions
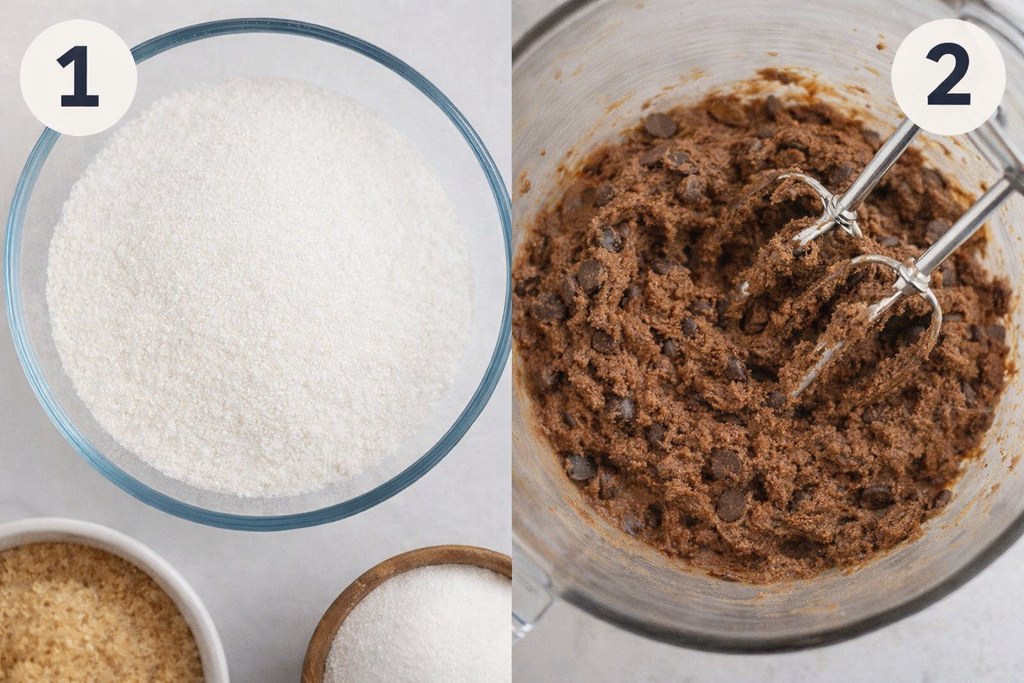
Step 1: Take a mixing bowl—either medium or large will do—and combine all the dry ingredients: flour, baking soda, salt, and any spices specified in the recipe. After mixing thoroughly, set the bowl aside for future use.
Phase 2: Employing a stand mixer fitted with the paddle attachment (or utilizing a hand mixer in a separate large bowl), combine the softened butter with brown sugar. Blend at medium to high speed for approximately one to two minutes, until the mixture achieves a light and fluffy consistency.
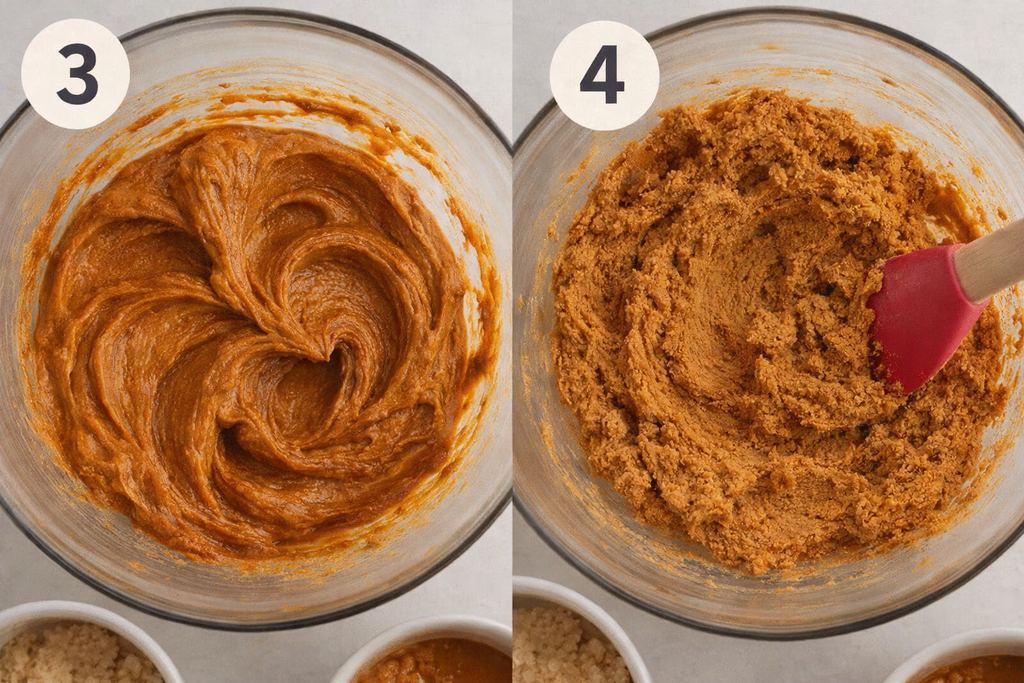
Step 3: Stop the stand mixer and utilize a spatula to scrape the mixture from the bowl’s sides. Incorporate the egg, dark syrup, vanilla extract, and apple cider vinegar. Mix on medium speed for about two minutes.
Step 4: Switch off the mixer once more and introduce the dry ingredients into the bowl. Mix on the lowest speed until everything is barely combined and no dry flour is visible. Refrigerate the dough for approximately one hour to cool.
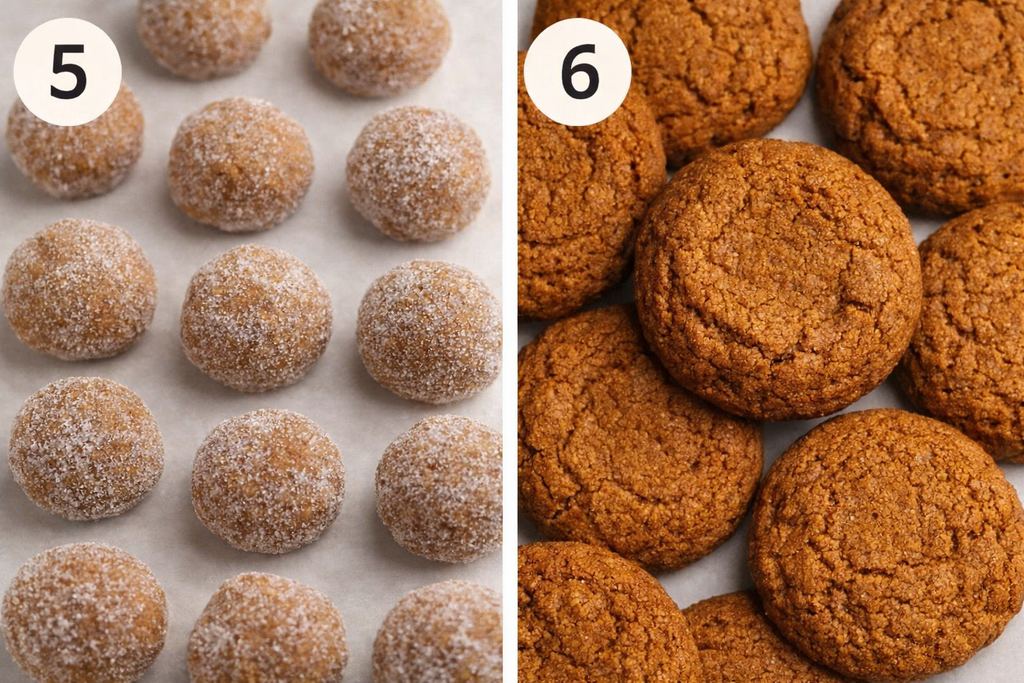
Step 5: Preheat your oven to 190°C (375°F) and line two baking sheets with parchment paper. Take approximately 1½ tablespoons of dough for every cookie, rolling it gently in your palms to create smooth spheres. Dredge each sphere in granulated sugar and place them around 3 inches apart on the lined sheets.
Step 6: Bake one sheet at a time for 10 to 12 minutes, or until the cookies exhibit solid edges and minor surface fissures. Store the unbaked tray in the fridge while the initial batch is baking. Let the completed cookies sit on the tray for 15 minutes, then transfer them to a cooling rack to cool completely.
Classic Molasses Crinkles with Warm Spices
Course: Food24
servings10
minutes10
minutes159
kcal1
hour20
minutesIngredients
2 ¼ cups all purpose flour
2 teaspoons baking soda
2 teaspoons ground ginger
¼ teaspoon ground allspice
¼ teaspoon ground cloves
¼ teaspoon ground nutmeg
1 teaspoon ground cinnamon
½ teaspoon kosher salt
1 ½ sticks unsalted butter room temperature
1 cup light brown sugar
2 teaspoons vanilla extract
1 large egg room temperature
¼ cup unsulphured molasses or treacle
1 teaspoon apple cider vinegar
½ cup white sugar for rolling
Directions
- Inside a roomy vessel, vigorously blend every powdered component—the grain base, chemical riser, aromatic seasonings, plus mineral crystals—until evenly dispersed. Place this mixture aside.
- Using a countertop mixing machine fitted with a flat beater, or alternatively a generous container paired with an electric handheld tool, whip softened dairy fat together with pale caramelized sweetness until airy and voluminous. This aeration stage generally requires a brief minute or two.
- (Amount reference: one and one-half bars of salt-free dairy fat paired with a full measure of light molasses-style crystals.)*
- Incorporate dark syrup, a single shell-bound binder, fragrant essence, plus fermented apple acid. Continue agitation at a moderate pace for roughly a couple of minutes, pausing to clear residue from vessel walls and base so the blend becomes uniform.
- Introduce the reserved powder blend into the moistened base and operate the mixer at its gentlest setting. Halt immediately once everything comes together and no pale lines remain.
- Transfer the prepared mixture into cold storage to firm for no less than sixty minutes. For extended resting—up through the next day—seal the container opening using cling film.
- Bring the baking chamber to a high heat equal to three hundred seventy-five on the Fahrenheit scale, matching one hundred ninety Celsius. Prepare a pair of flat metal trays by covering them with nonstick lining.
- Remove the chilled mixture; texture should feel dense. Portion rounded mounds measuring roughly one and one-half spoonfuls. Shape briefly between hands until smooth spheres form, then coat thoroughly with fine white crystals. Continue until all portions are finished.
- Arrange the coated rounds across the prepared trays, leaving roughly a hand’s width of space between each.
- Cook one tray at a time for around ten to twelve minutes, keeping remaining portions chilled between batches. Completion is indicated by fractured surfaces and firm outer rims. The interior visible through the splits may appear slightly moist—this is ideal for achieving a tender, elastic bite.
- If surface fissuring seems insufficient, sharply tap the hot tray against a work surface or stovetop once or twice to encourage additional cracking. Allow the finished rounds to rest atop the warm tray for about a quarter hour, then transfer onto a metal lattice so cooling finishes completely.